Hengshi Documentation
Table of Contents generated with DocToc
- Data Science
- Background
- Feature Description
- Workflow
- Notes
- Creating a Note
- Deleting a Note
- Editing a Note
- Paragraphs
- Creating a New Paragraph
- Creating a New Paragraph by Uploading a File
- Paragraph Settings
- Opening a Paragraph
- Deleting a Paragraph
- Runtime Environment Settings
- Adding a Runtime Environment
- Authorization
- Revoking Authorization
- Deletion
- Runtime Settings
- Execution
- Test Execution
- Submit Execution
- Result Preview
- Execution Log
- Execute All
- Execution Plan
- Execution Plan and Task Queue Management
- Execution Plan
- Execution Queue
Data Science
Background
Data scientists are accustomed to writing code rather than using a self-service style for data cleaning, data exploration, data modeling, machine learning, data visualization and other data processing tasks. Well-known products providing these functionalities include Databricks Data Science Workspace, Zeppelin, Jupyter, etc. Hengshi Sense version 1.1, following these products, offered a "Data Science" functionality, supporting the writing and execution of Python, R, Scala, Markdown, Native SQL, Spark SQL code. This feature, leveraging the Livy Spark job service management, actually executes the code on Spark. Since it was a significant implementation overhead and there was low customer demand, it was not ported to versions after 2.0. However, considering the "Data Preparation" functionality, we were torn between catering to IT personnel or business users. The existing self-serve "Data Preparation" is geared towards business users, but the current customer need is actually the execution of SQL from within the "Data Science" feature, so we decided to bring back the "Data Science" functionality, starting with support for SQL.
Feature Description
A new "Data Science" entry has been added, which is at the same level as "Data Preparation" and others. Only users with the "Data Management" role can see the "Data Science" entry. All users with the "Data Management" role can view all "Notes" without isolation.
Workflow
- Step 1: Administrator creates data scientist user and assigns the data management role.
- Step 2: The data scientist user logs in and creates a note.
- Step 3: Set the connections available for the note and give authorization to use.
- Step 4: The data scientist user enters the note, adds an SQL type paragraph, sets the target connection for execution, writes the SQL statement, and runs the paragraph.
- Step 5: The data scientist user sets the execution plan for the note.
The following will introduce in detail the various concepts and operations of data science.
Notes
There are multiple "Notes" in data science, each independent of each other. Each "Note" contains multiple "Paragraphs." Each "Note" supports:
- Create, delete, edit, and view
- Rename
- Execute all/stop all
- Set an execution plan, to be uniformly scheduled by the Scheduler.
- Users can set whether the entire "Note" or a single "Paragraph" should be treated as a transaction.
- Users can set the list of connections available for the "Note." The connections a user can add must be ones with RW (read-write) permissions.
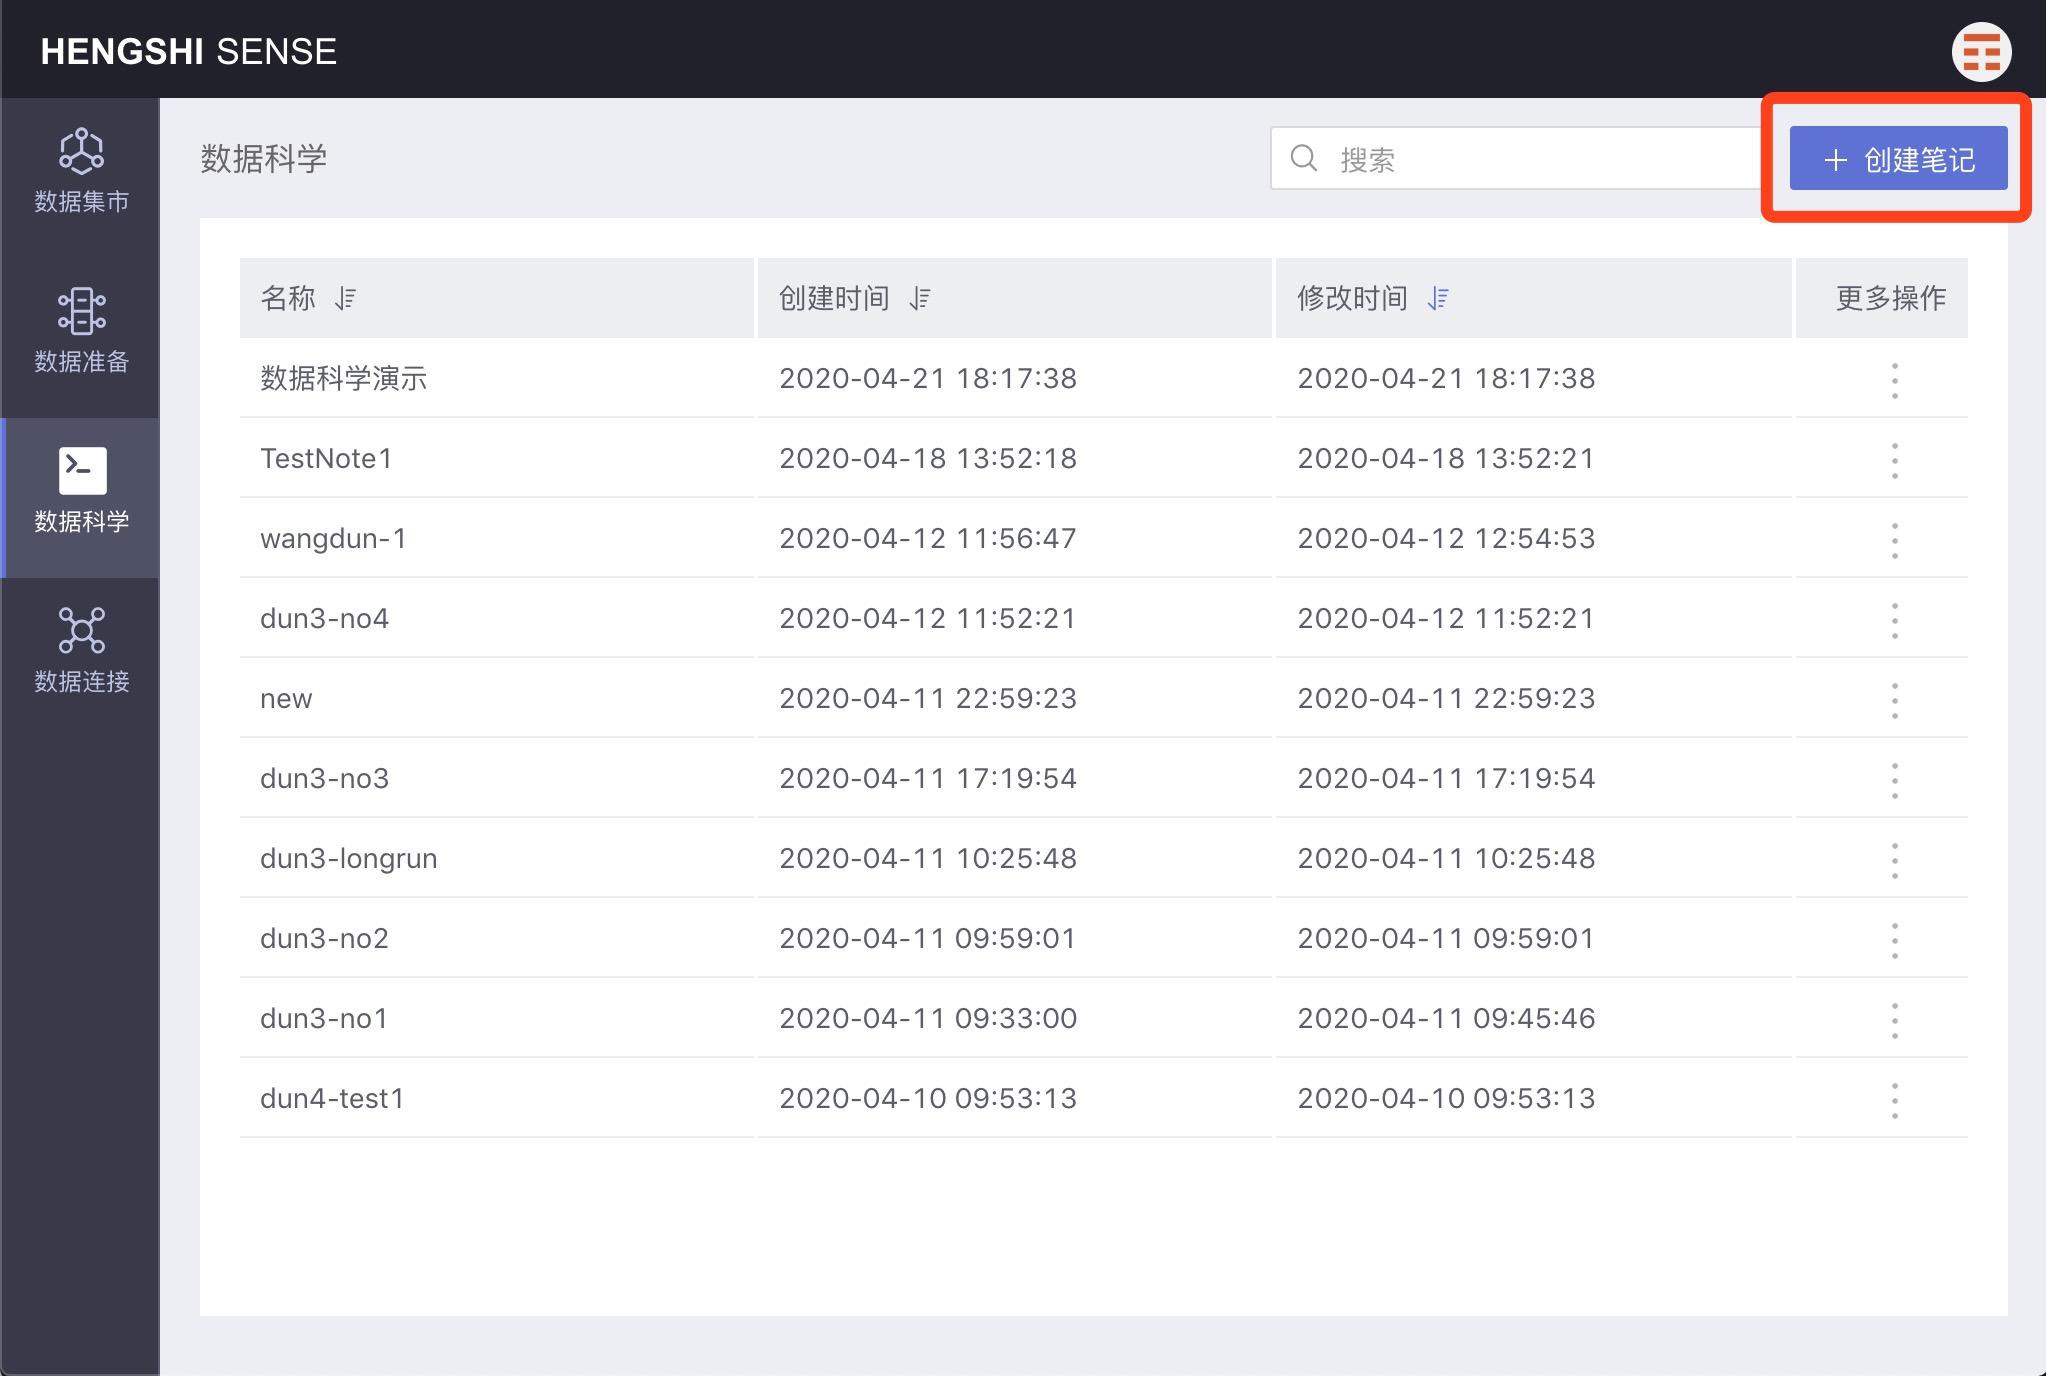
Creating a Note
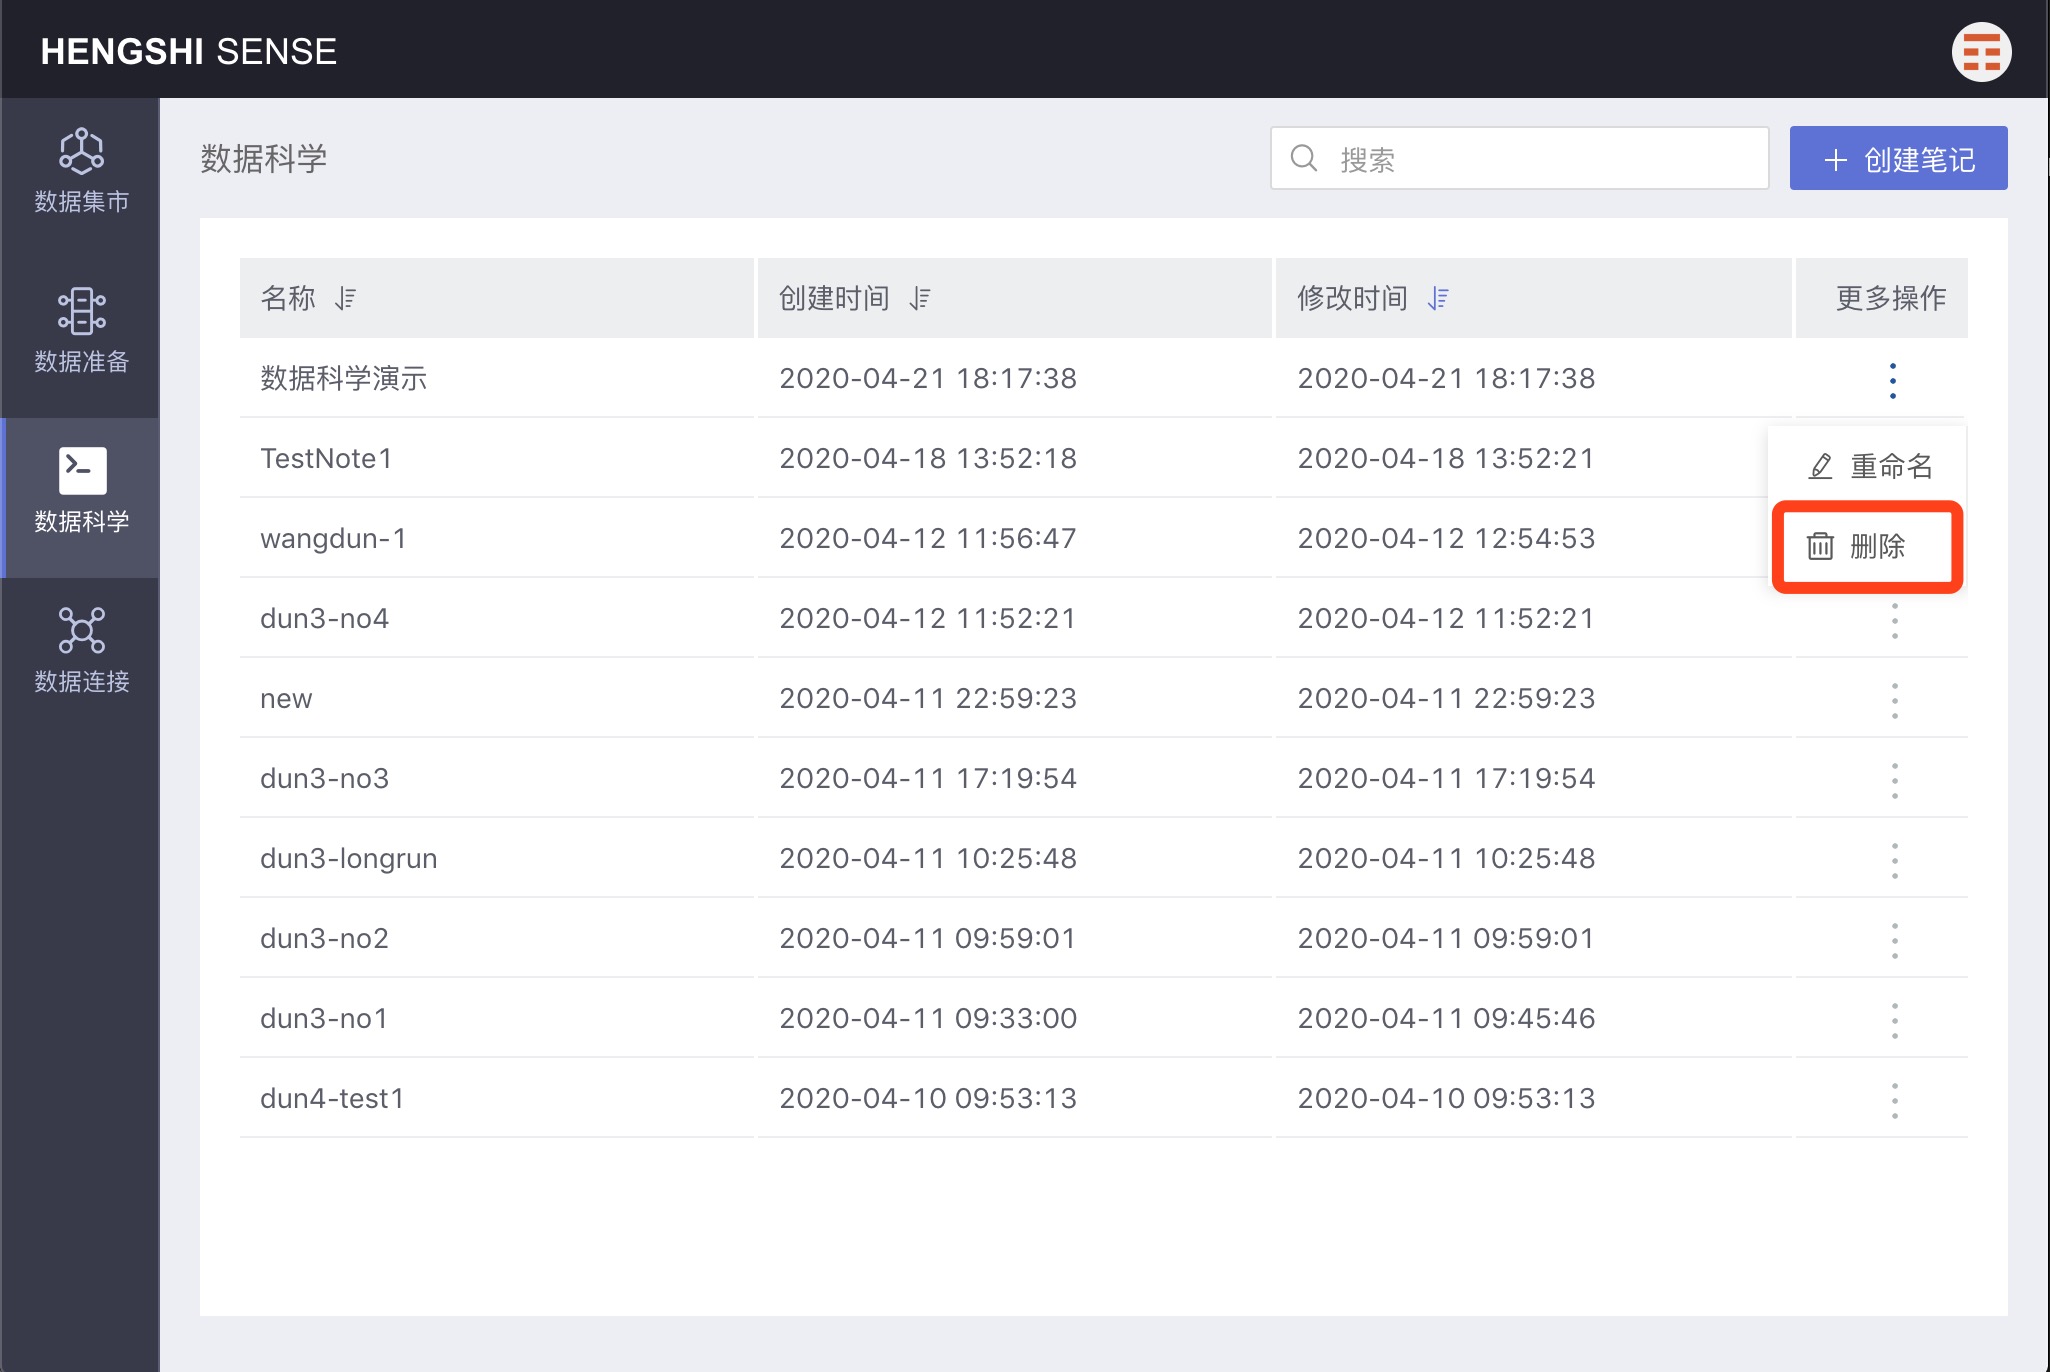
Deleting a Note
Select a note, open the menu with three dots, and click delete.
Editing a Note
Click on a note in the notes list, open the note for modification.
Paragraphs
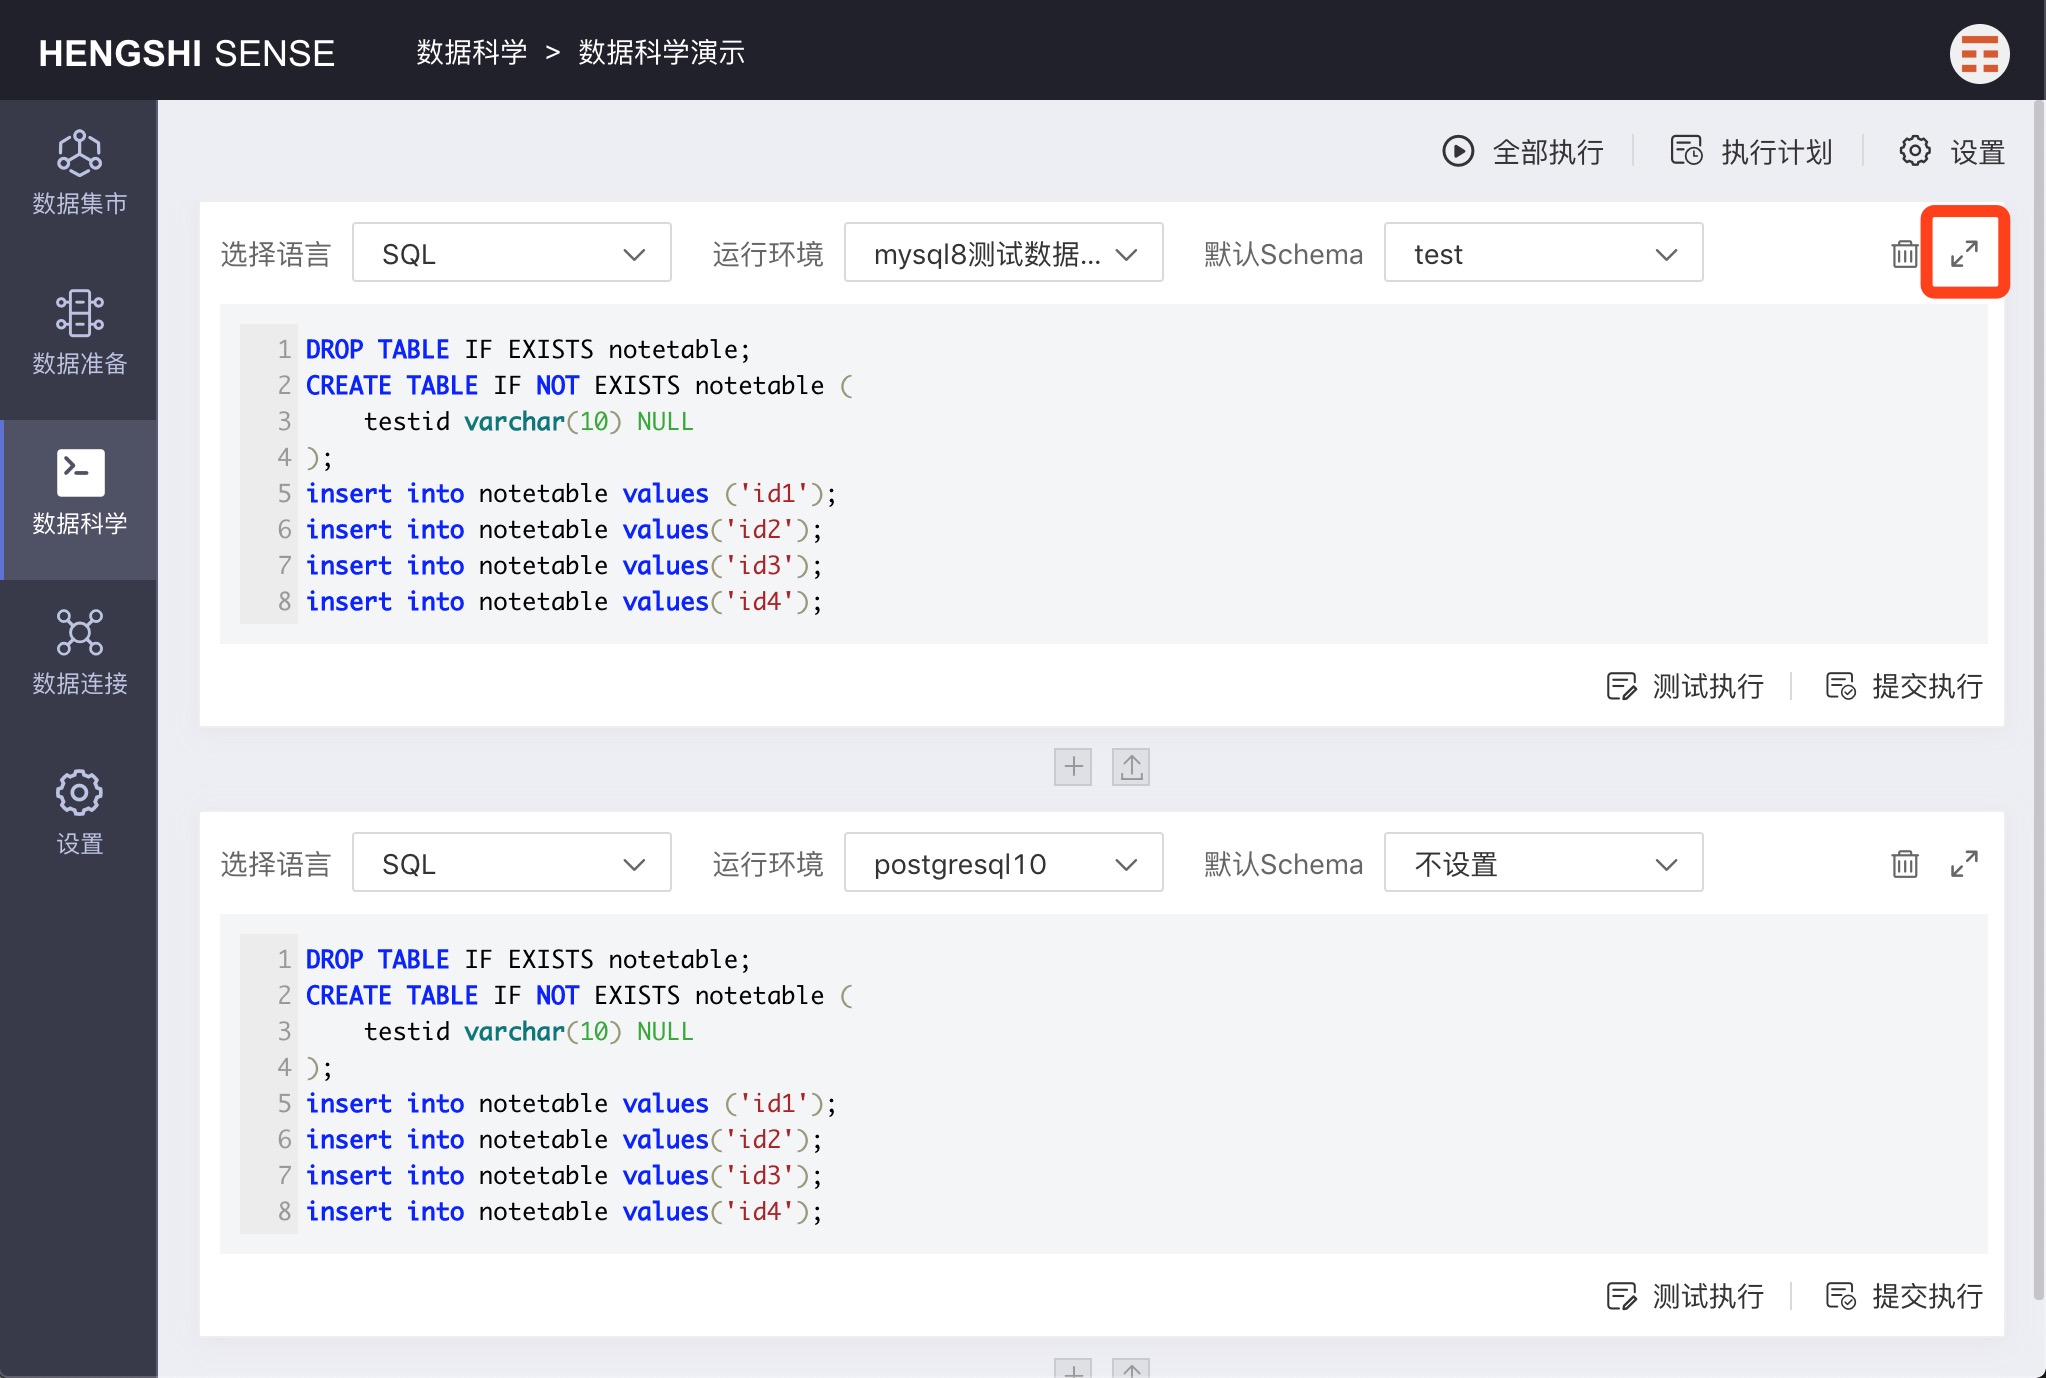
Each “Paragraph” sets a type, currently only supporting SQL. Each “Paragraph” supports:
- Create, delete, edit, and view. Creation includes new blank "Paragraphs" and generating new "Paragraphs" by uploading files.
- Can be executed individually, including "Test Execution" (do not submit) and "Submit Execution"
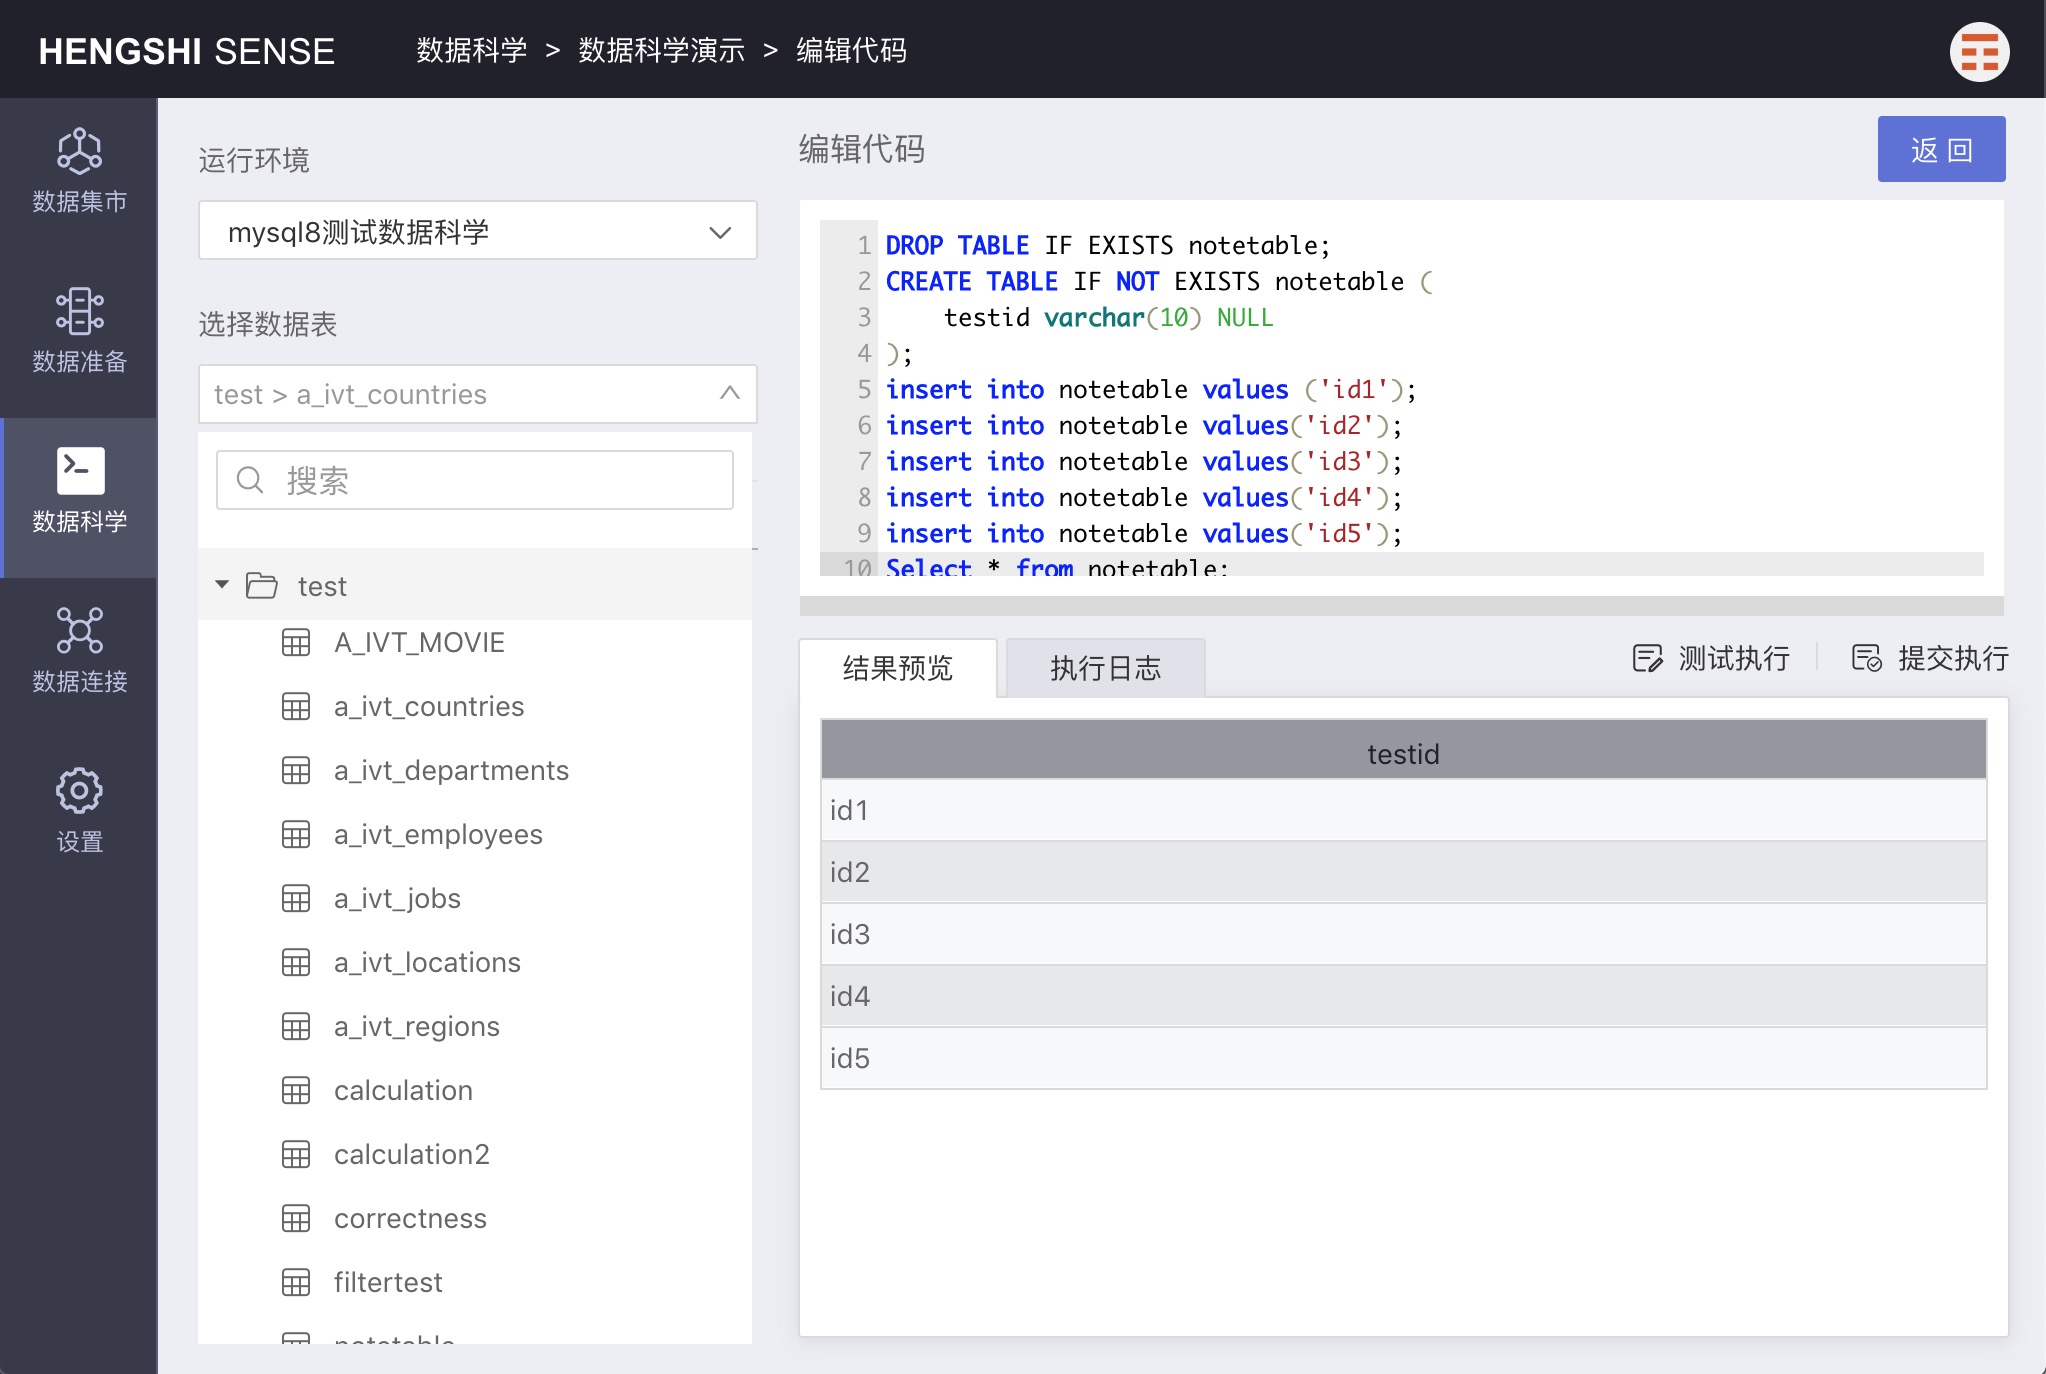
- Standard output: If the final statement in the paragraph is a Select statement, the results of the first 20 rows will be outputted; otherwise, no output will be displayed.
- View execution log
- Choose a connection. SQL types can choose a connection from the "Note's" connection list.
- Choose the default execution path (schema).
- Open, becoming a separate "Paragraph" in edit mode, similar to an SQL query dataset.

Creating a New Paragraph
Clicking + adds a new paragraph where users can enter their script. Users can only write Native SQL that conforms to the syntax required by the selected connection type.
Creating a New Paragraph by Uploading a File
Clicking the upload icon allows for the upload of a text file whose content will then be uploaded to the paragraph.
Paragraph Settings
Each paragraph can set the language, runtime environment, and default schema.

Language
Language refers to the scripting language used in the paragraph; currently, only SQL is supported.
Runtime Environment
Runtime Environment refers to the data connection used to run the paragraph.
Default Schema
Default Schema refers to the default schema used in the paragraph when no specific schema is designated.
Opening a Paragraph
Clicking the 'open' icon on the right side of the paragraph will display the paragraph in full-screen mode, easing editing and debugging.
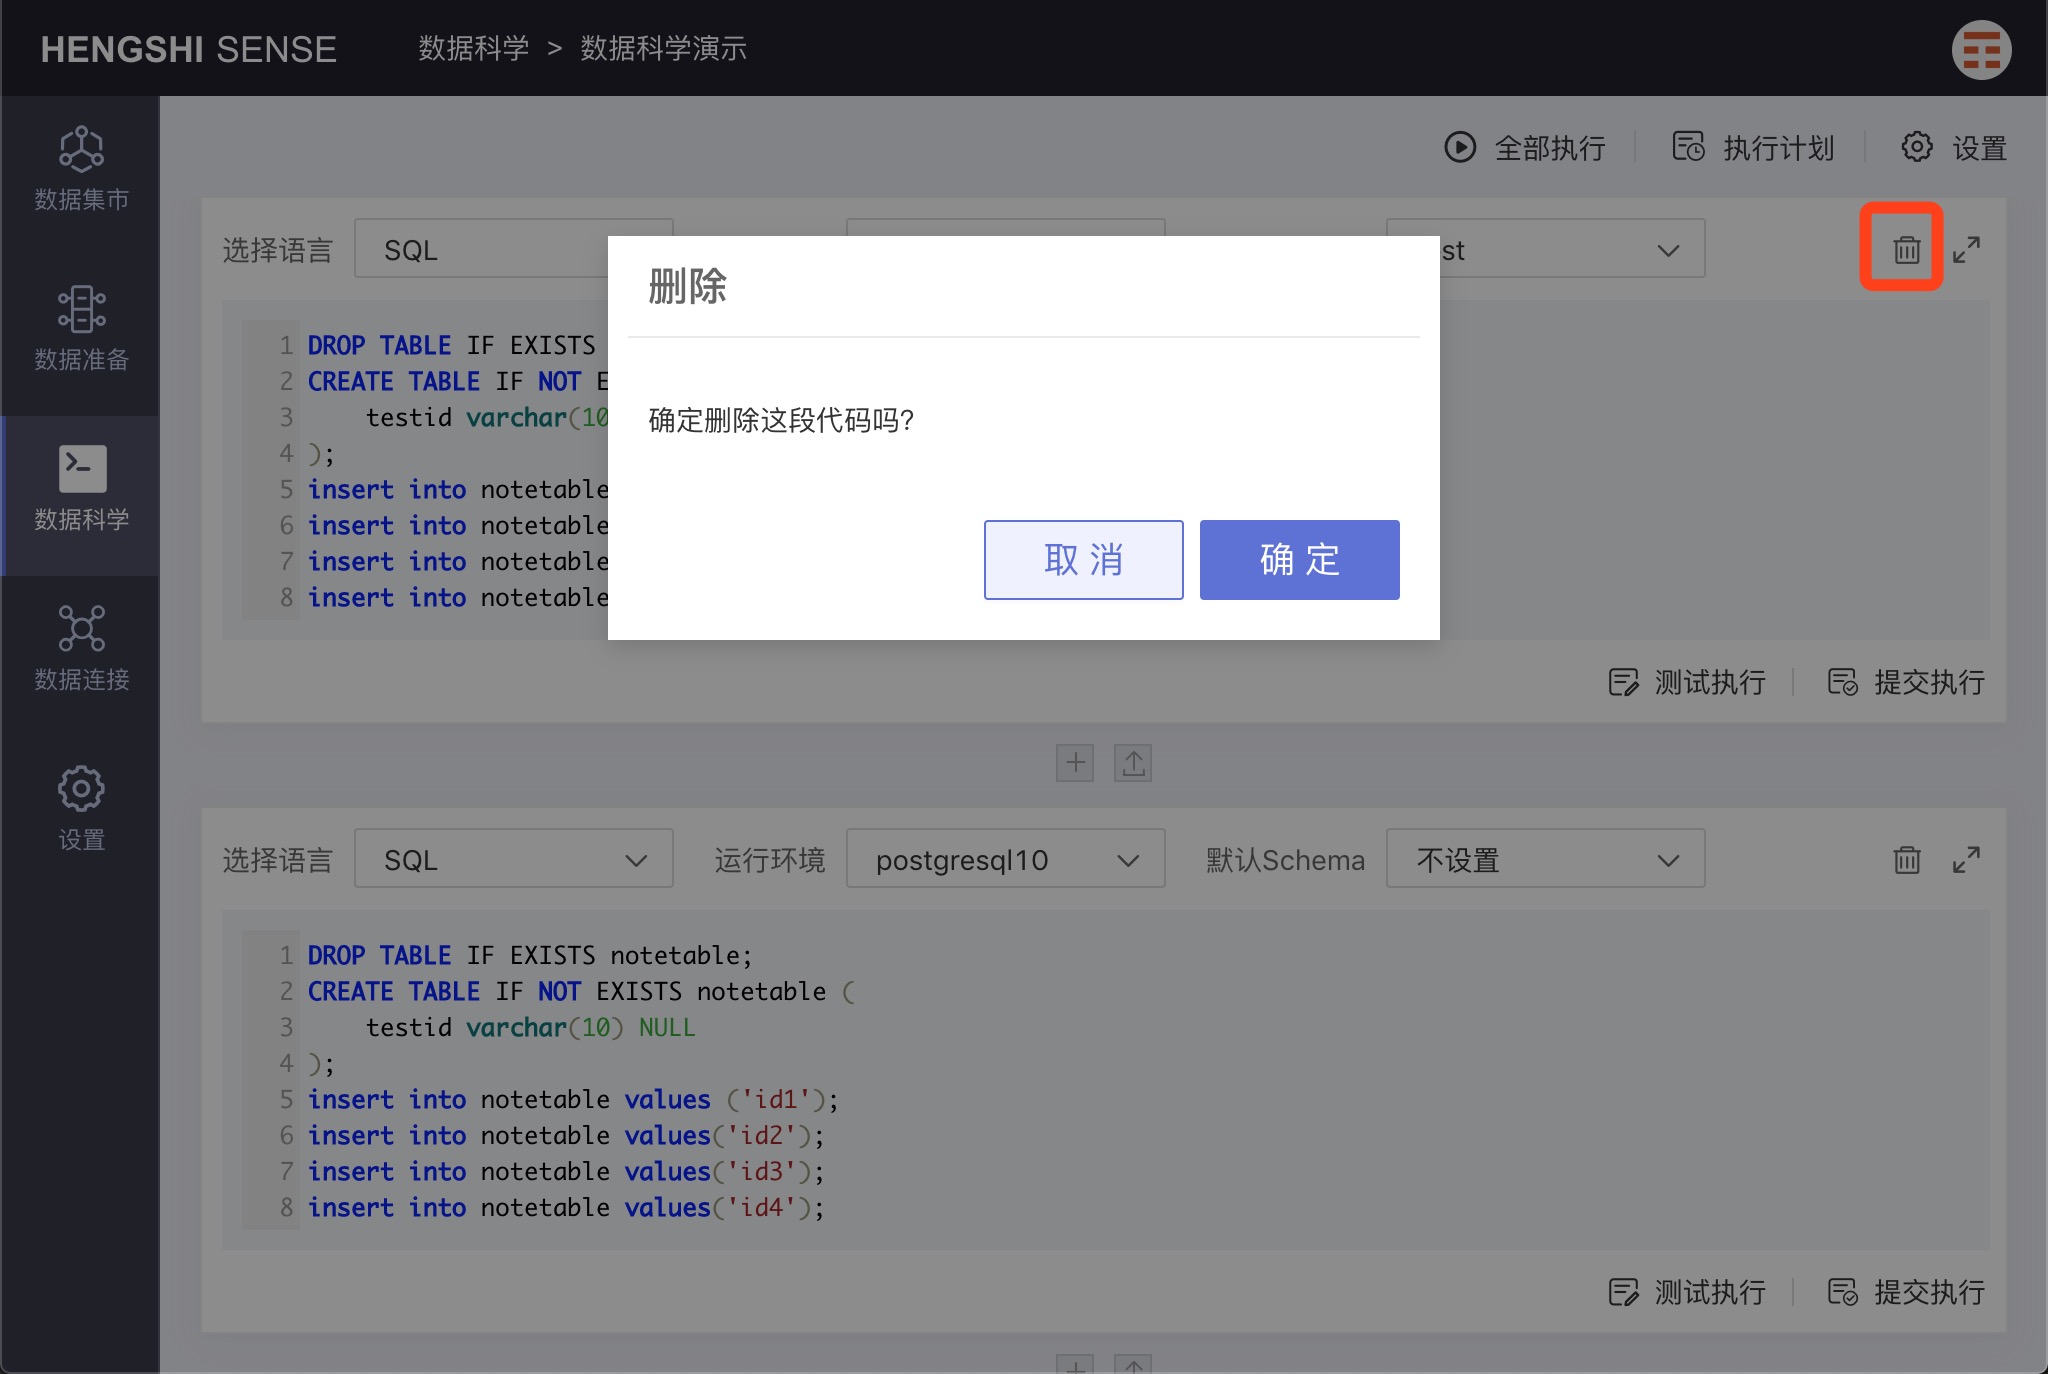
Deleting a Paragraph
Click the 'delete' icon on the right side of each paragraph to remove an individual paragraph.
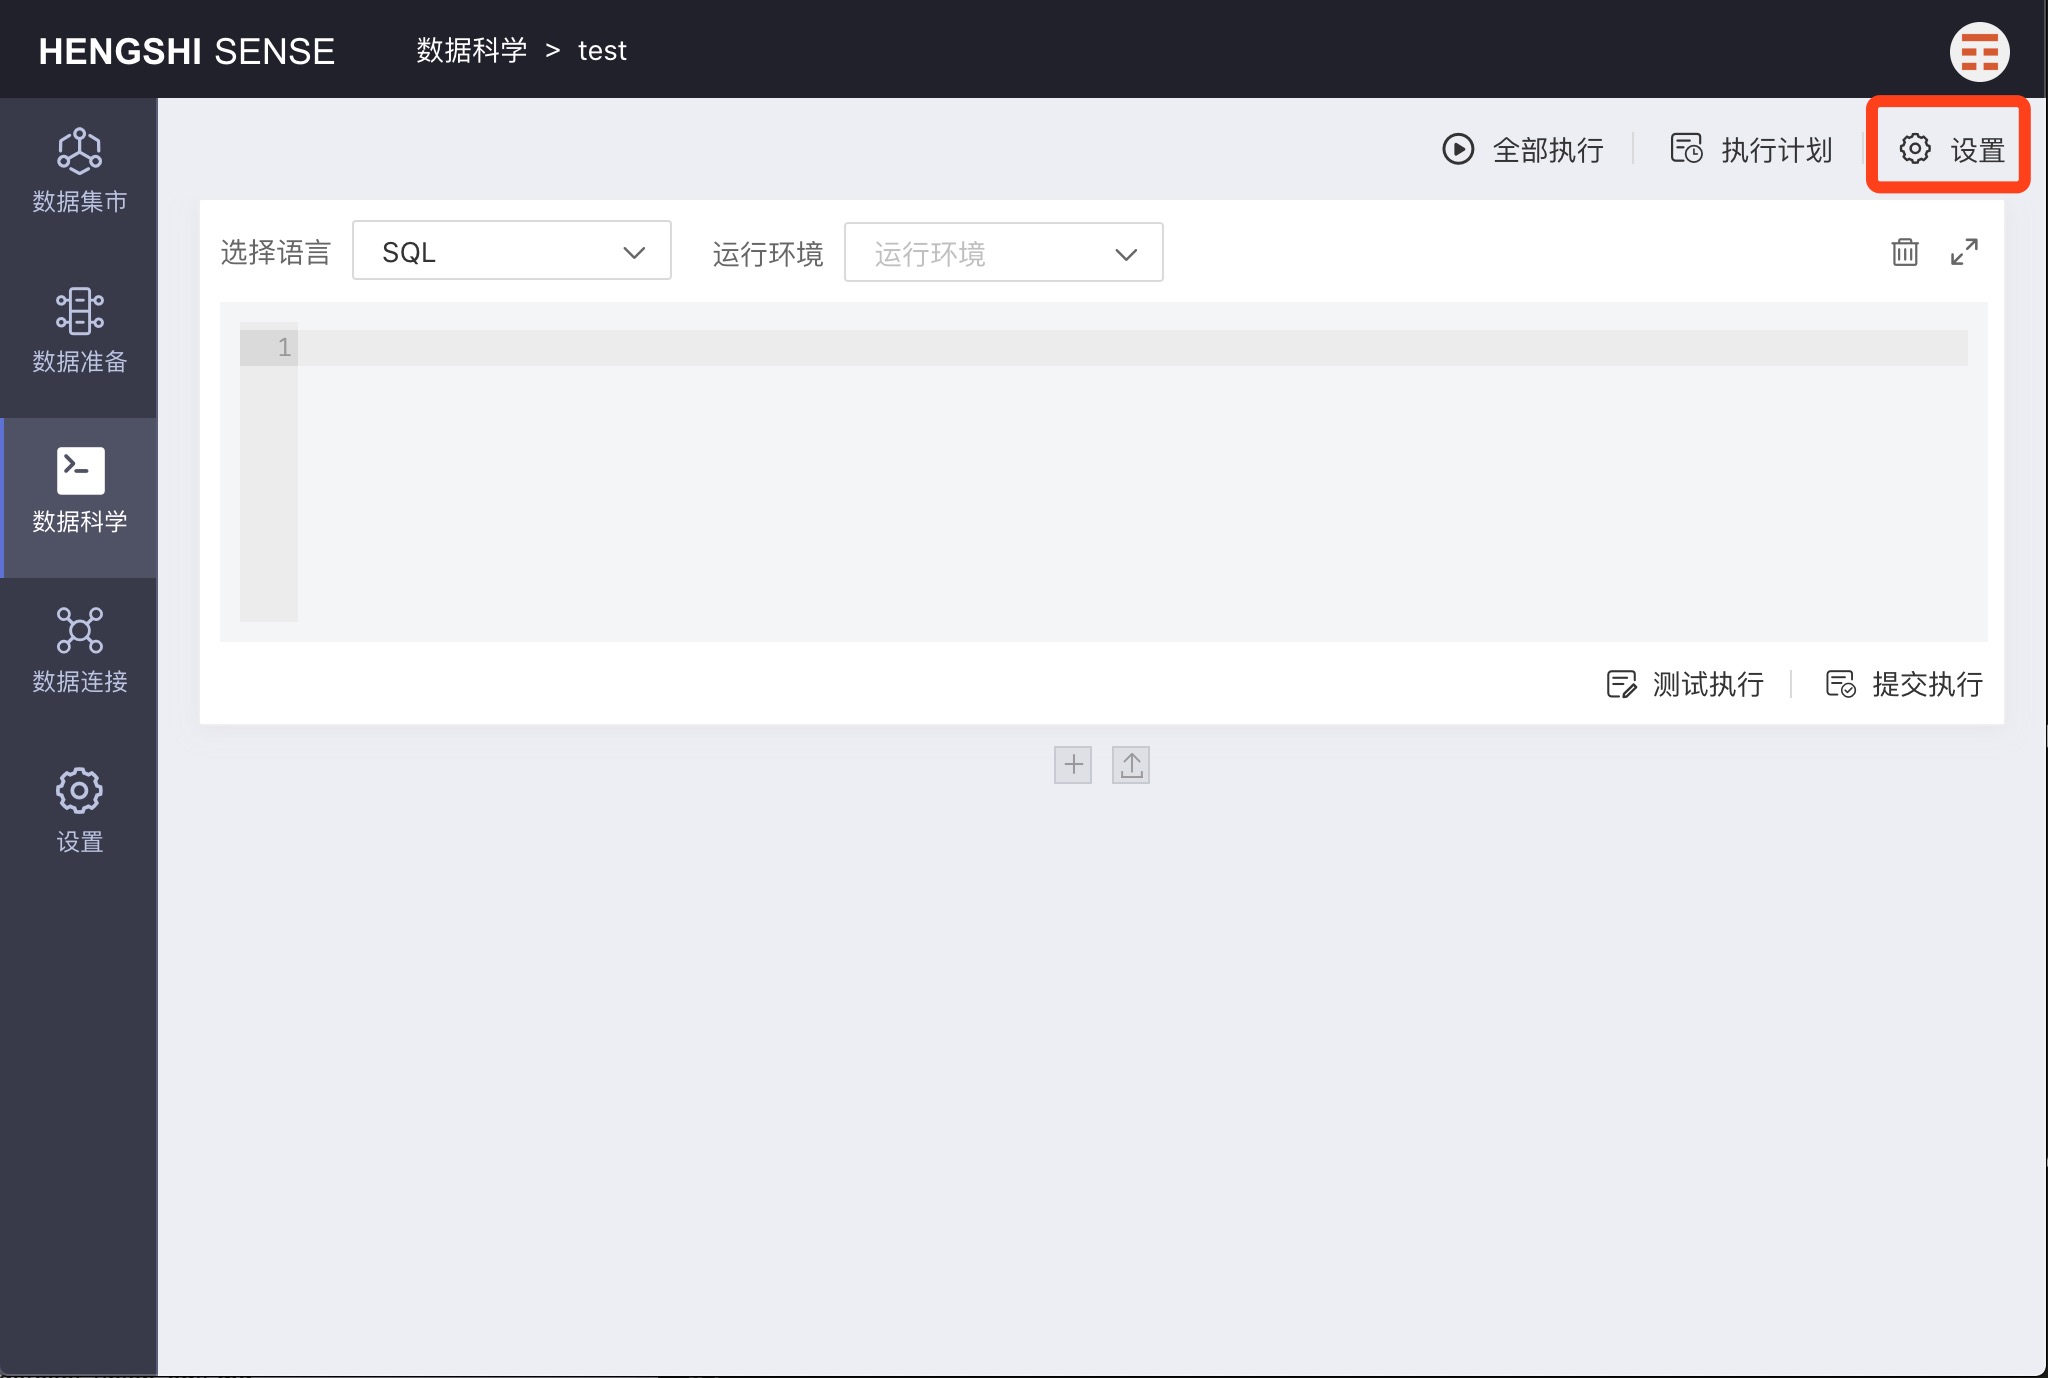
Runtime Environment Settings
Click 'settings' to open the Runtime Environment Settings pop-up. As previously mentioned, a runtime environment refers to the data connection used to run paragraphs.
Adding a Runtime Environment
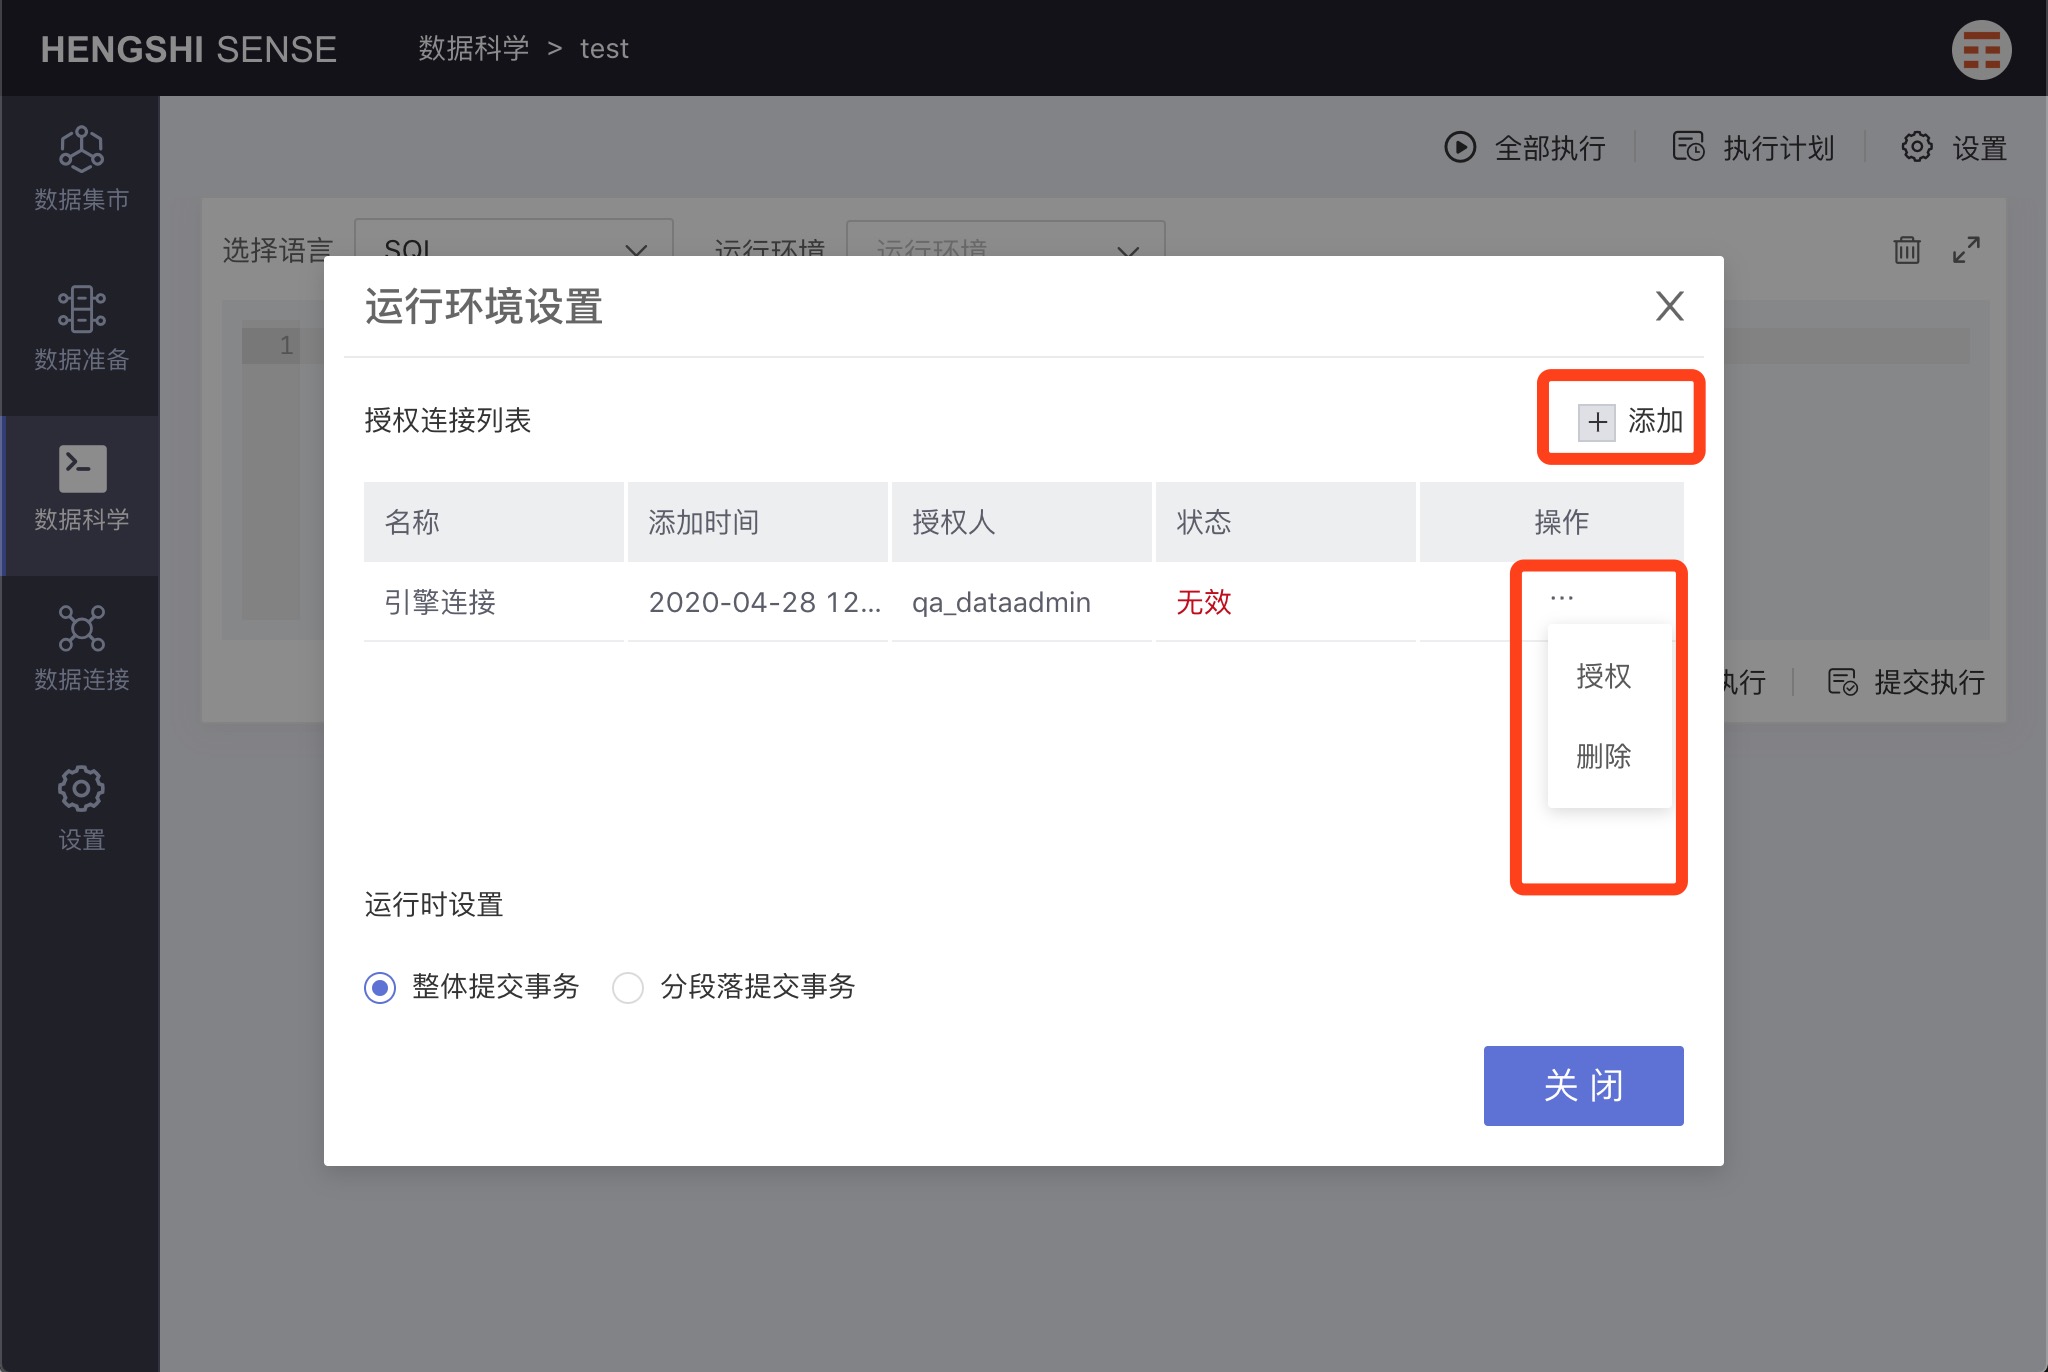
Clicking 'add' will bring up the data connection selection page. After selecting a data connection, it will be displayed in the 'authorized connection list'.
If the user does not have RW permissions, the connection 'status' is invalid. If the user does have RW permissions, the connection 'status' is valid.
Authorization
In the 'authorized connection list', open the menu for a connection and choose 'authorize' to grant all users of data science access to that connection; all users will be able to use it to run notes, whether or not they have RW permissions.
Revoking Authorization
After authorization, all users can execute notes, posing a risk of data leakage. If a user does not want to grant access to other users, they can revoke authorization after each execution. Thus, other users won't be able to use the connection to execute notes.
Clicking 'revoke authorization' causes the connection status to change to 'invalid', and no users can use that connection anymore.
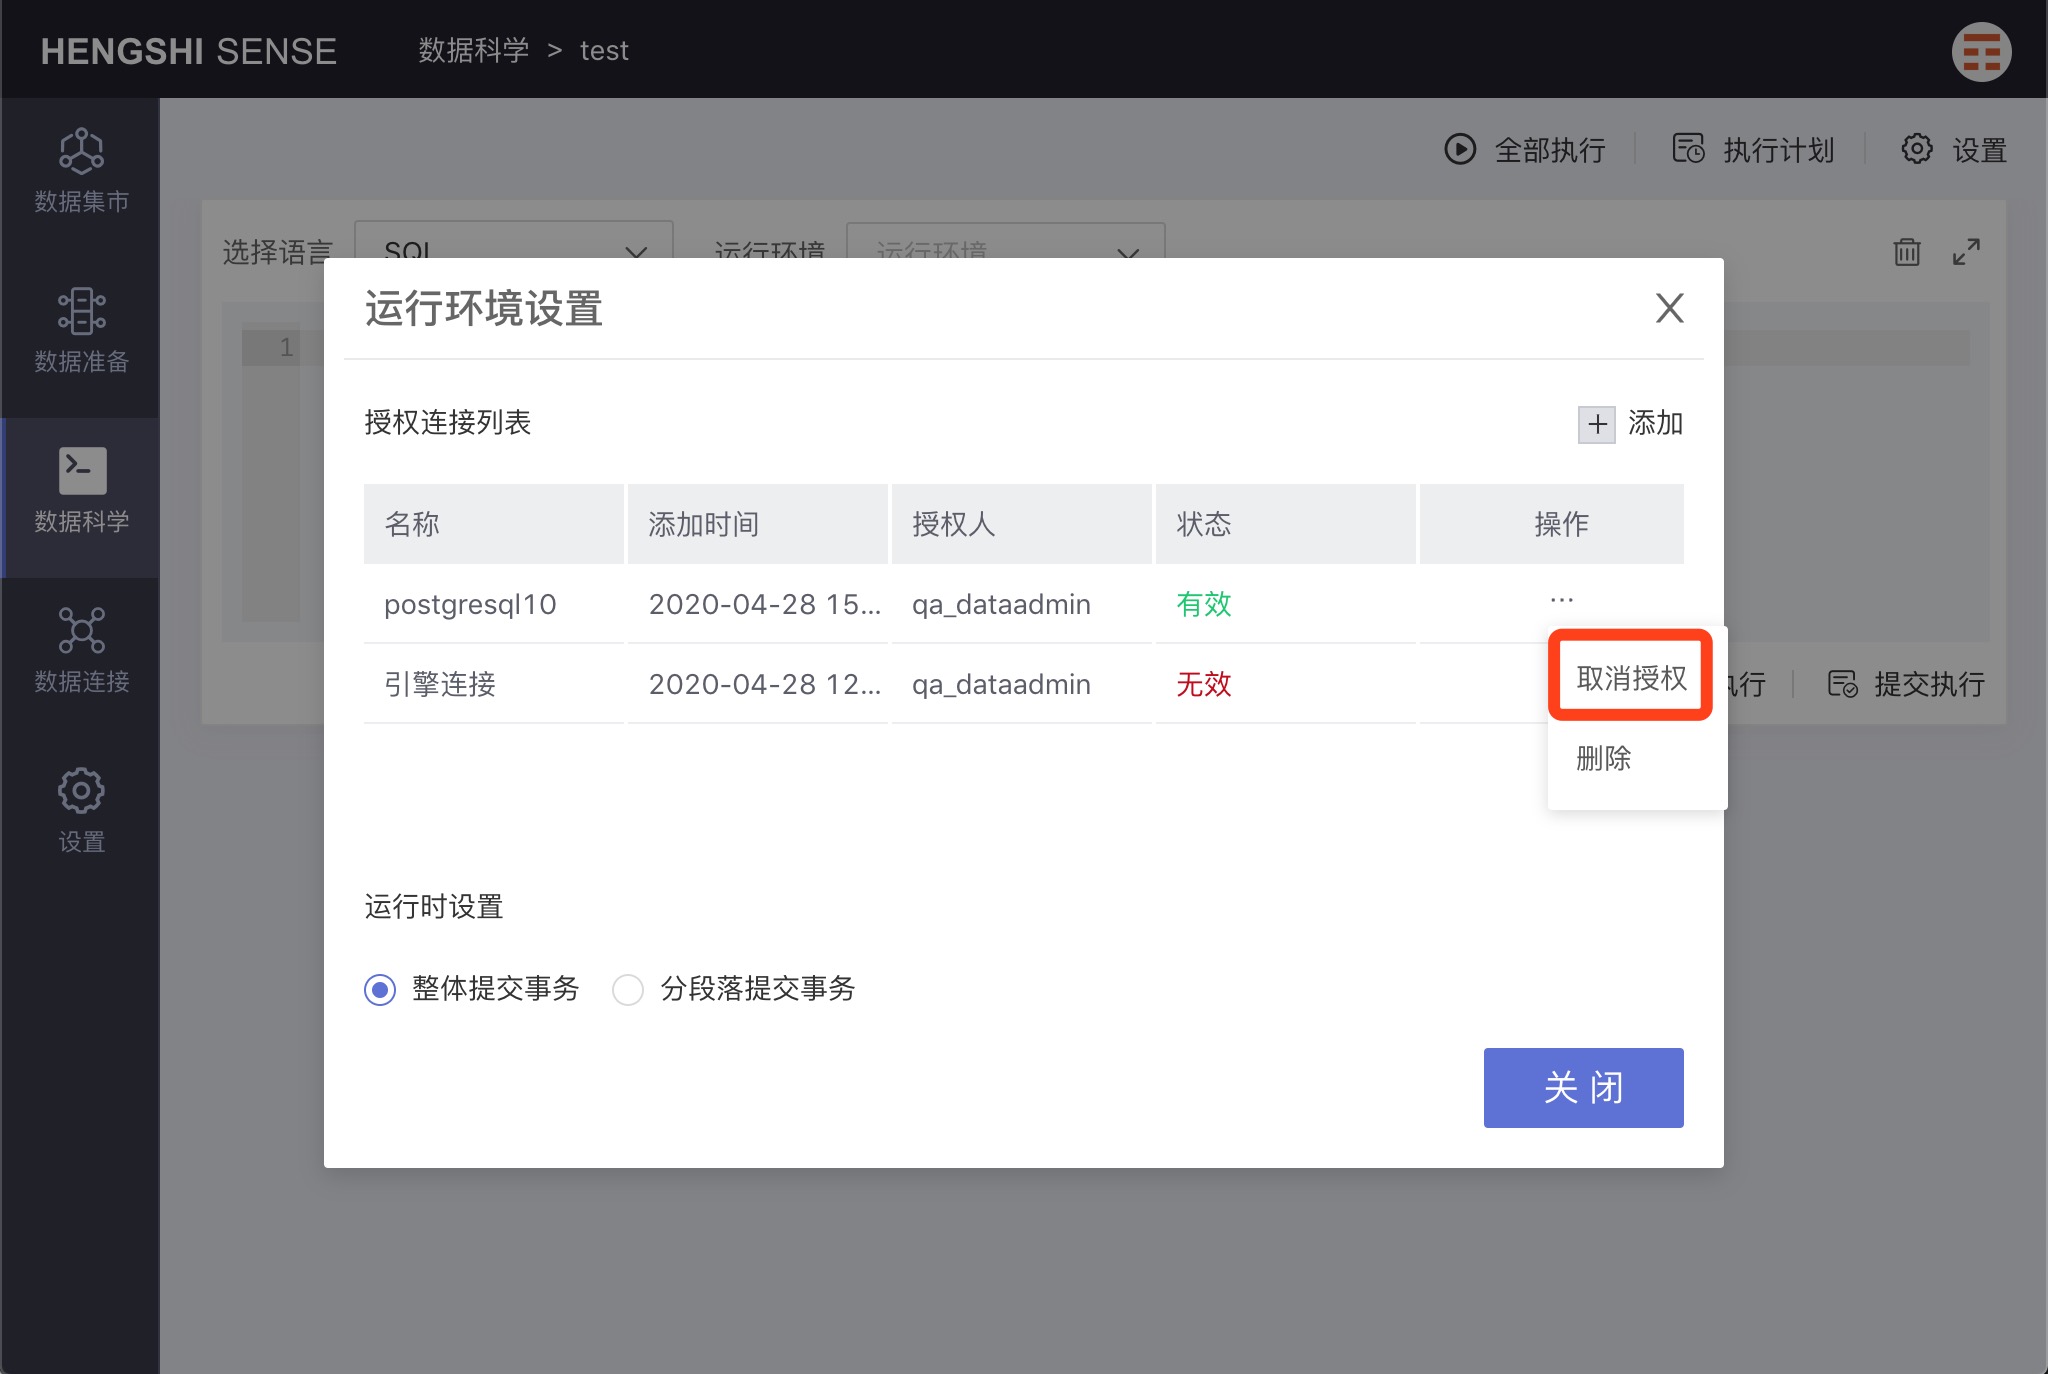
Deletion
In the 'authorized connection list', open the menu for a connection and choose 'delete' to remove that connection from the list and make it unavailable for executing notes.
Runtime Settings
Commit Transactions as a Whole
Selecting 'Commit transactions as a whole' means that, when running notes, all paragraphs will be treated as one transaction, and if one paragraph fails, all paragraphs will be rolled back.
Commit Transactions by Paragraph
Selecting 'Commit transactions by paragraph' means that, when running notes, each paragraph will be treated as one transaction, and if a paragraph fails, only that paragraph will roll back, while other transactions will execute and commit as usual.
Execution
Test Execution
Click 'Test Execution' to execute the current paragraph without submitting it to the database.
Submit Execution
Click 'Submit Execution' to execute the current paragraph and submit the results to the database.
Result Preview
If there is an SQL query statement in a paragraph, the 'Result Preview' will display the query results. Otherwise, there will be no content in the result preview.
Execution Log
The 'Execution Log' will display logs from the execution process for users to debug or monitor.

Execute All
Clicking 'Execute All' will execute all paragraphs in the current note, and the execution results will be submitted to the database.
Execution Plan
Clicking the 'Execution Plan' in the upper right corner will pop up the 'Execution Plan' window.
Select 'Enable' to schedule the note for automatic execution according to the set execution plan.
Unselect 'Enable', and the note will not execute automatically and can only be started manually.
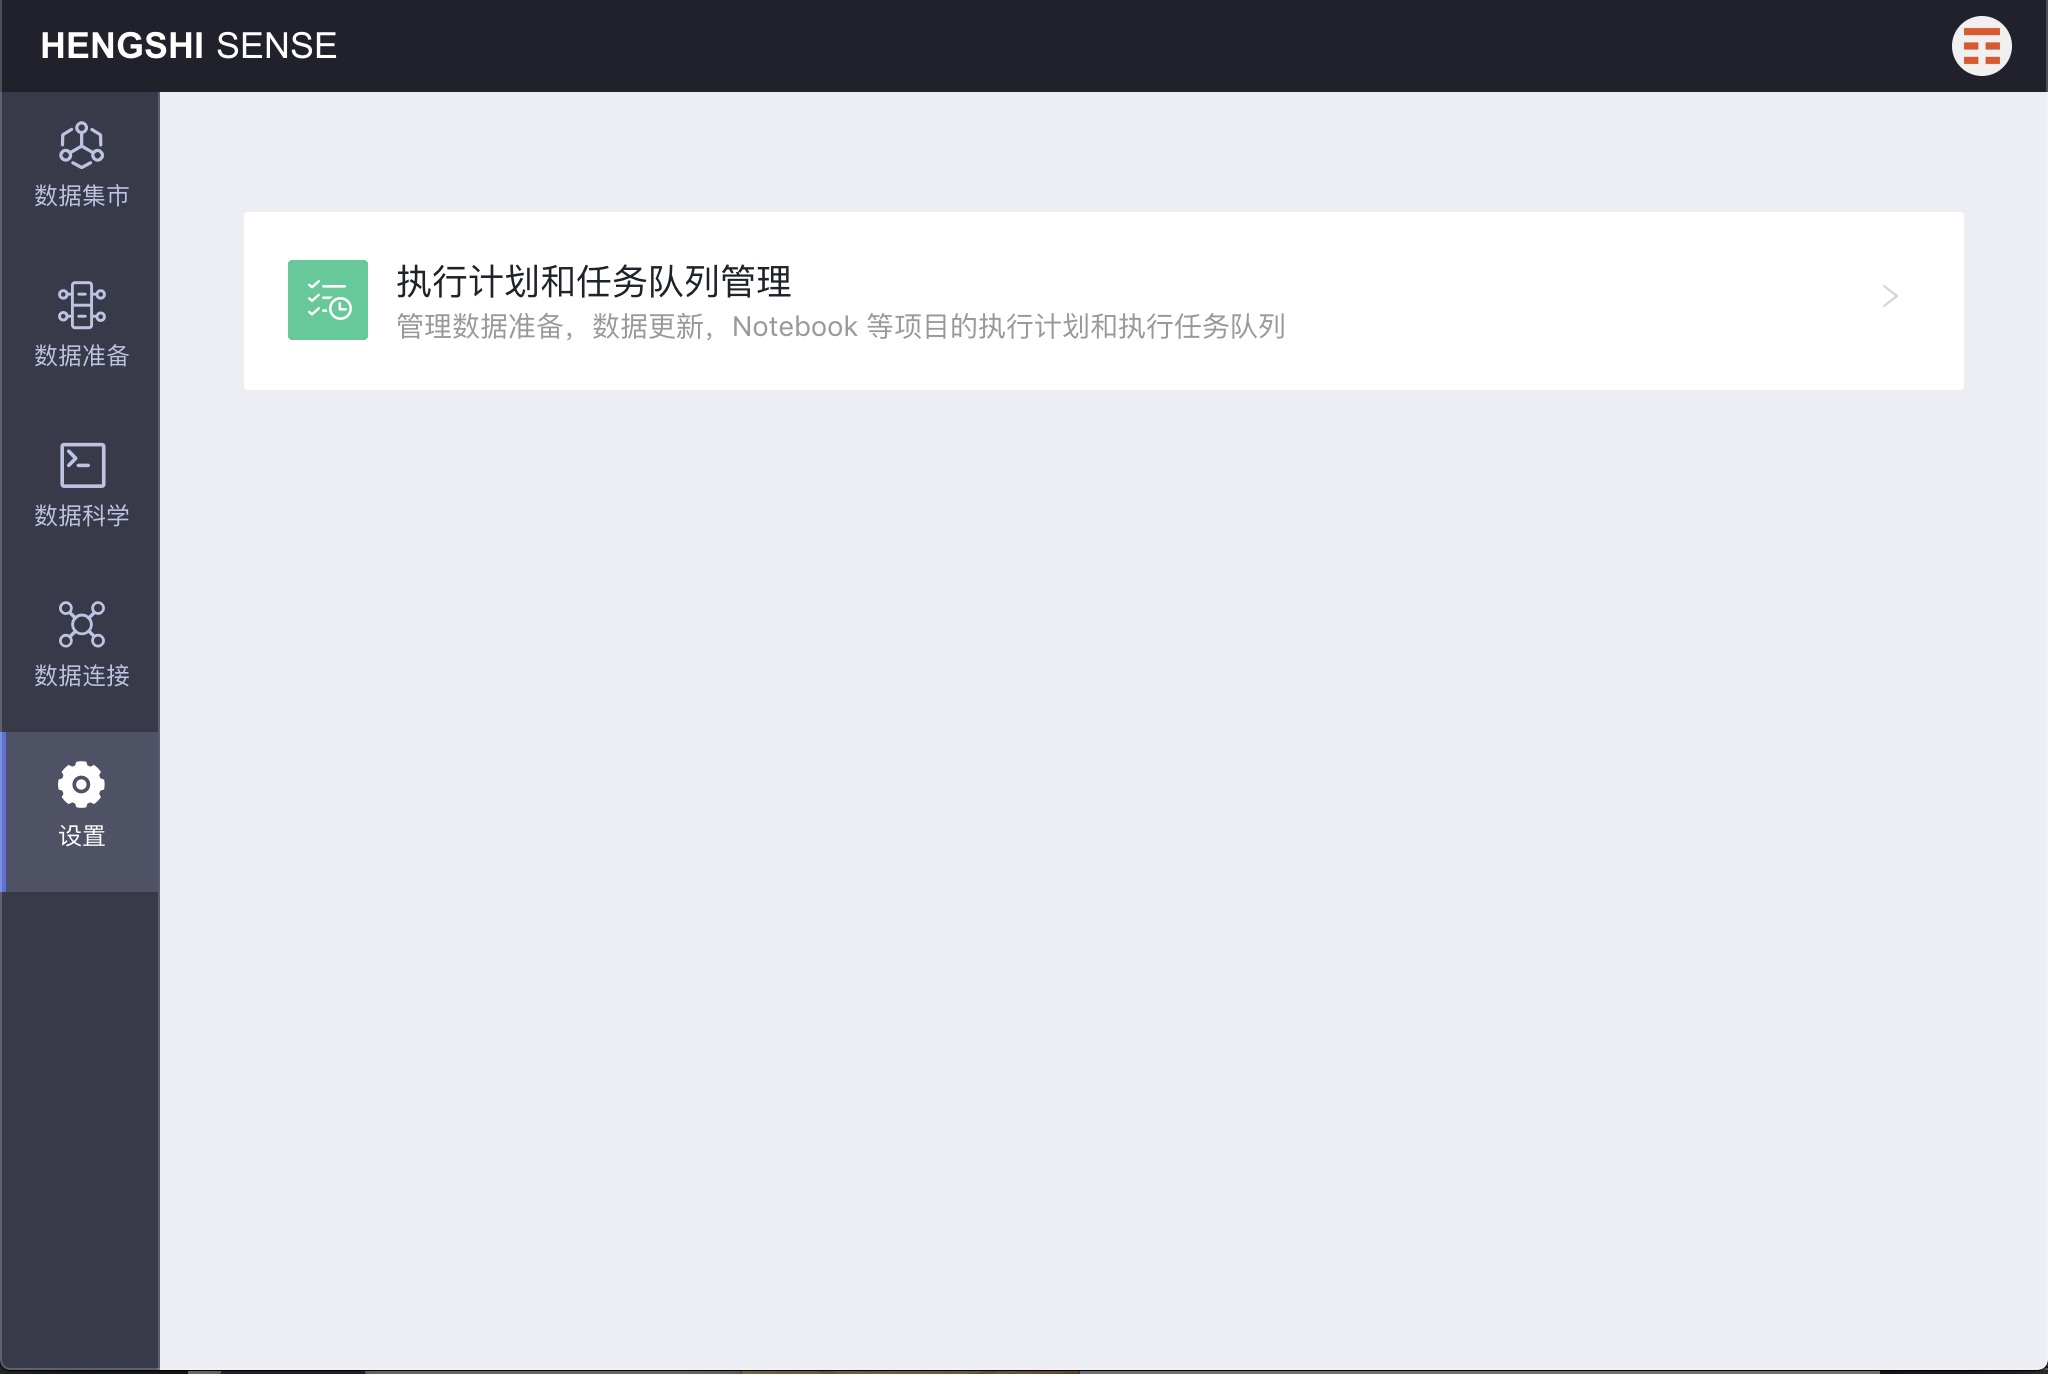
Execution Plan and Task Queue Management
A data administrator opens the main menu 'Settings' to see 'Execution Plan and Task Queue Management'.
Clicking to open, you will see two tabs: 'Execution Plan' and 'Execution Queue'.
Execution Plan
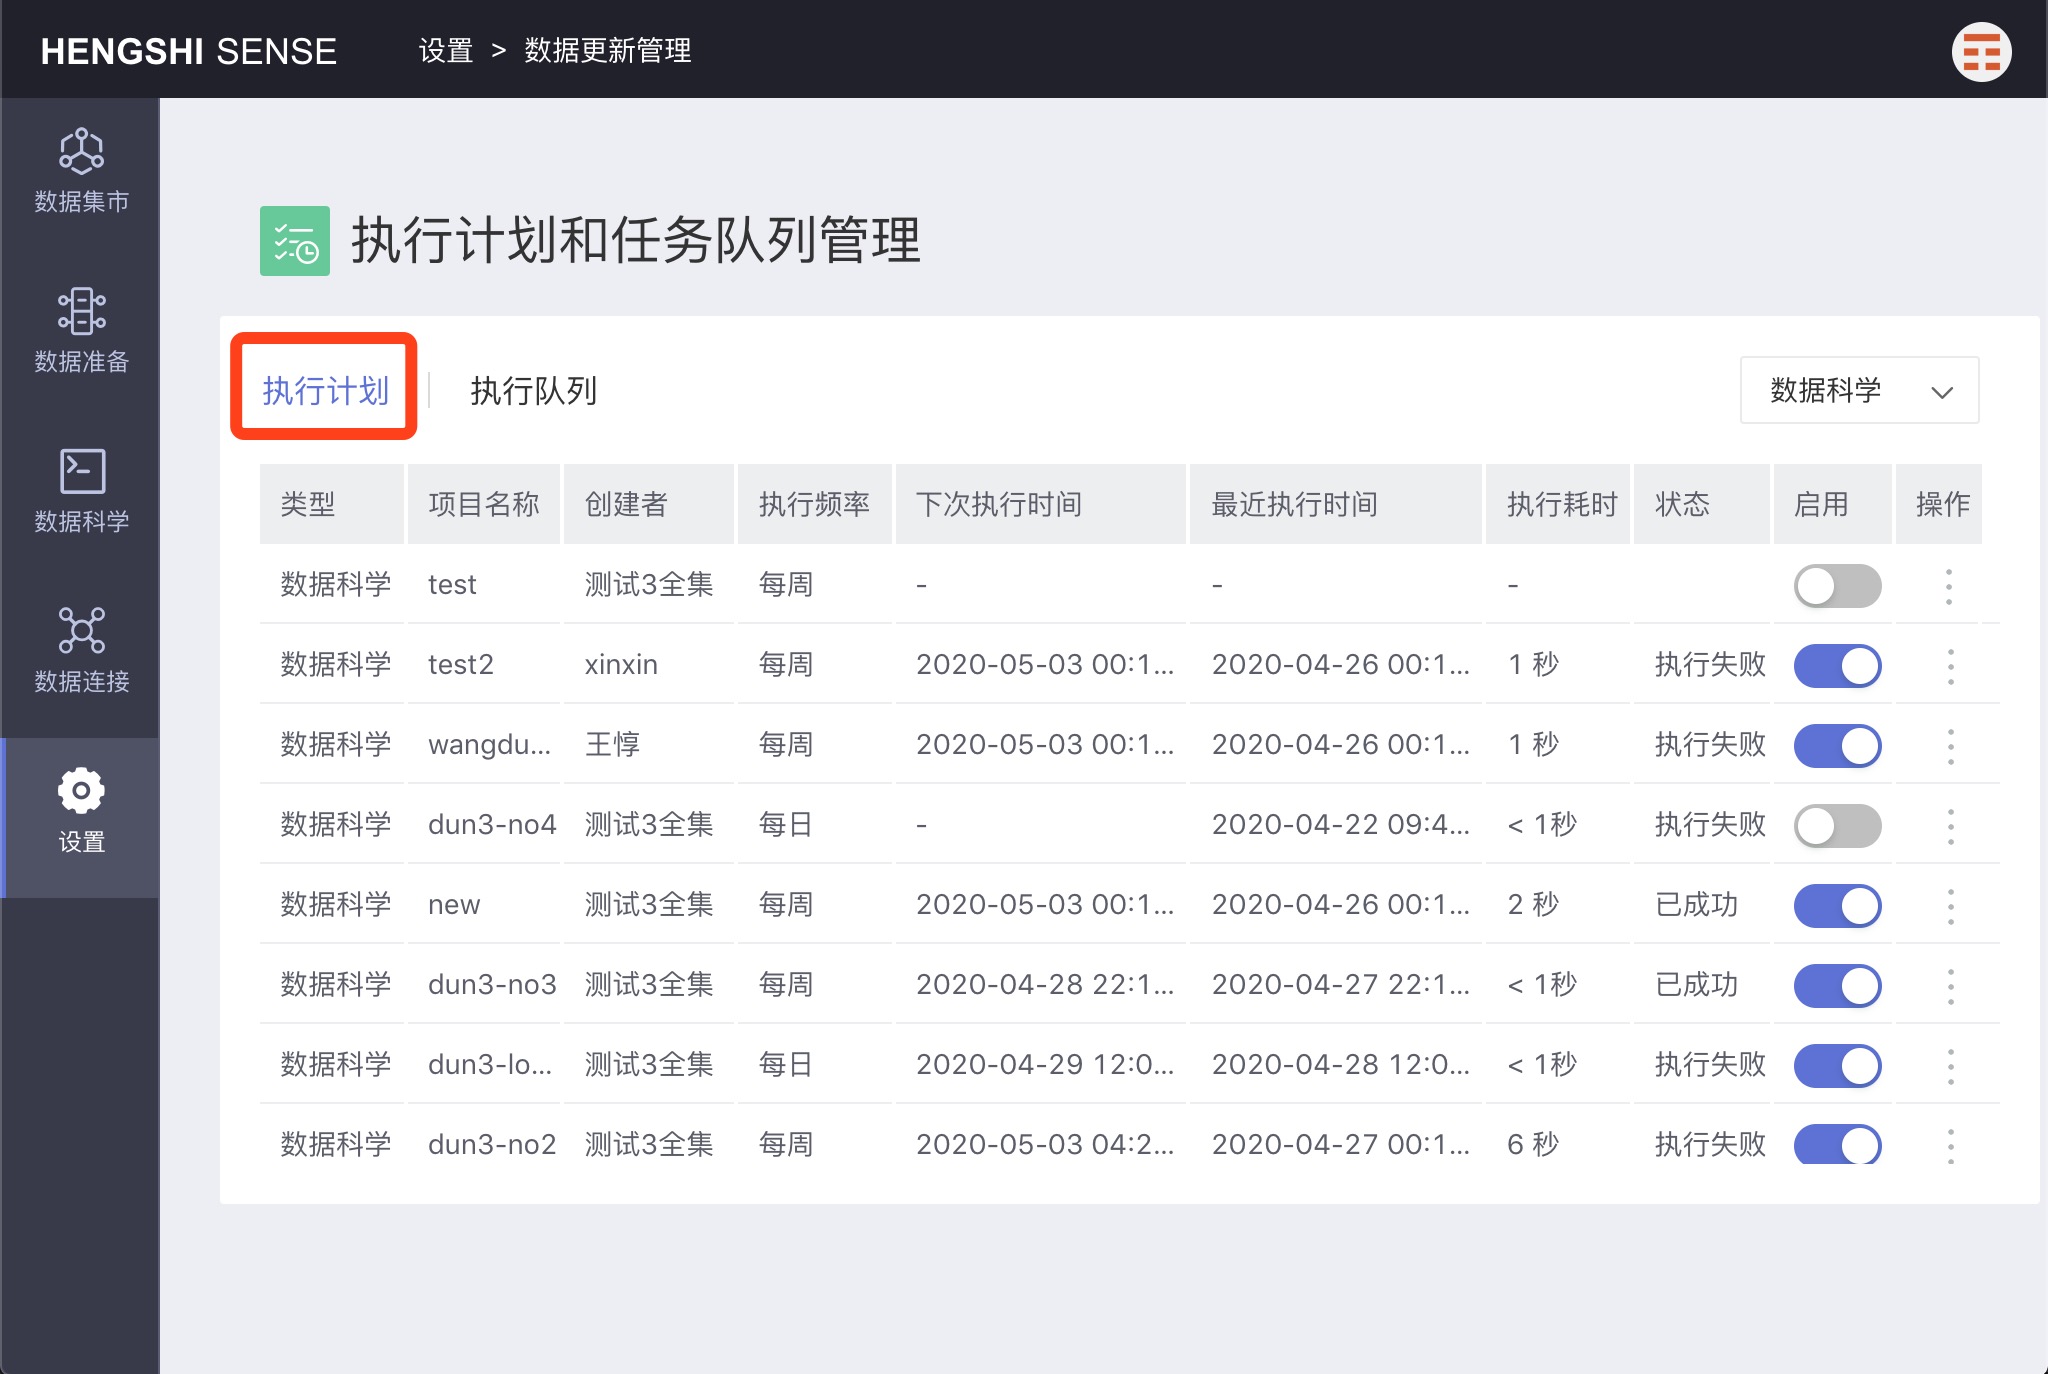
Click on the menu in the operation column to perform the corresponding actions.
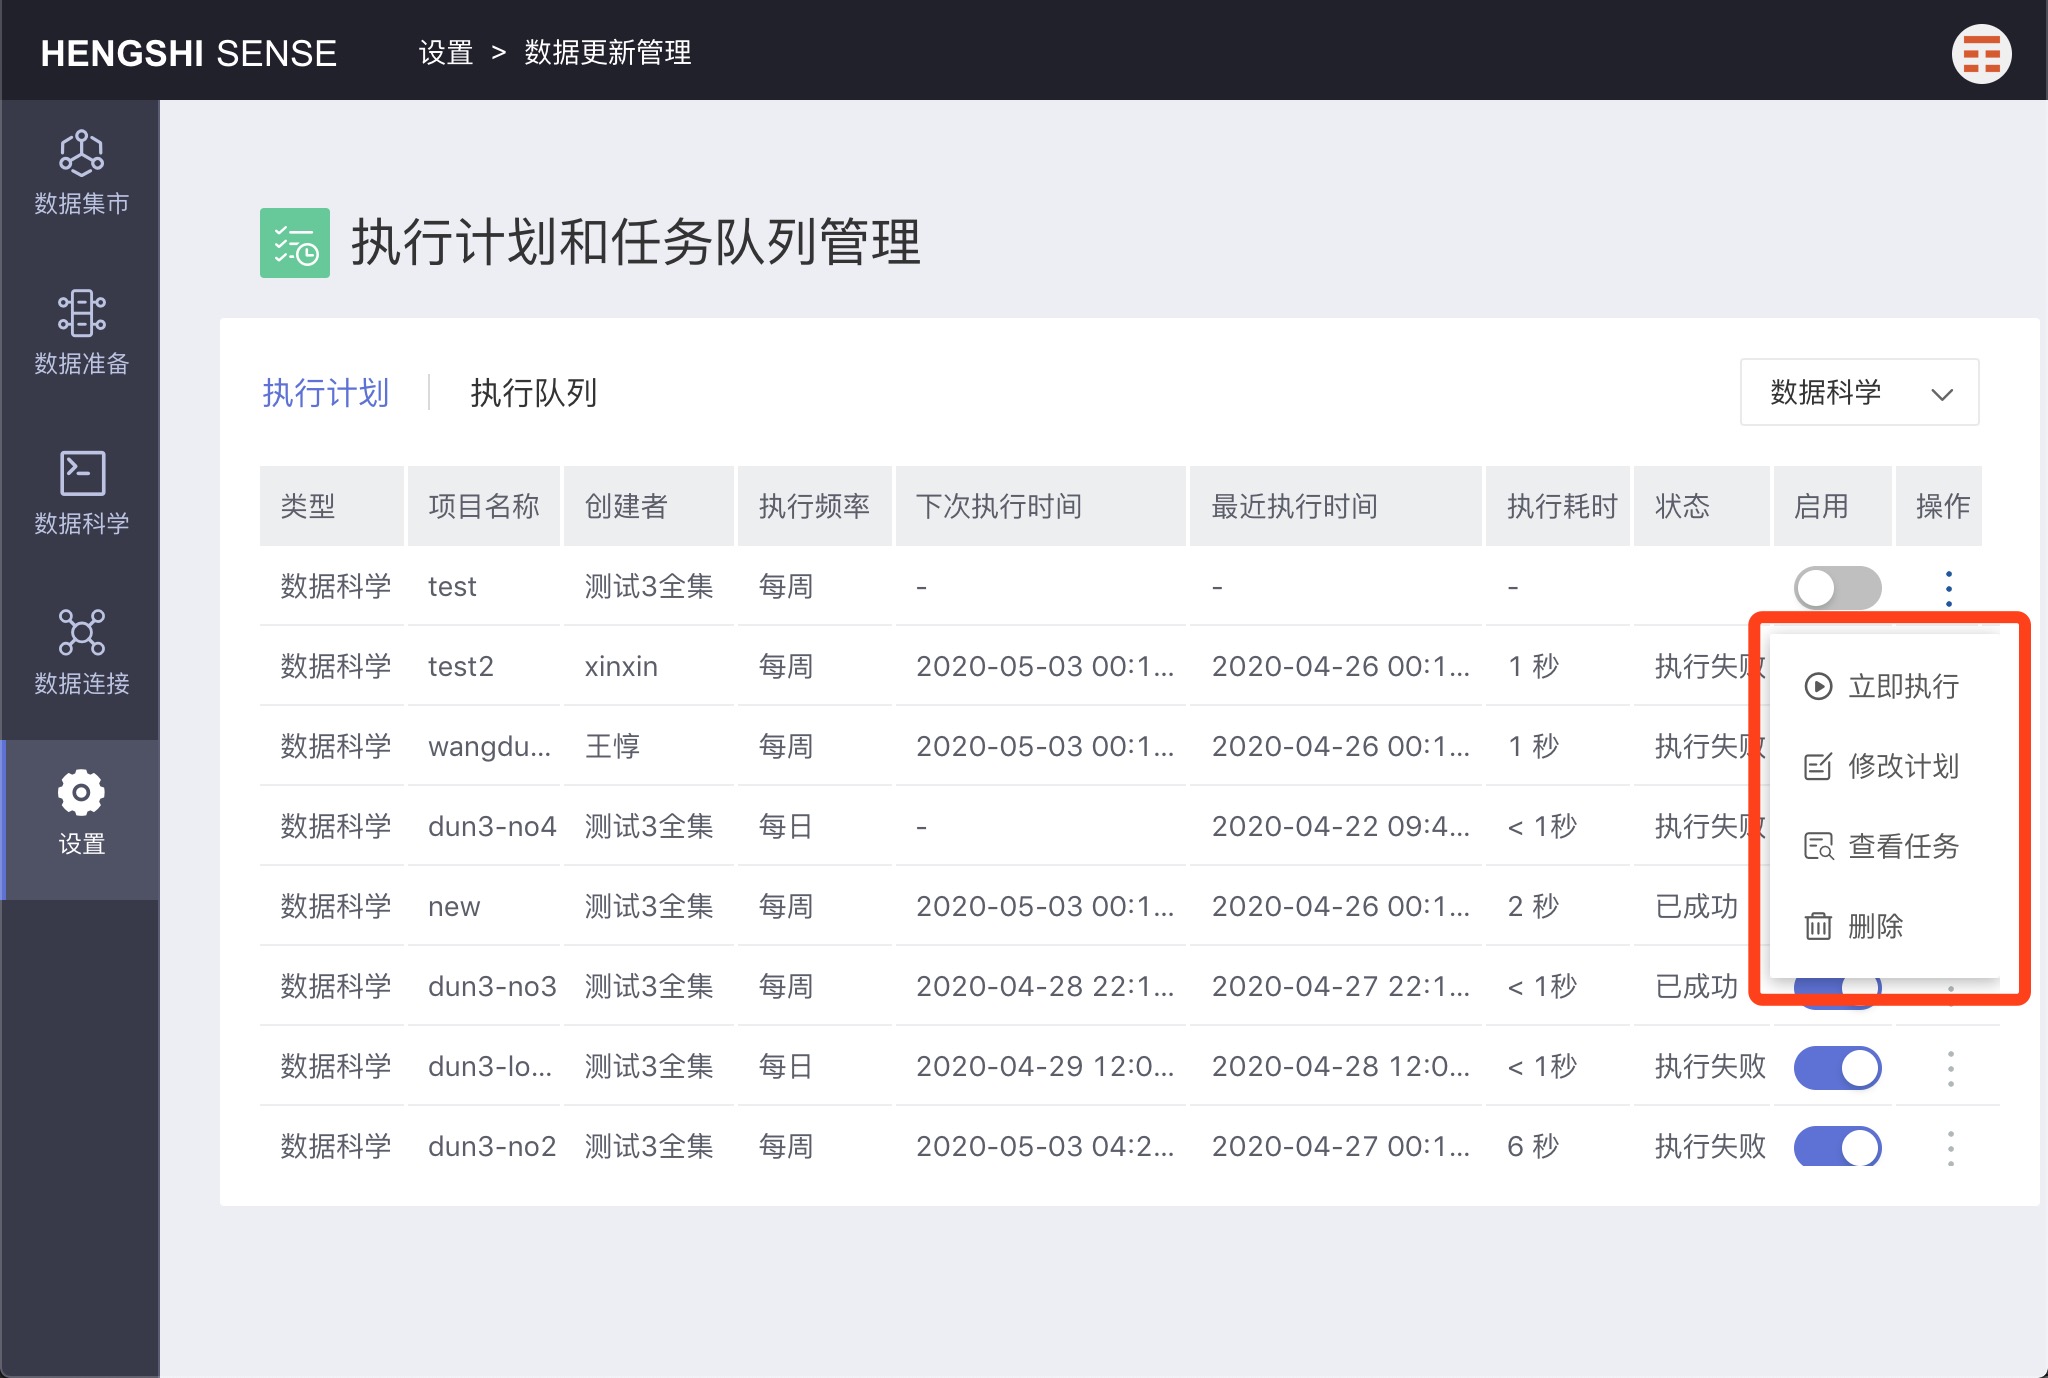
Immediate Execution
Execute a task immediately.
Modify Plan
Modify the execution plan.
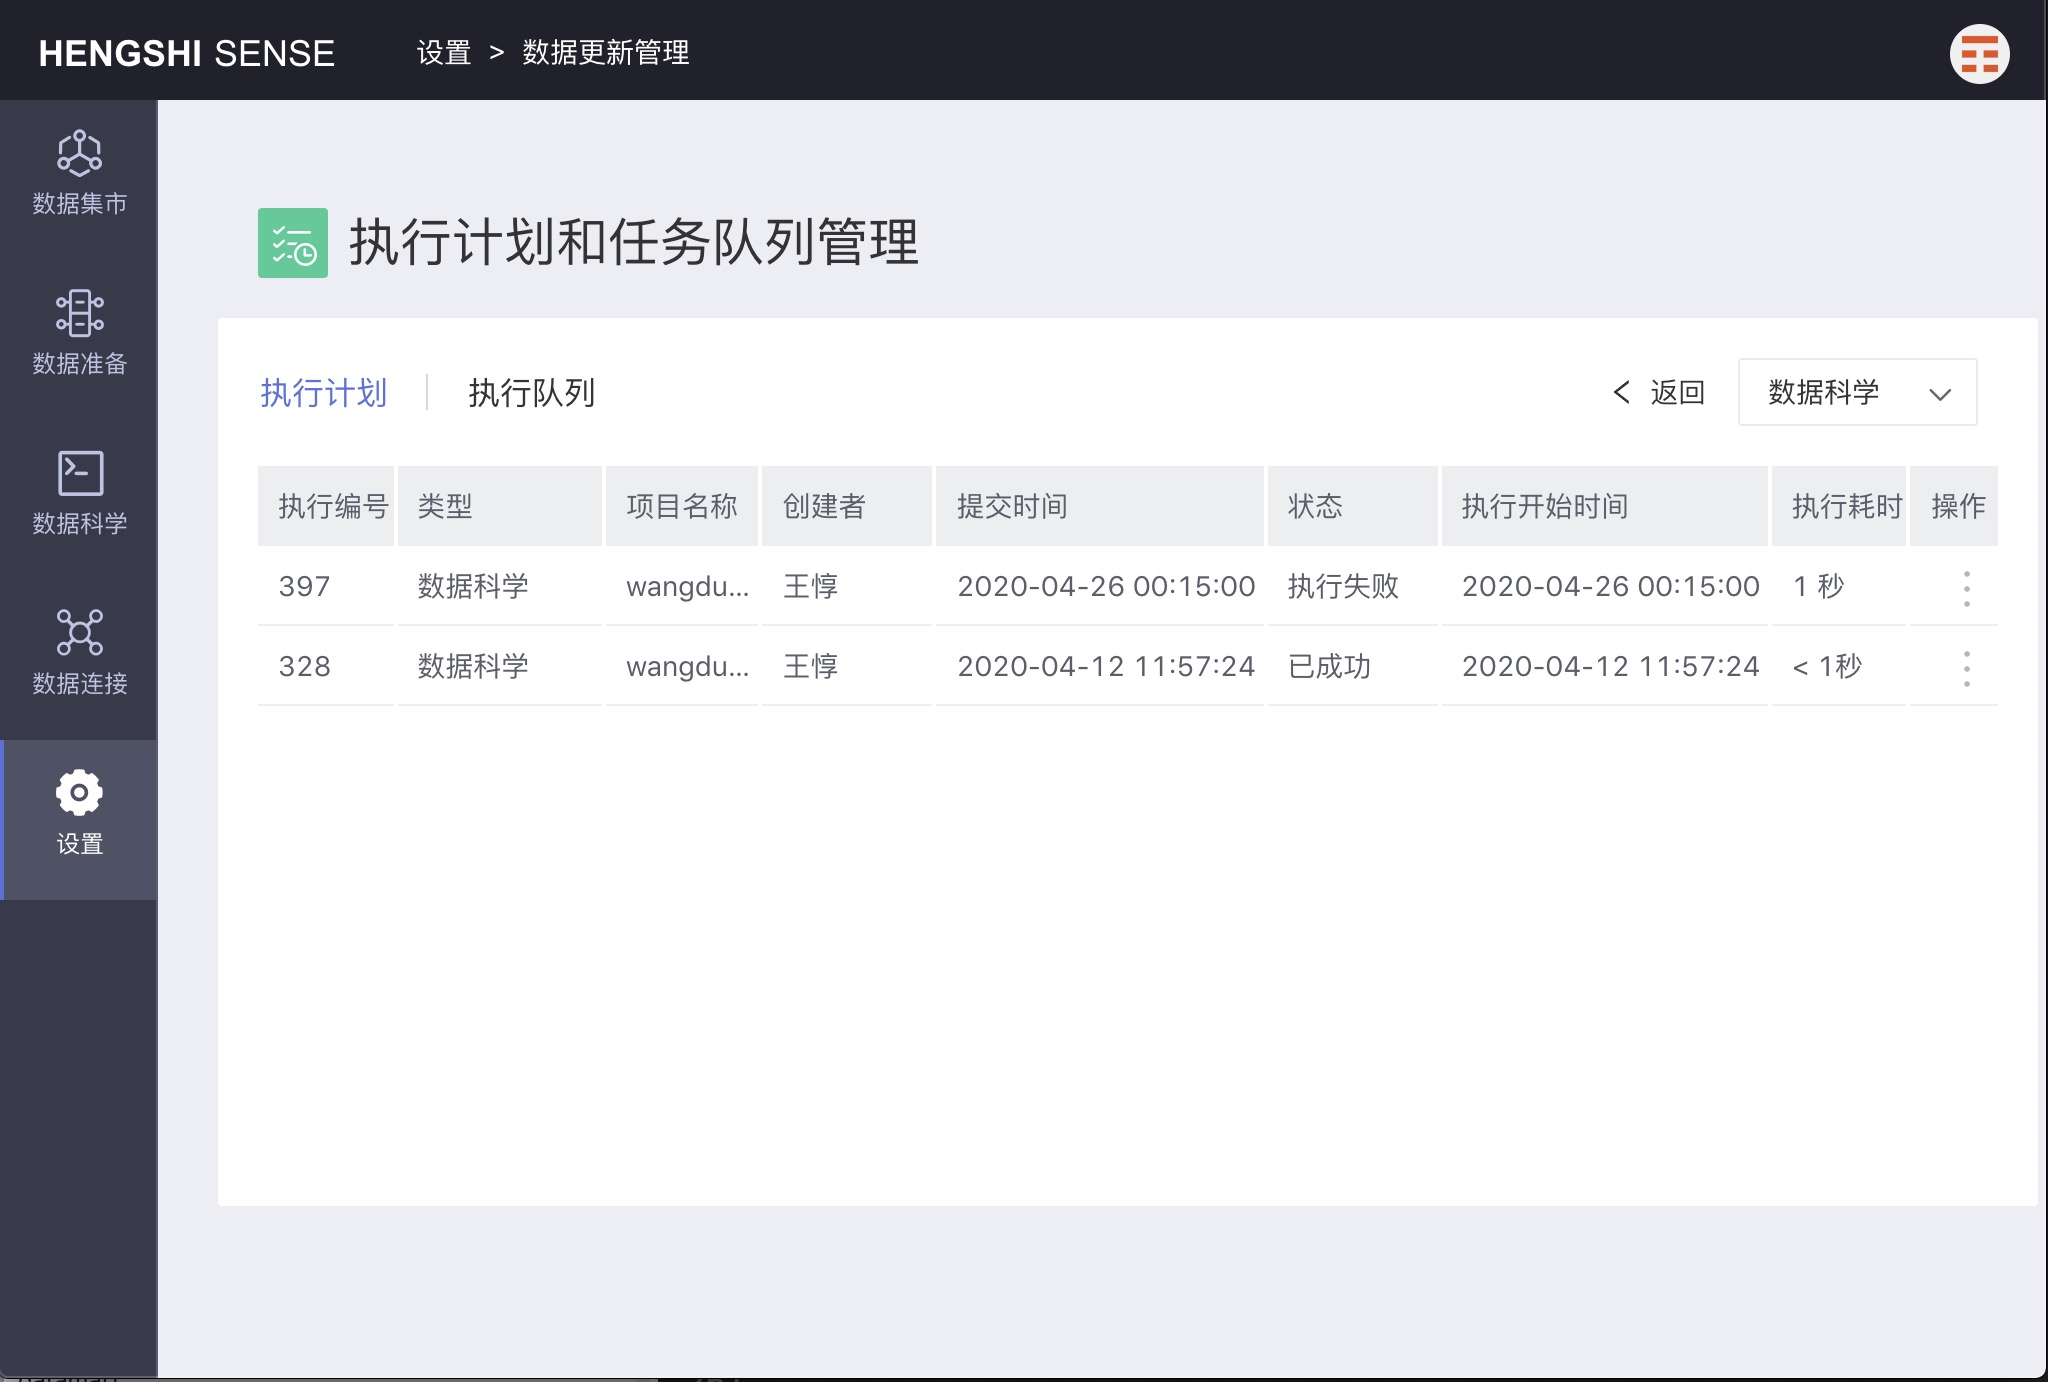
View Tasks
Click to view all tasks that have been executed for that project.
Deletion
Delete the execution plan. The note's execution plan will be deleted.
Execution Queue
This UI is similar to 'View Tasks' but will show all execution tasks here.
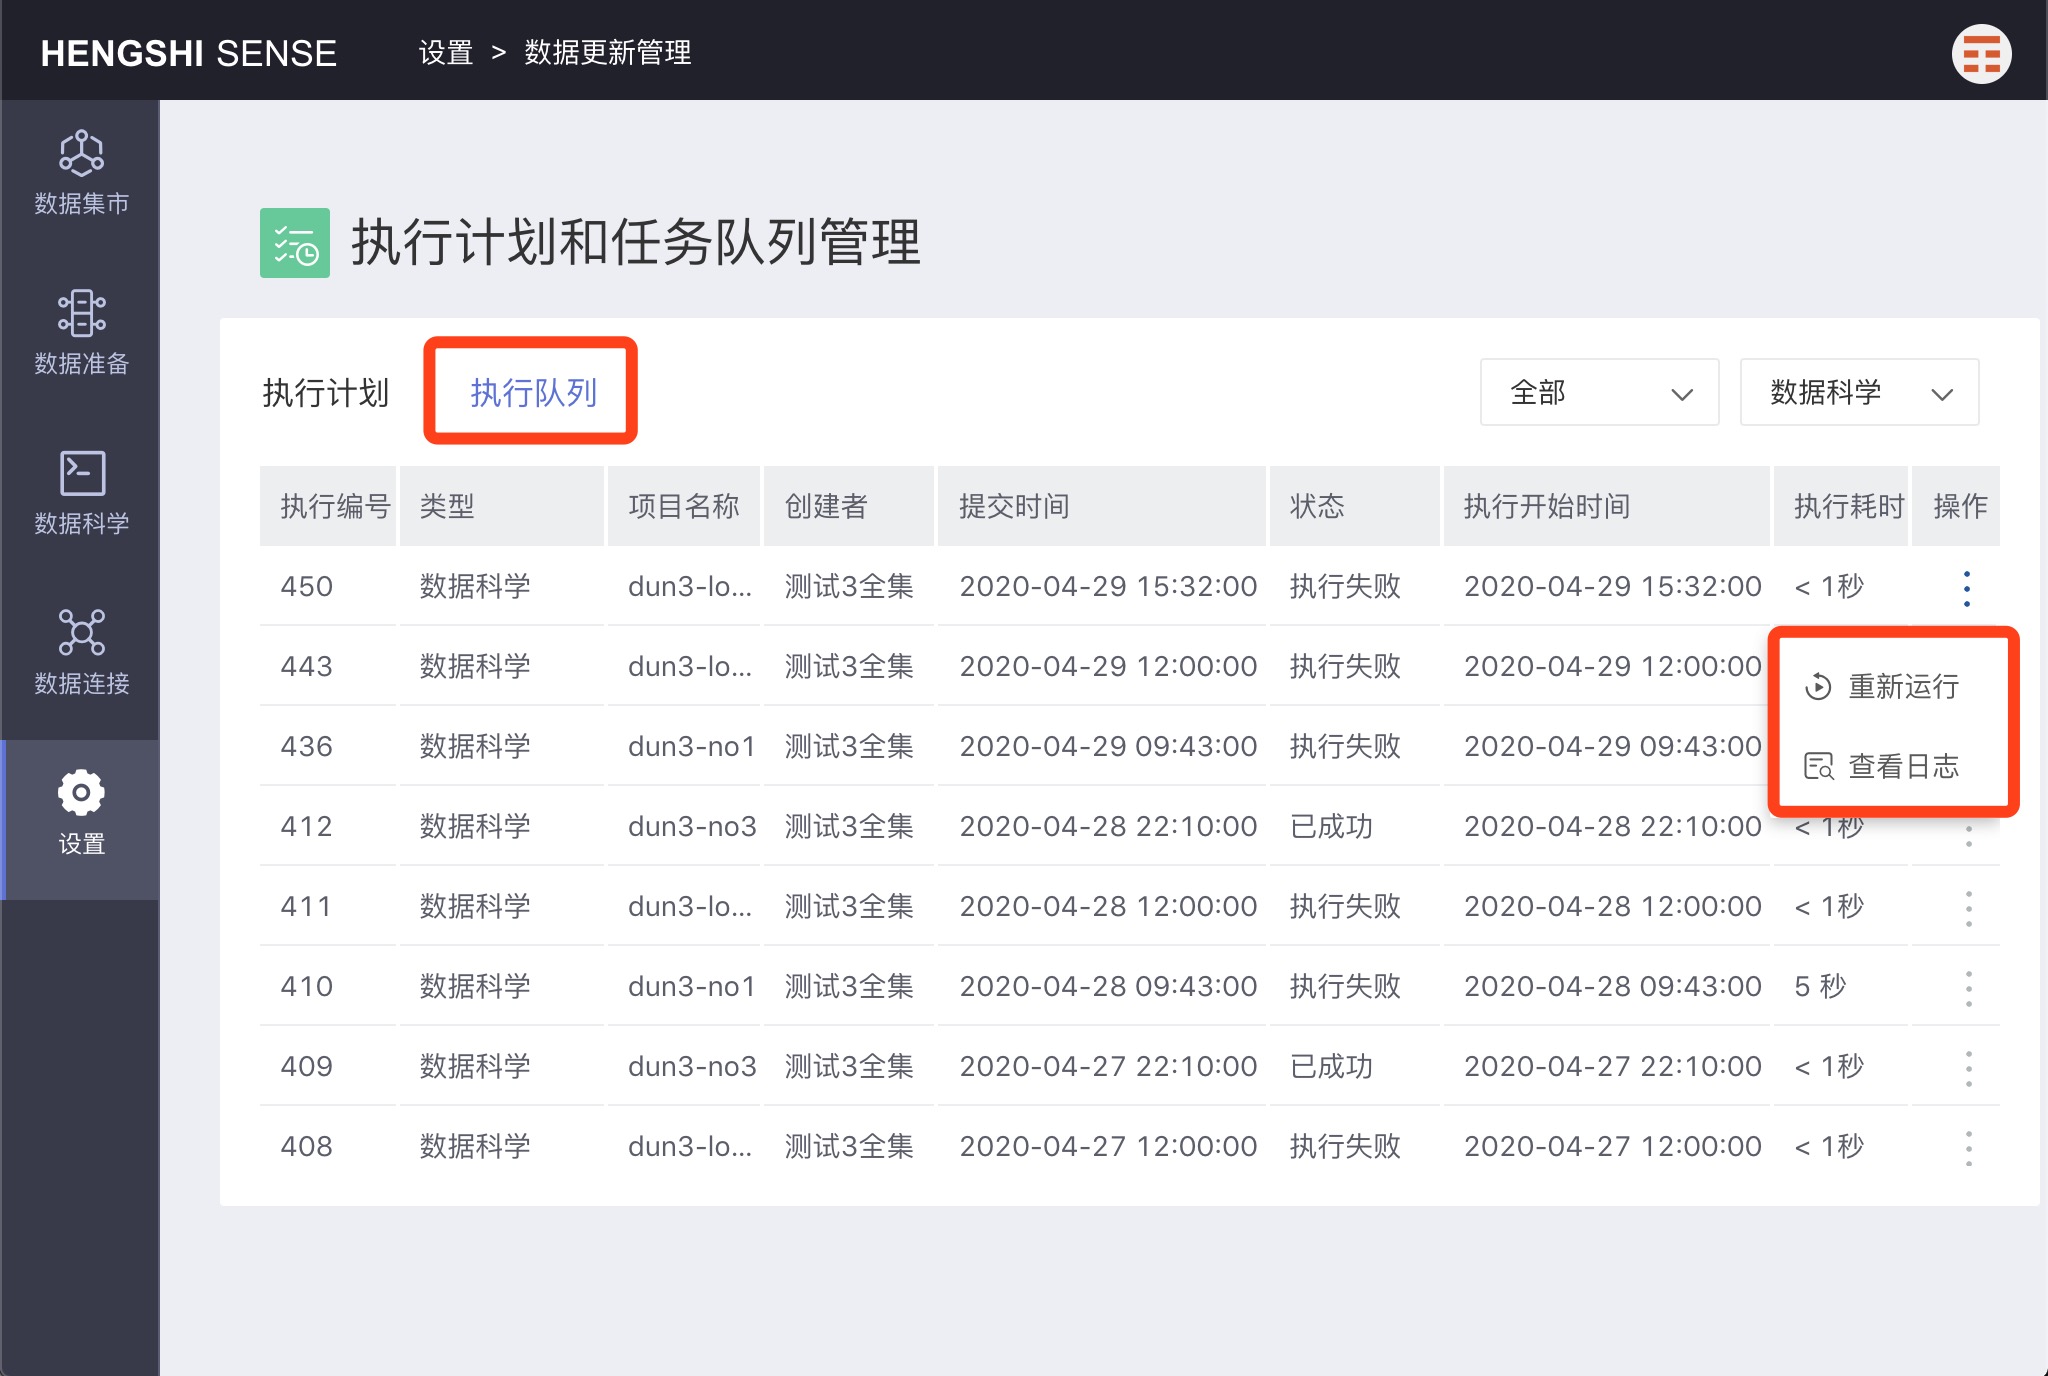
Re-execute
Click 'Re-execute' to resubmit a task for execution. A new execution record will appear in the execution queue.
View Log
You can view the execution log of the task.