Hengshi Documentation
Data Preparation
Data Preparation provides ETL (Extract-Transform-Load) functionality, which extracts data from various sources, applies filters, transforms formats, adds computed columns, joins, merges, aggregates, and more. After processing, the resulting data is output to a data source specified by the user for subsequent exploratory analysis.
Creating a New Project
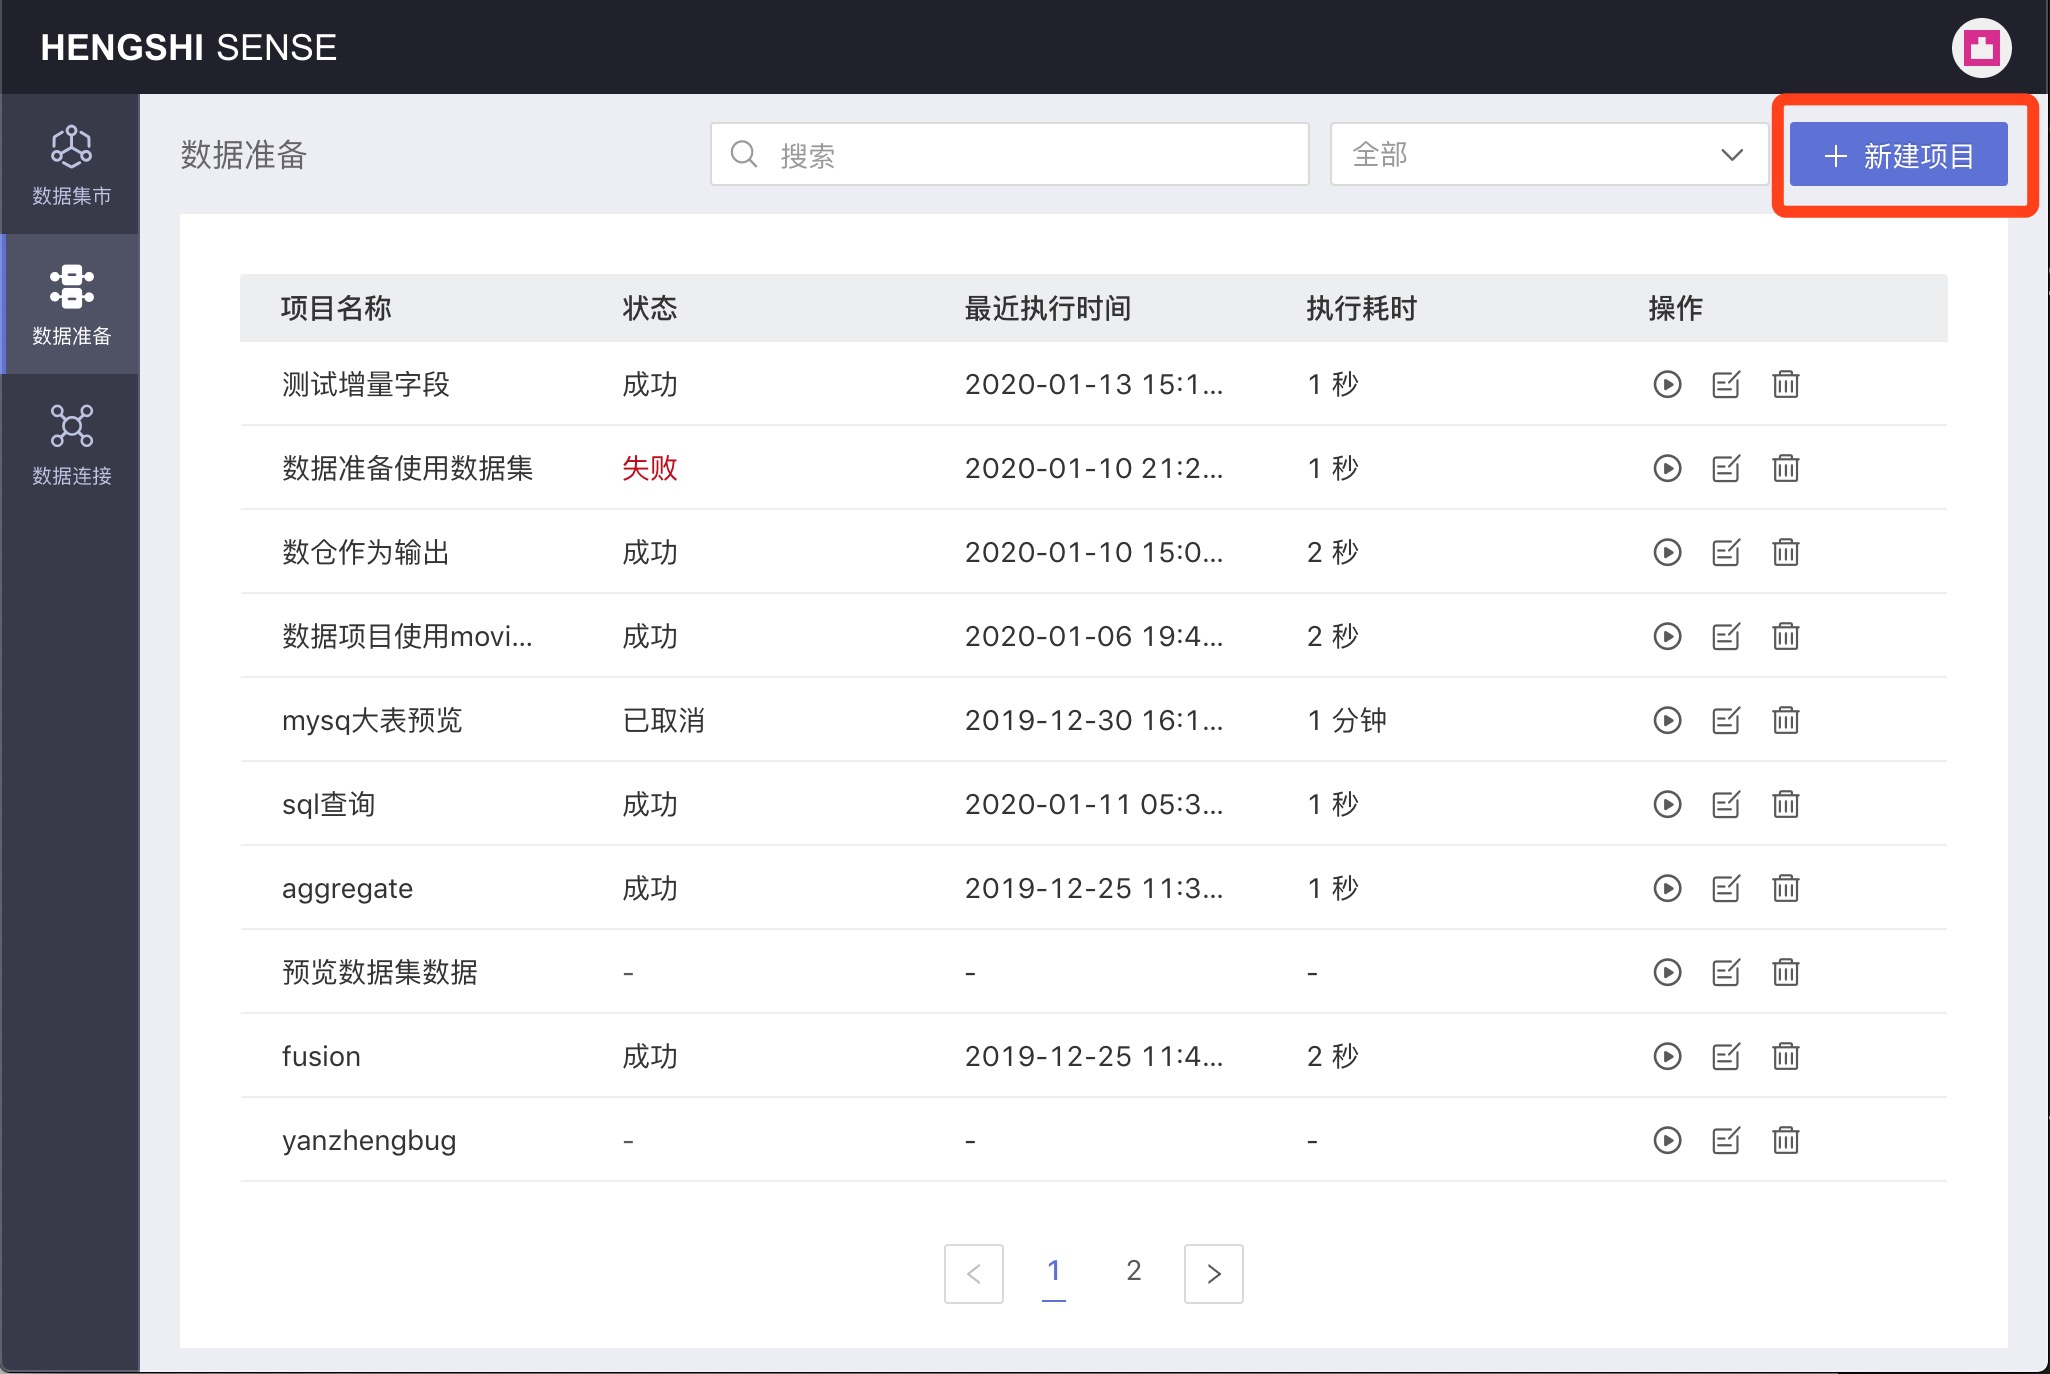
Click the New Project button in the upper right corner:
A new project operation box pops up, enter the project name in the popup, and from the optional data connections in the Default Output Path dropdown, select the default output path for the project:
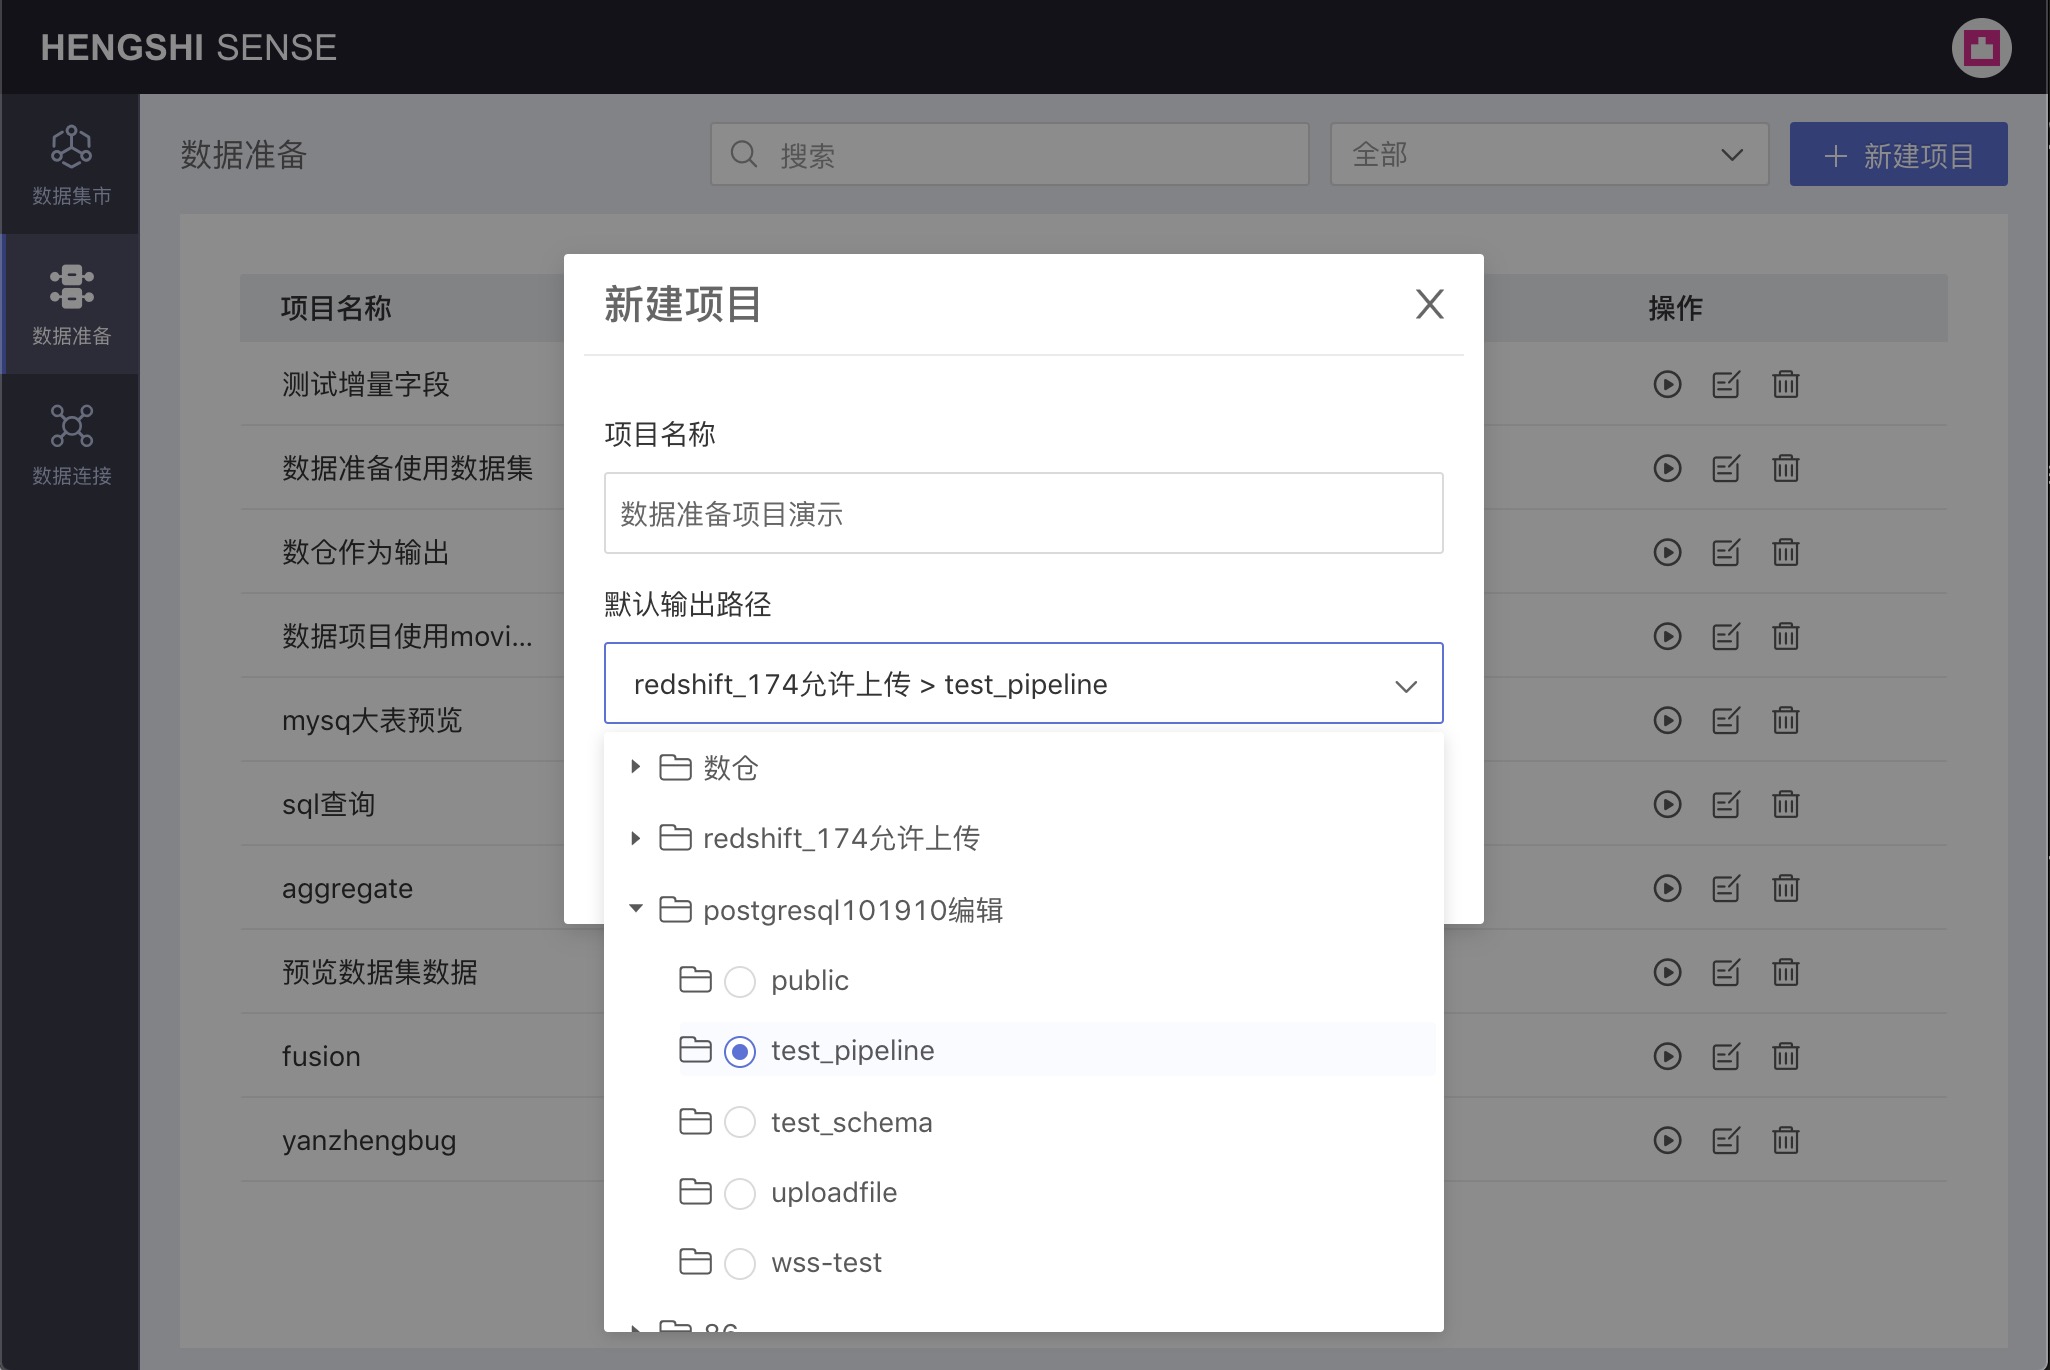
Please note:
Currently only Greenplum, PostgreSQL, and Amazon Redshift are supported as output paths;
To use a data source as an output path for data preparation, the owner must check the Support Data Preparation Output option when creating the connection: Greenplum, PostgreSQL, Amazon Redshift.
Executing Projects
You can select Execute Project from the project list page, or Stop Execution for a project that is waiting to be executed.
Immediate Execution
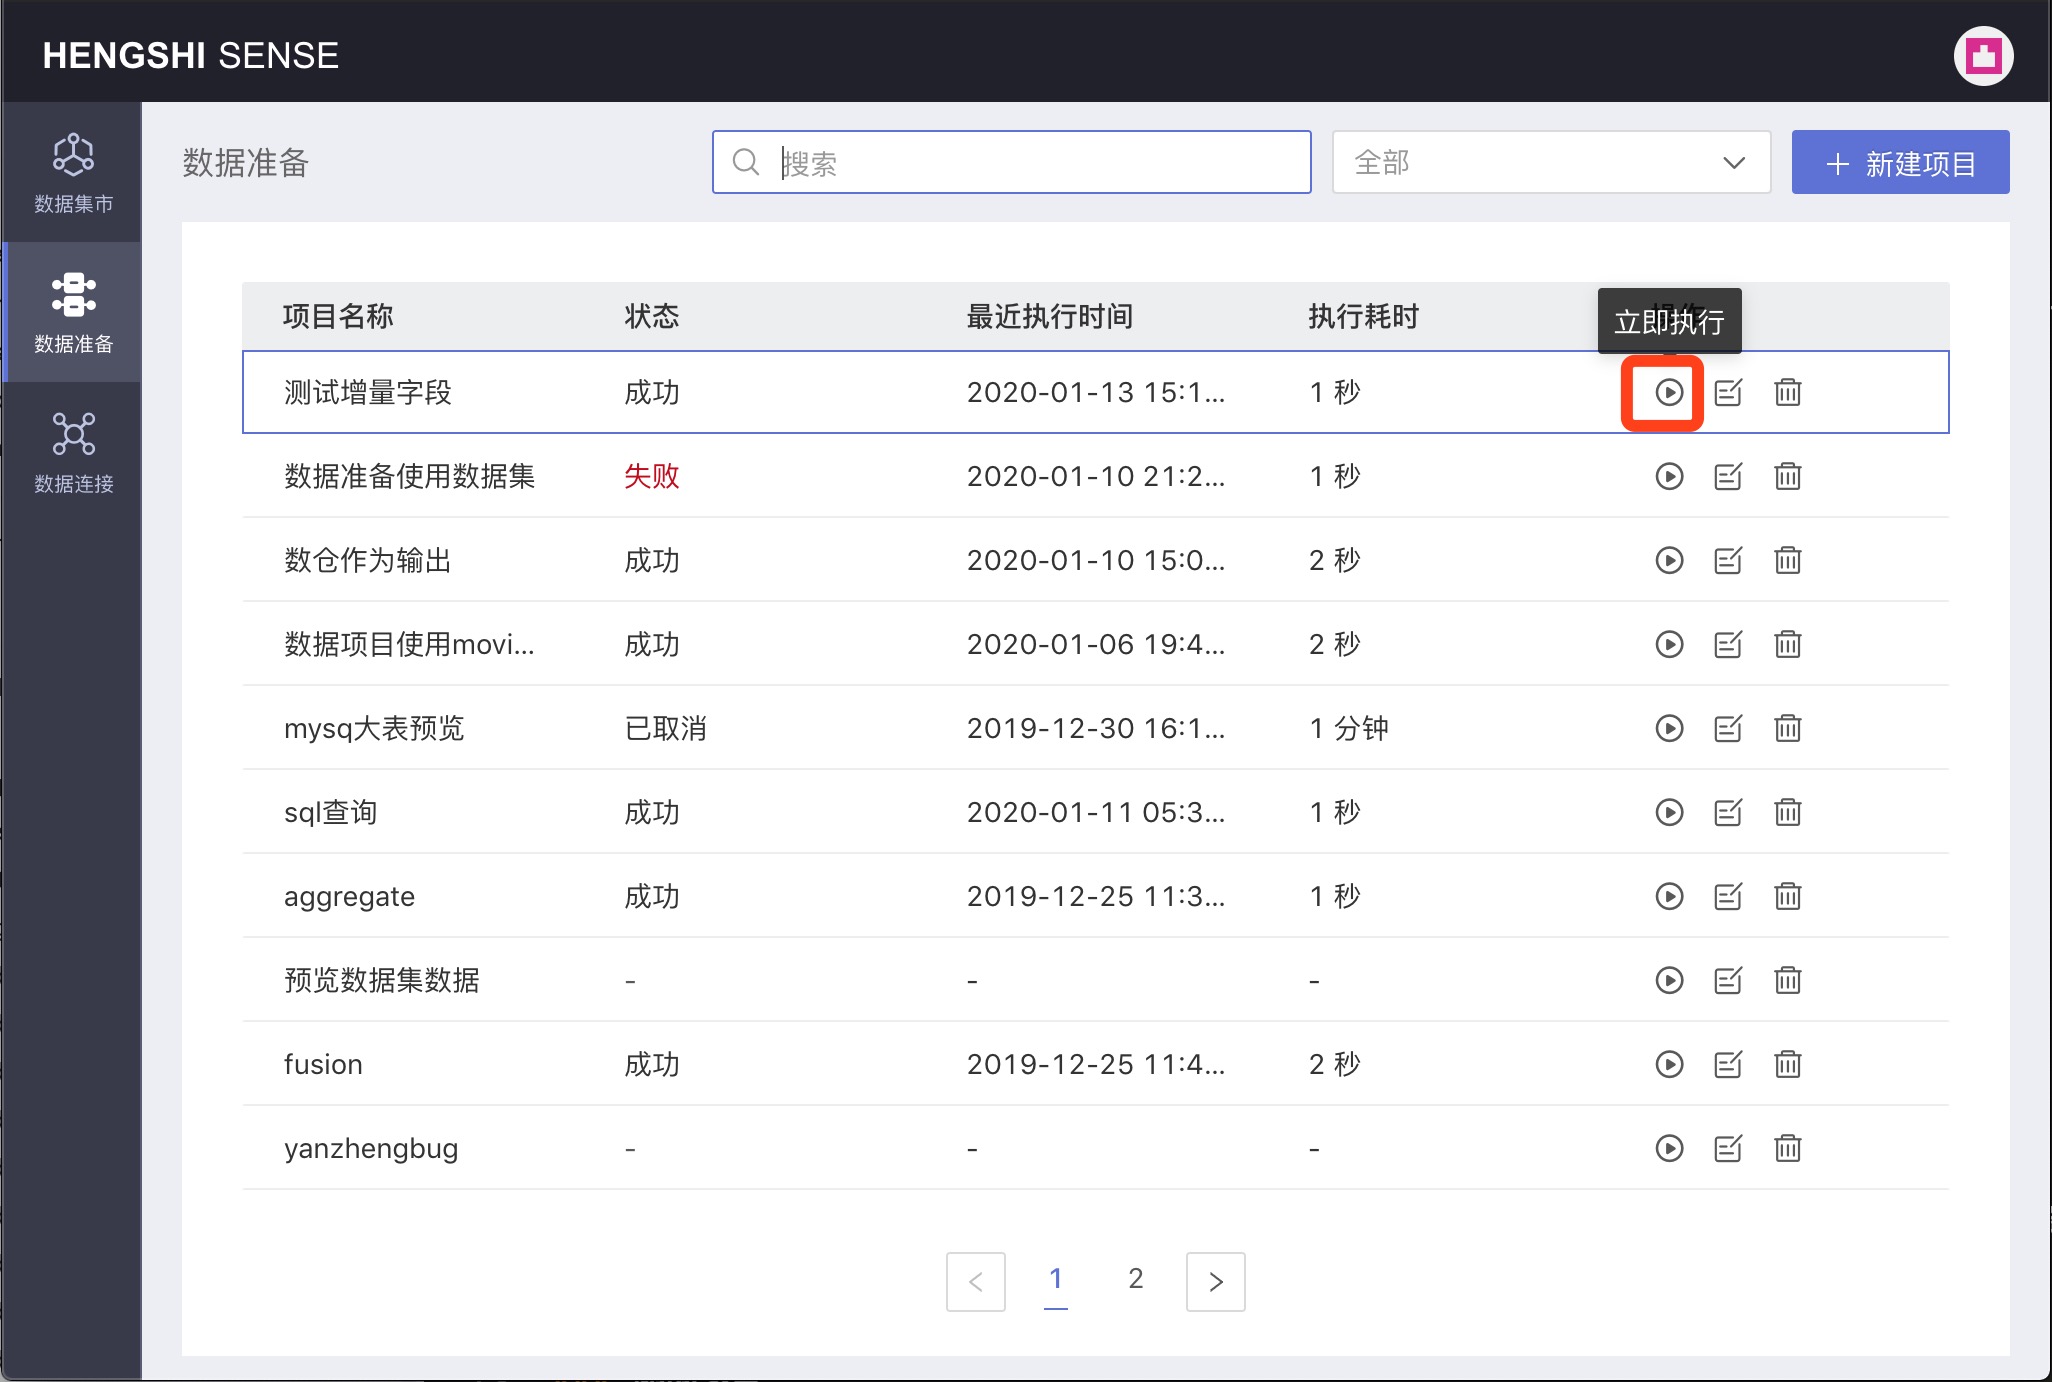
Click the Immediate Execution button in the Actions column to execute the current project;
Stopping Execution

Please note, after clicking Immediate Execution, there are two possible project states:
- Queued: For projects that are queued, the action button is Stop Execution; clicking Stop Execution cancels this execution.
- In progress: For projects that are in progress, execution cannot be canceled; the action button is disabled, and you must wait for the execution to complete.
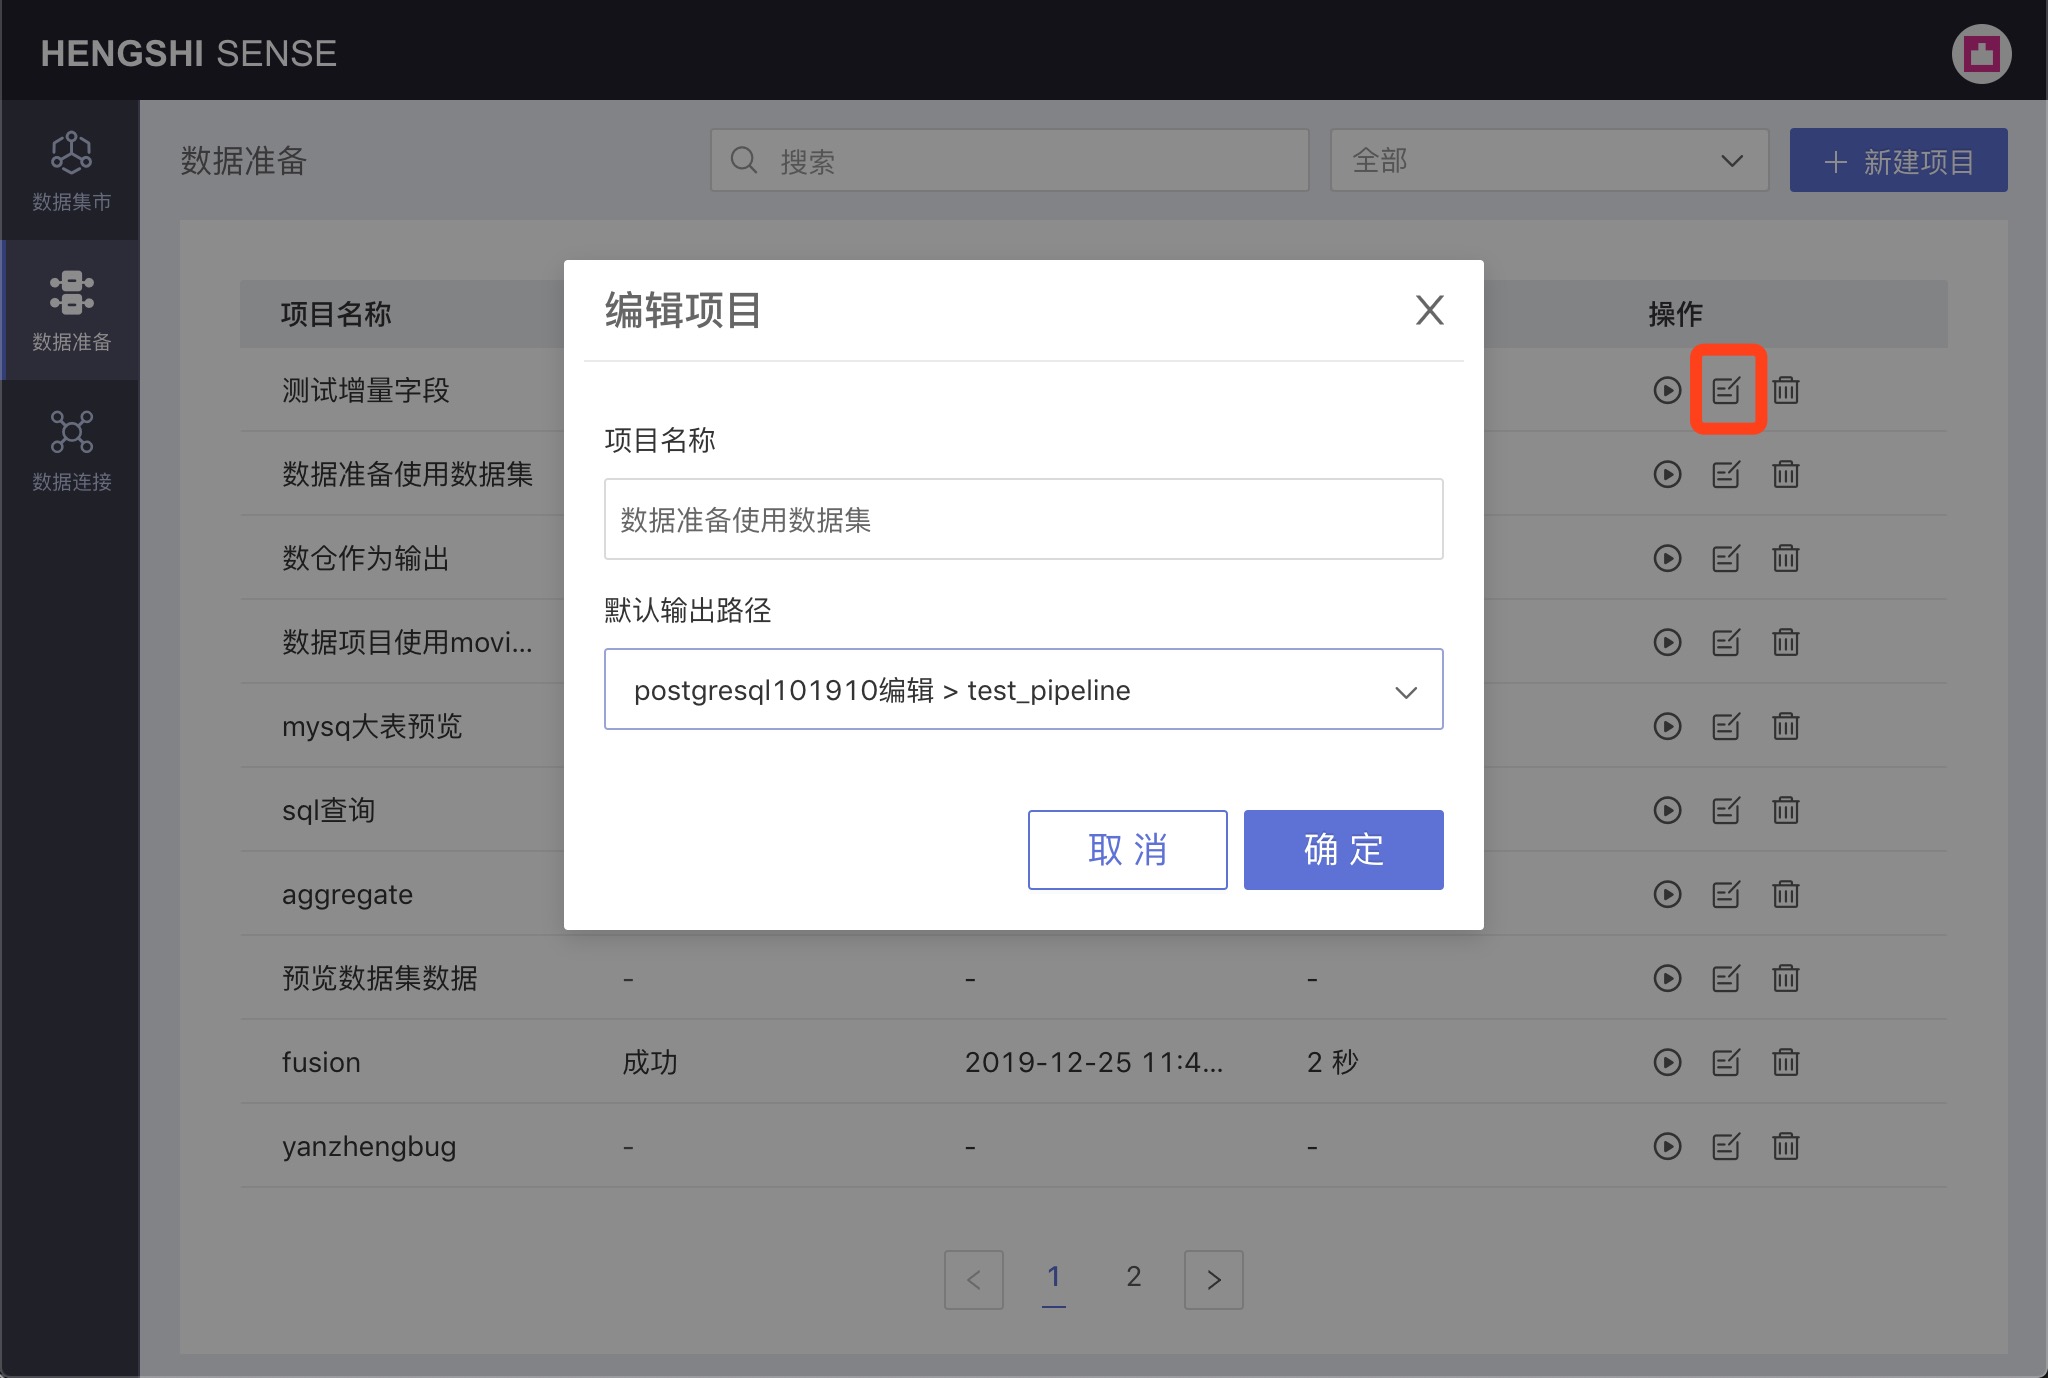
Editing Projects
Click the Edit button in the Actions column for the respective project to modify the project's name and the default output path in the popup that appears;
Deleting Projects
Click the Delete button in the Actions column for the respective project, a confirmation box will pop up, click confirm to delete the project;

Filtering Projects
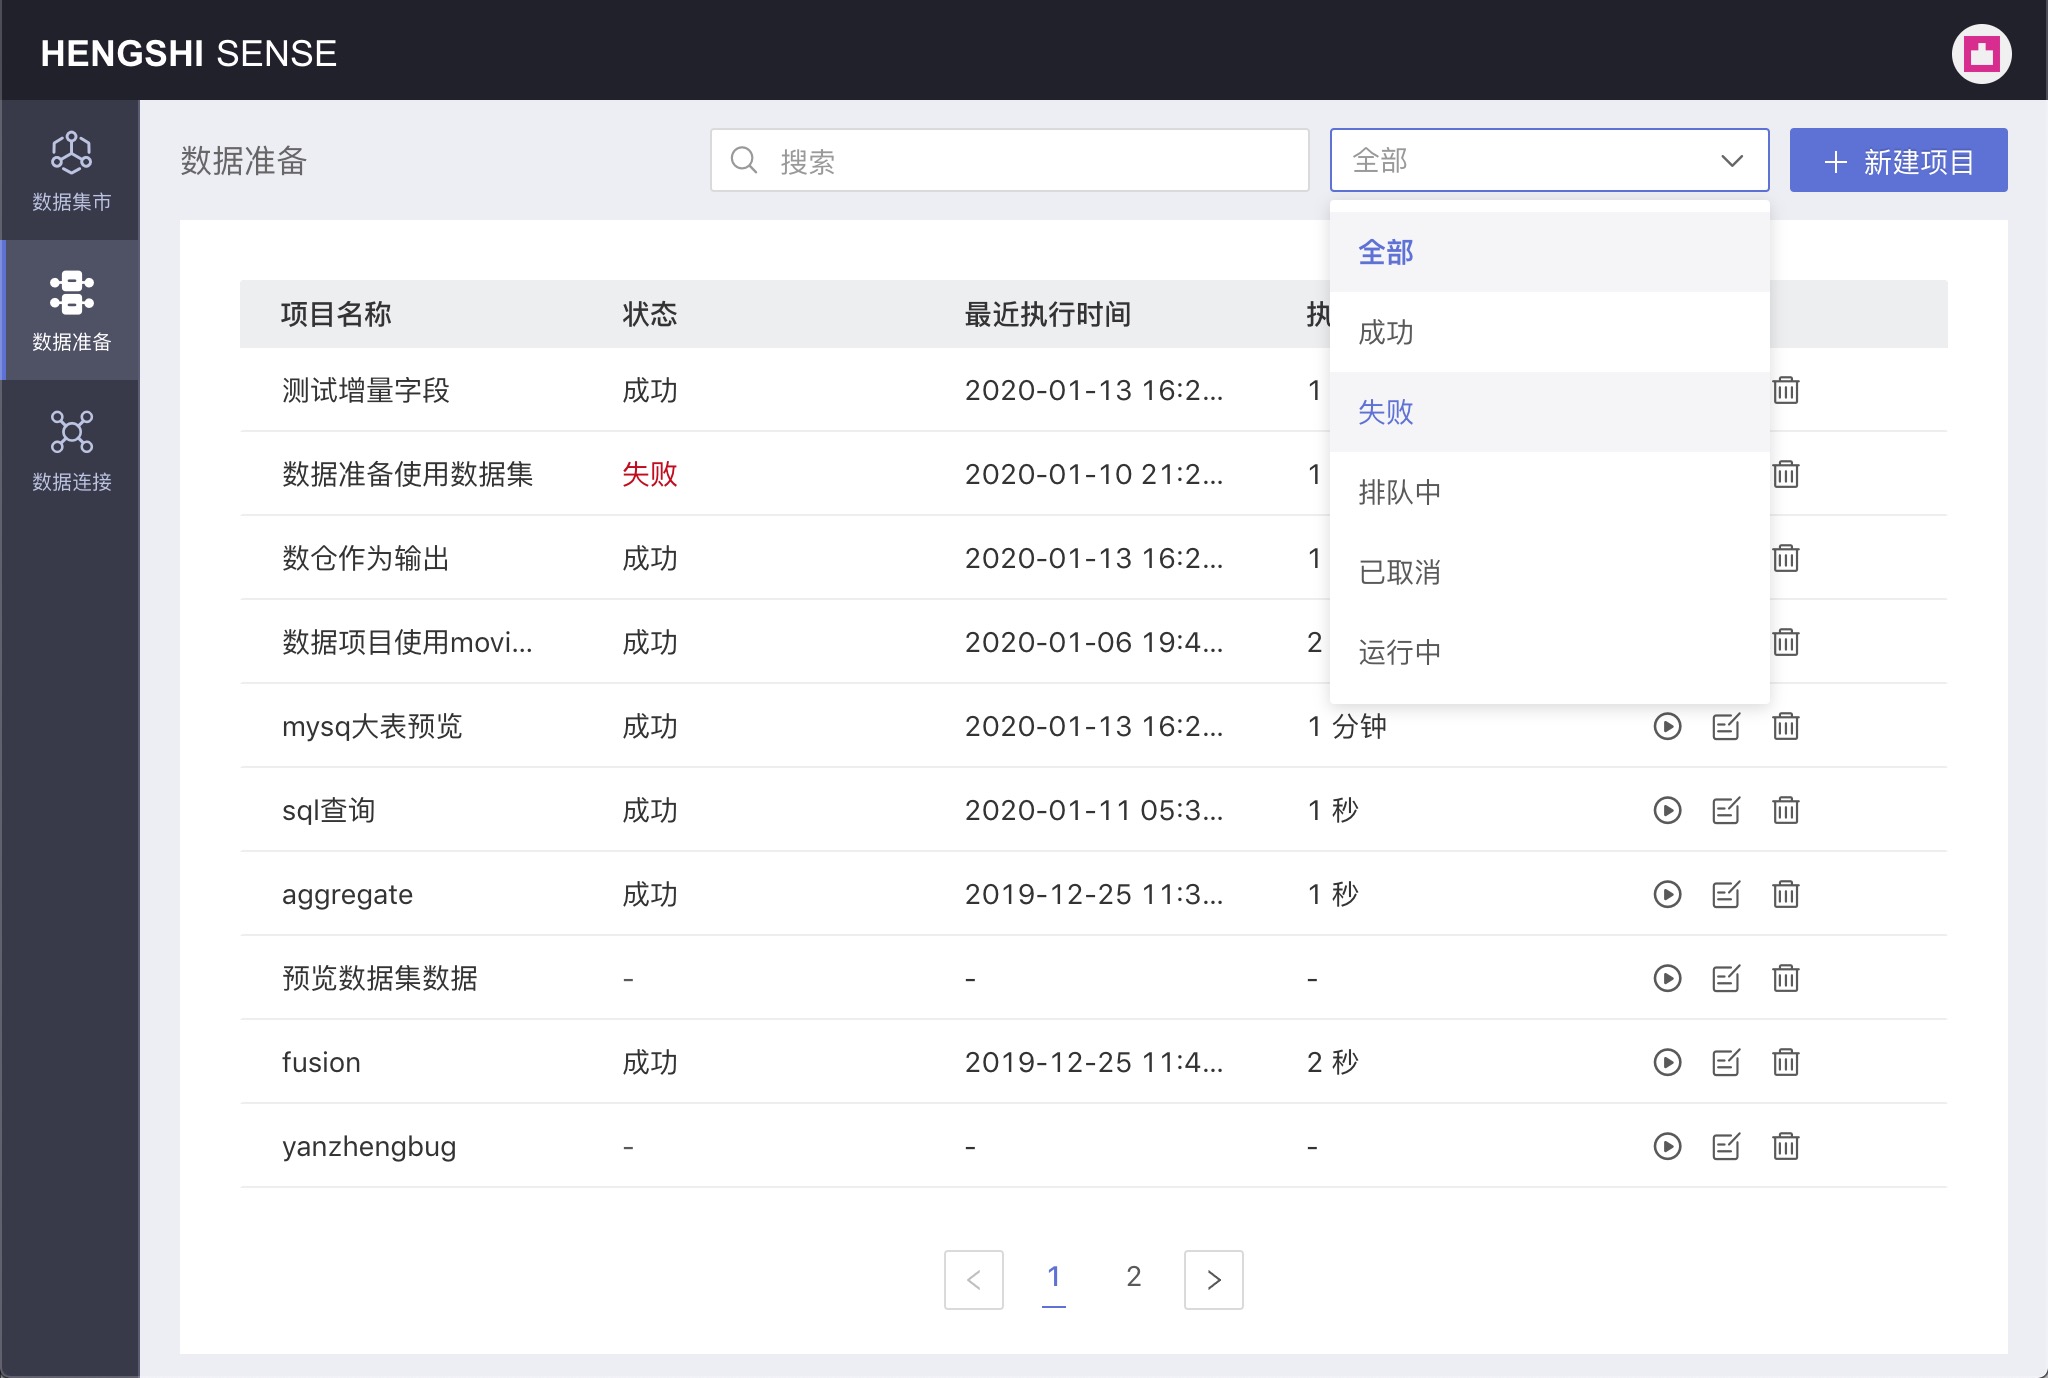
Project filtering supports categorization by the project's execution status, which includes the following options in the execution status dropdown:
- All
- Successful
- Failed
- Queuing
- Canceled
- Running
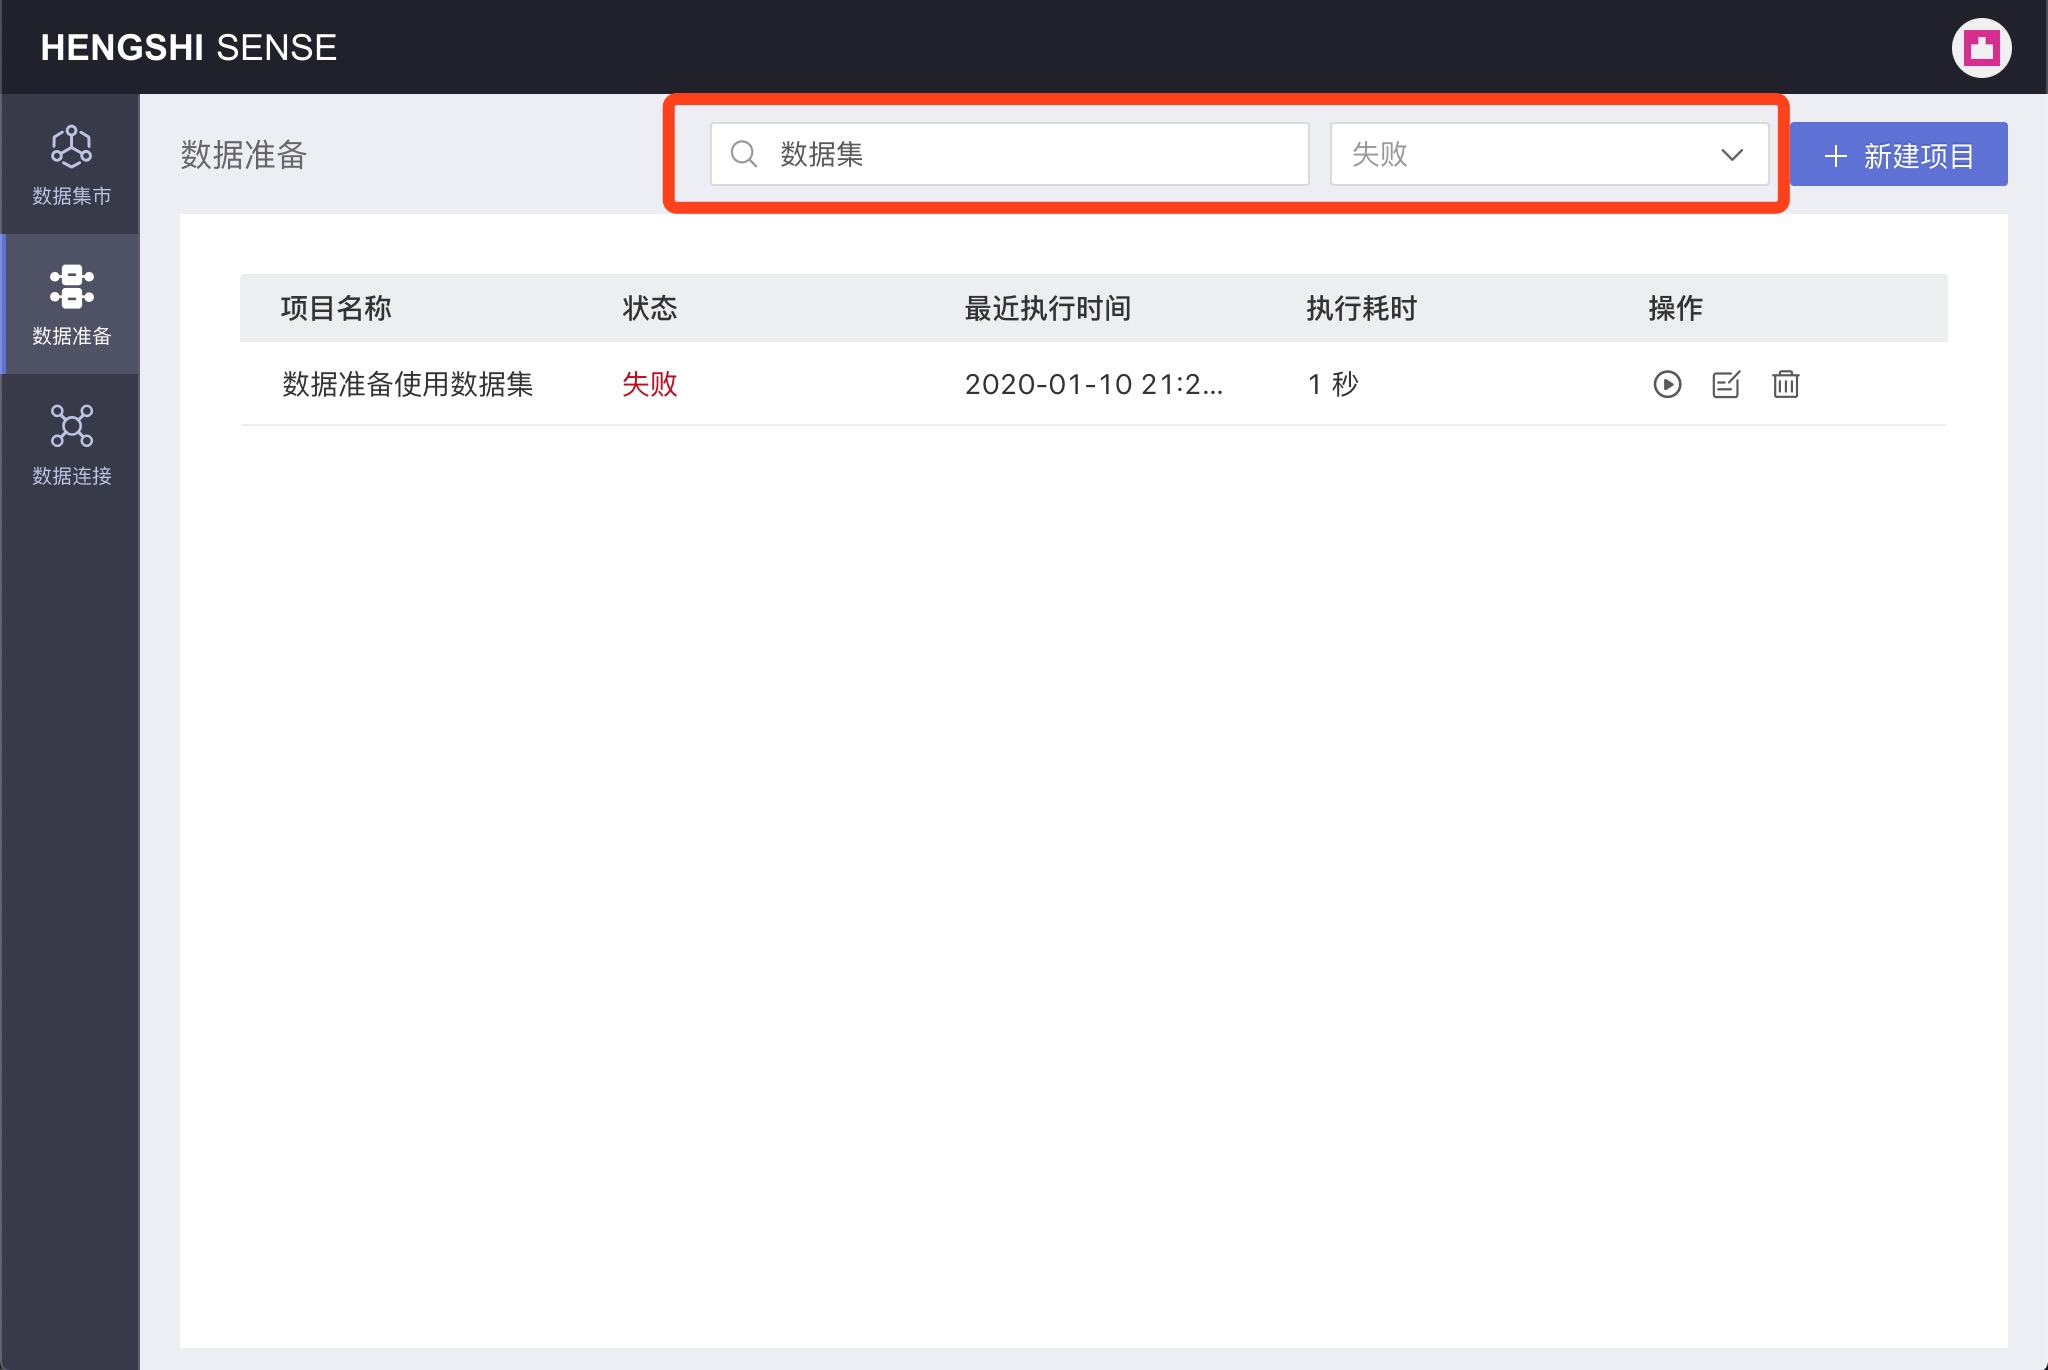
Supports searching for projects containing keywords under a specified filter condition. For example, search for failed projects containing the keyword "dataset" among all projects:
Adding Nodes
Input Nodes
Types of Input Nodes
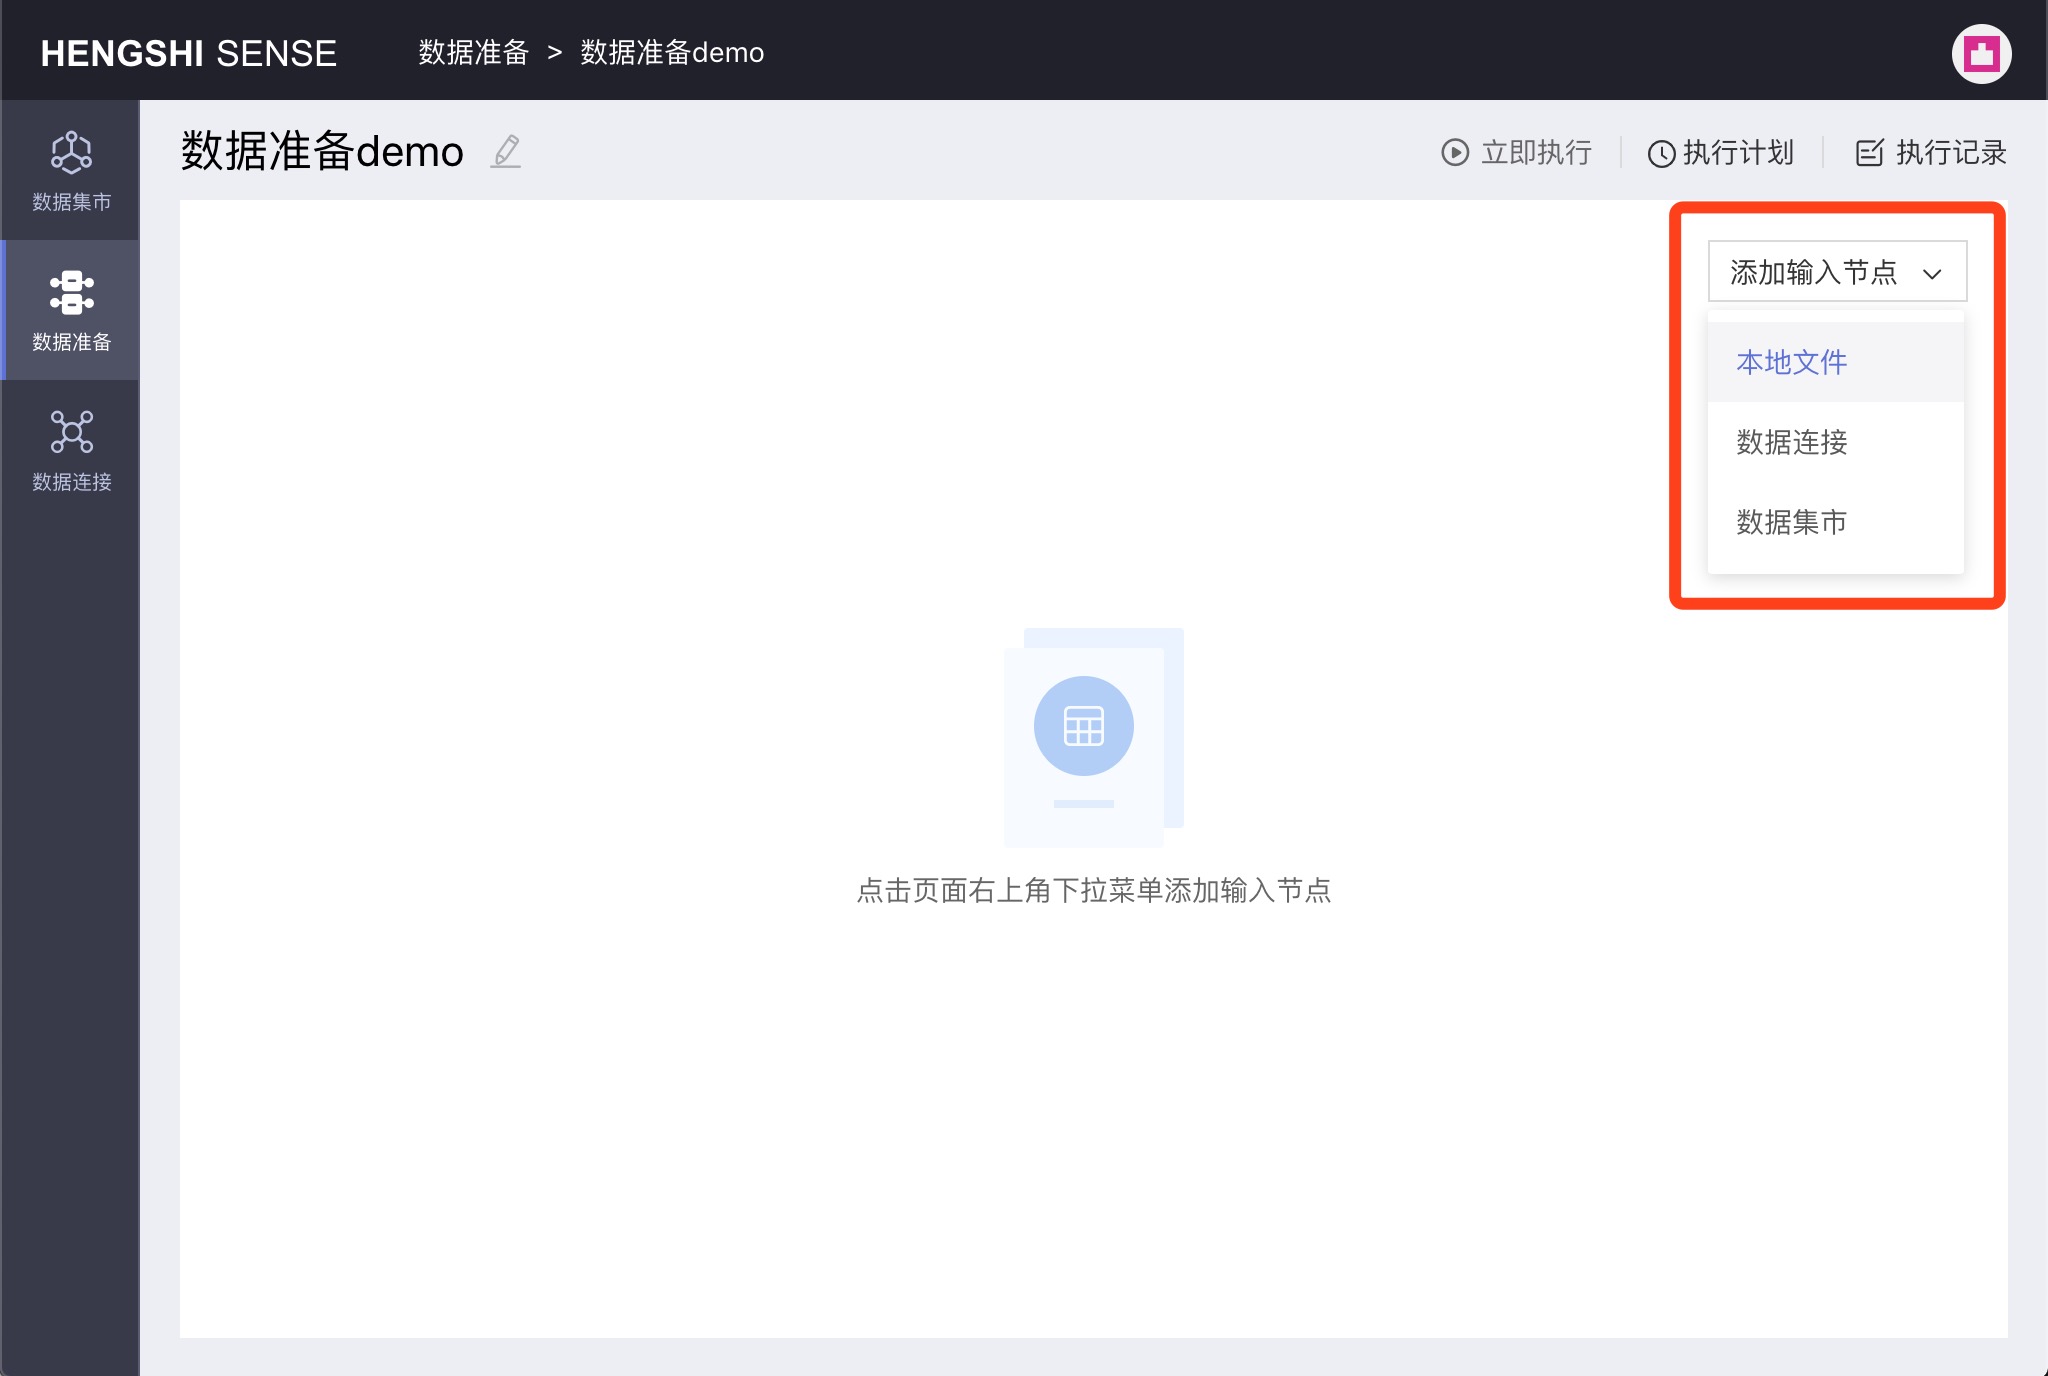
Supports three types of input nodes: Local Files, Data Connections, and Datasets.
After opening a project, there's a Add Input Node dropdown in the upper right corner of the screen, from which you can select the type of input node you wish to add:
Local Files
When adding local files as input nodes, both csv and excel file formats are supported.
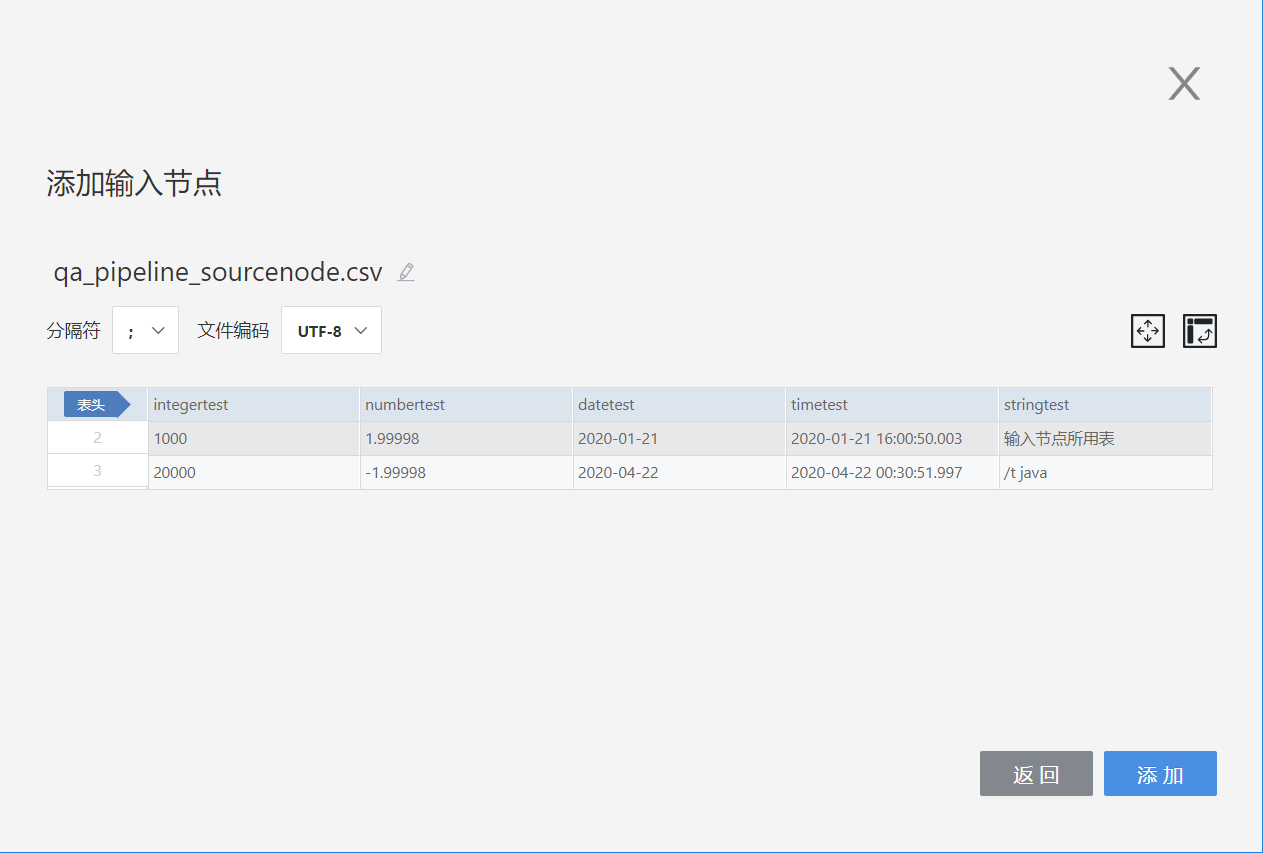
- csv files
When uploading a csv file, you can set the file's delimiter, encoding, and choose whether to set headers, select rows and columns, invert rows and columns, etc., following the format of the local file.
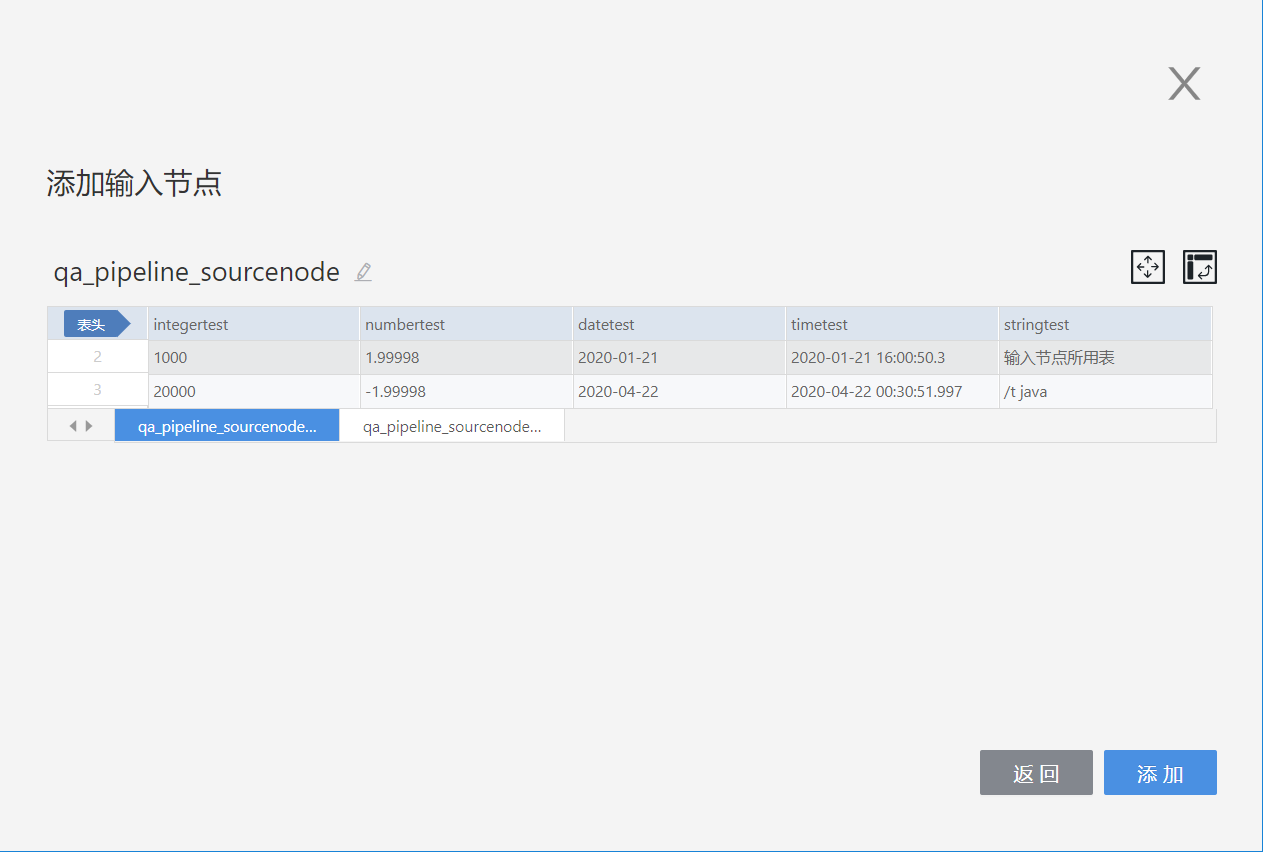
- excel files
When uploading an excel file, you can choose the required sheet from a multi-sheet file and then set headers, select rows and columns, invert rows and columns, etc., as needed.
Data Connections
When adding tables from data connections as input nodes, they are divided into two main categories: built-in data connections and user data connections:
- Built-in connections
These are the engine data connections embedded within the Hengshi system;
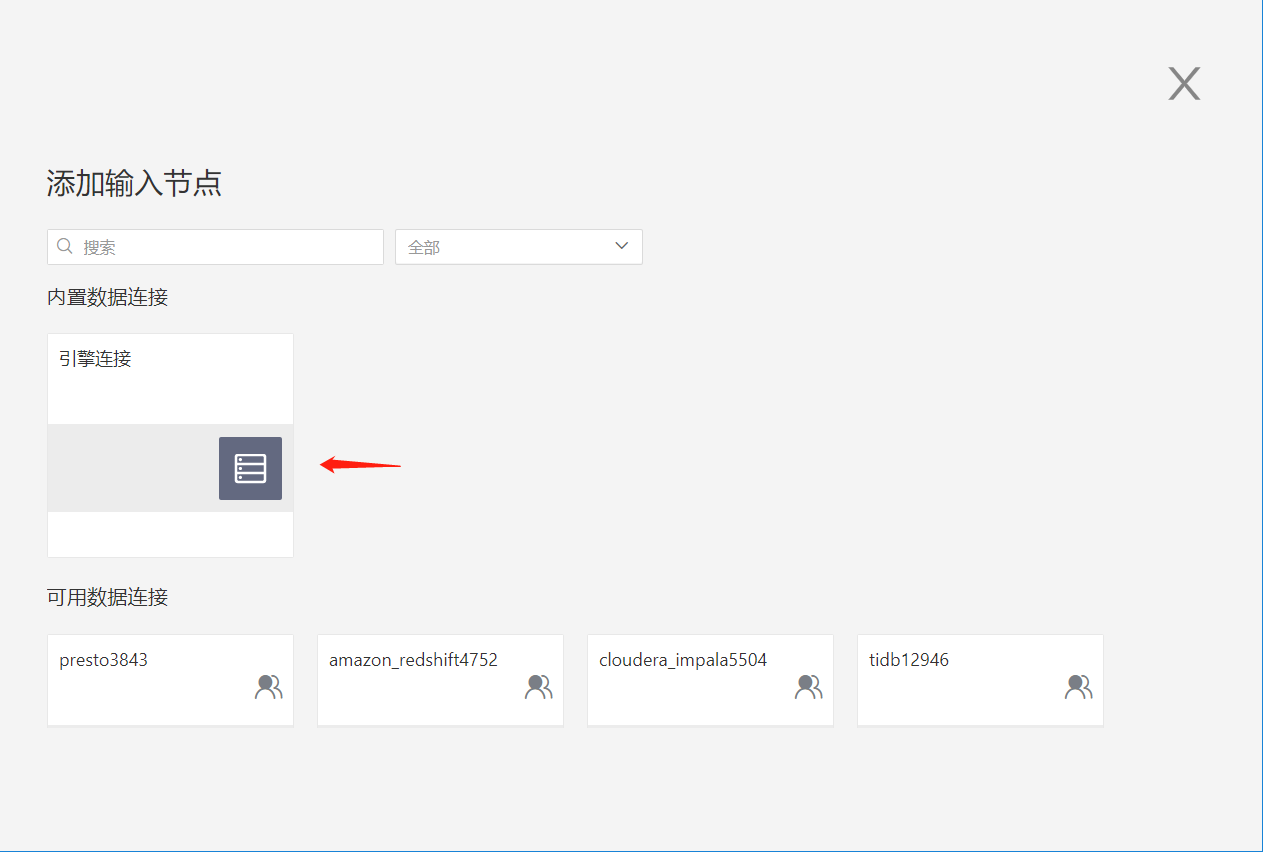
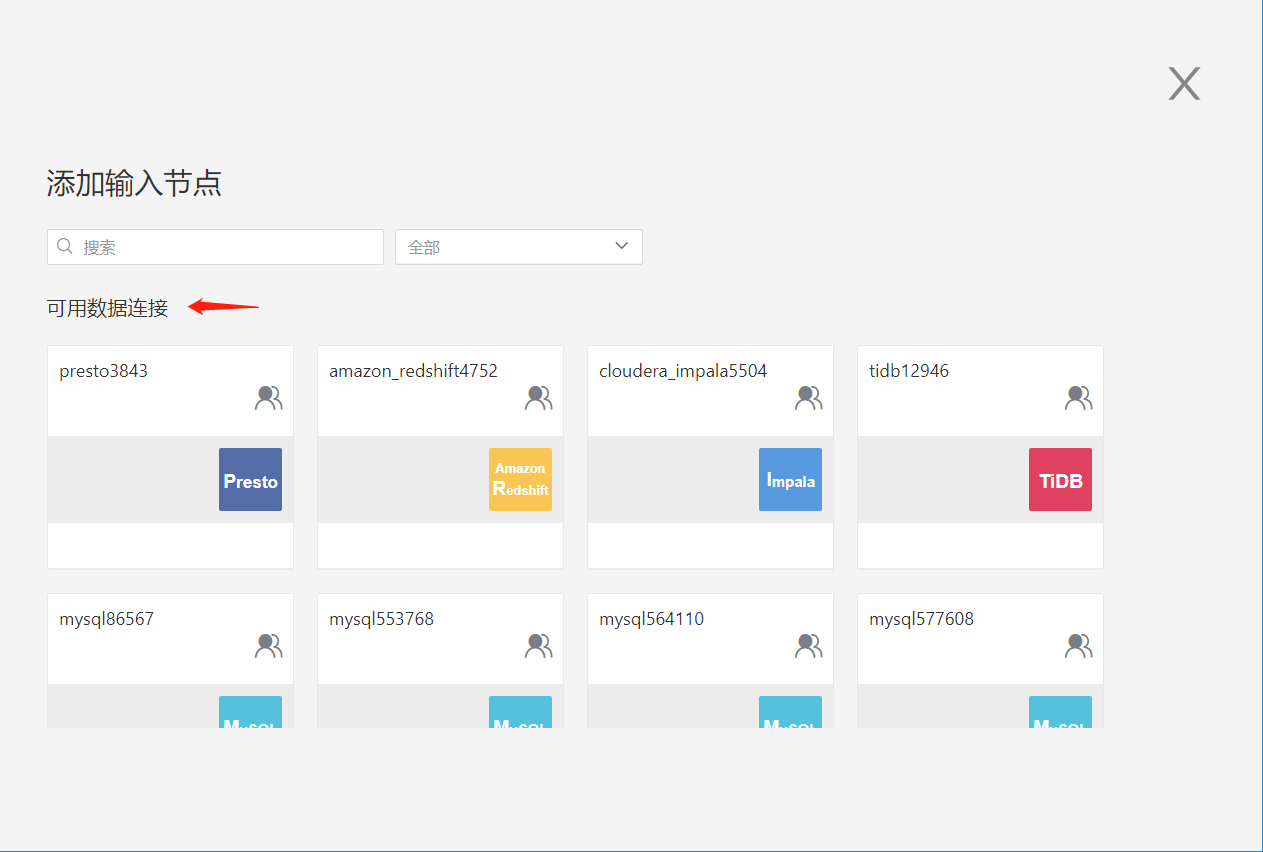
- User connections
These include data connections created by the user and those authorized for access by the current account. The user can choose a table from within a connection to serve as the input node:
If the user has only View Name permission for a table, the Add button is grayed out when previewing data and the table cannot be used as an input node:

Datasets
Datasets from the dataset market can be selected as input nodes, enabling users to export the dataset's results to the output source for convenient exploration and use.

Preview Data Sampling
The data sampling methods for previewing input nodes are divided into three ways: Default Sampling, Random Sampling, and All.
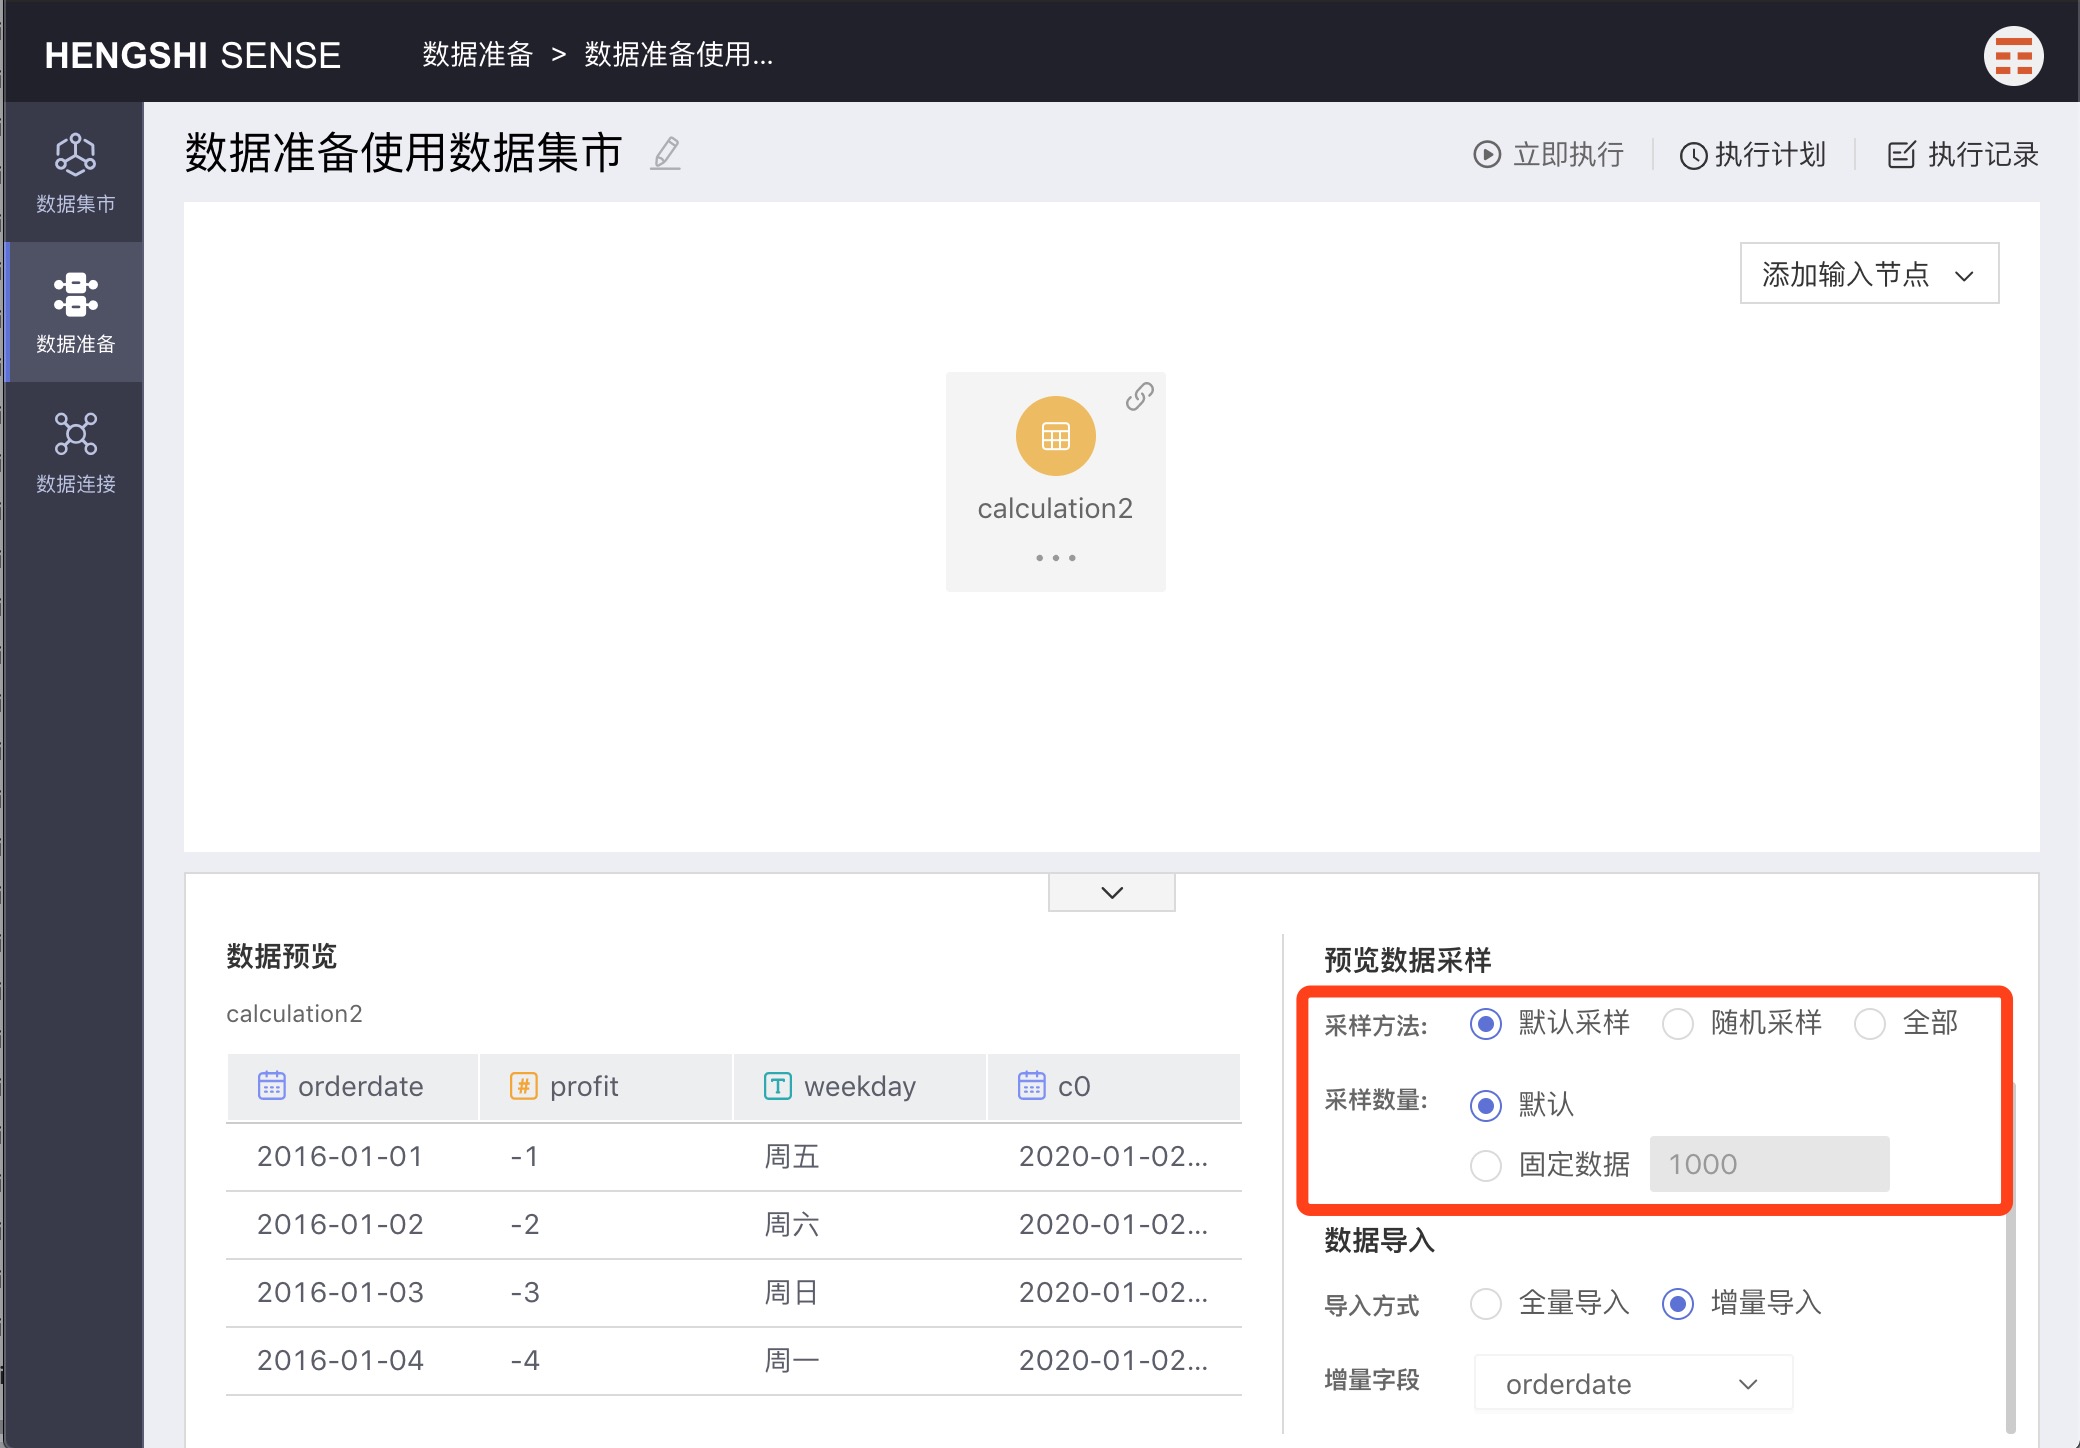
Default Sampling
Default sampling means extracting a specified amount of data in the order stored in the database. There are two types of sample quantification: default and fixed data:
1. Default: Choose "default" to extract the first 1000 rows stored in the database;
2. Fixed data: Choose "fixed data" to extract the first X rows from the database in sequence as per the number X entered in the input box.
Random Sampling
Random sampling means extracting a specified amount of data randomly without considering the storage location in the database. Like default sampling, there are two types: default and fixed data:
1. Default: Choosing "default" random extracts 1000 rows of data;
2. Fixed data: Choosing "fixed data" extracts X rows randomly from the database as per the number X entered in the input box;
All
When "All" is chosen for the sampling method, all data in the database is extracted, and the sample quantity cannot be manually set;
The sample quantity is solely for conveniently viewing the data of input nodes in data preparation. The amount of sampled data does not affect the data in the table generated at the output node after project execution; the table data at the output node are full data sets.
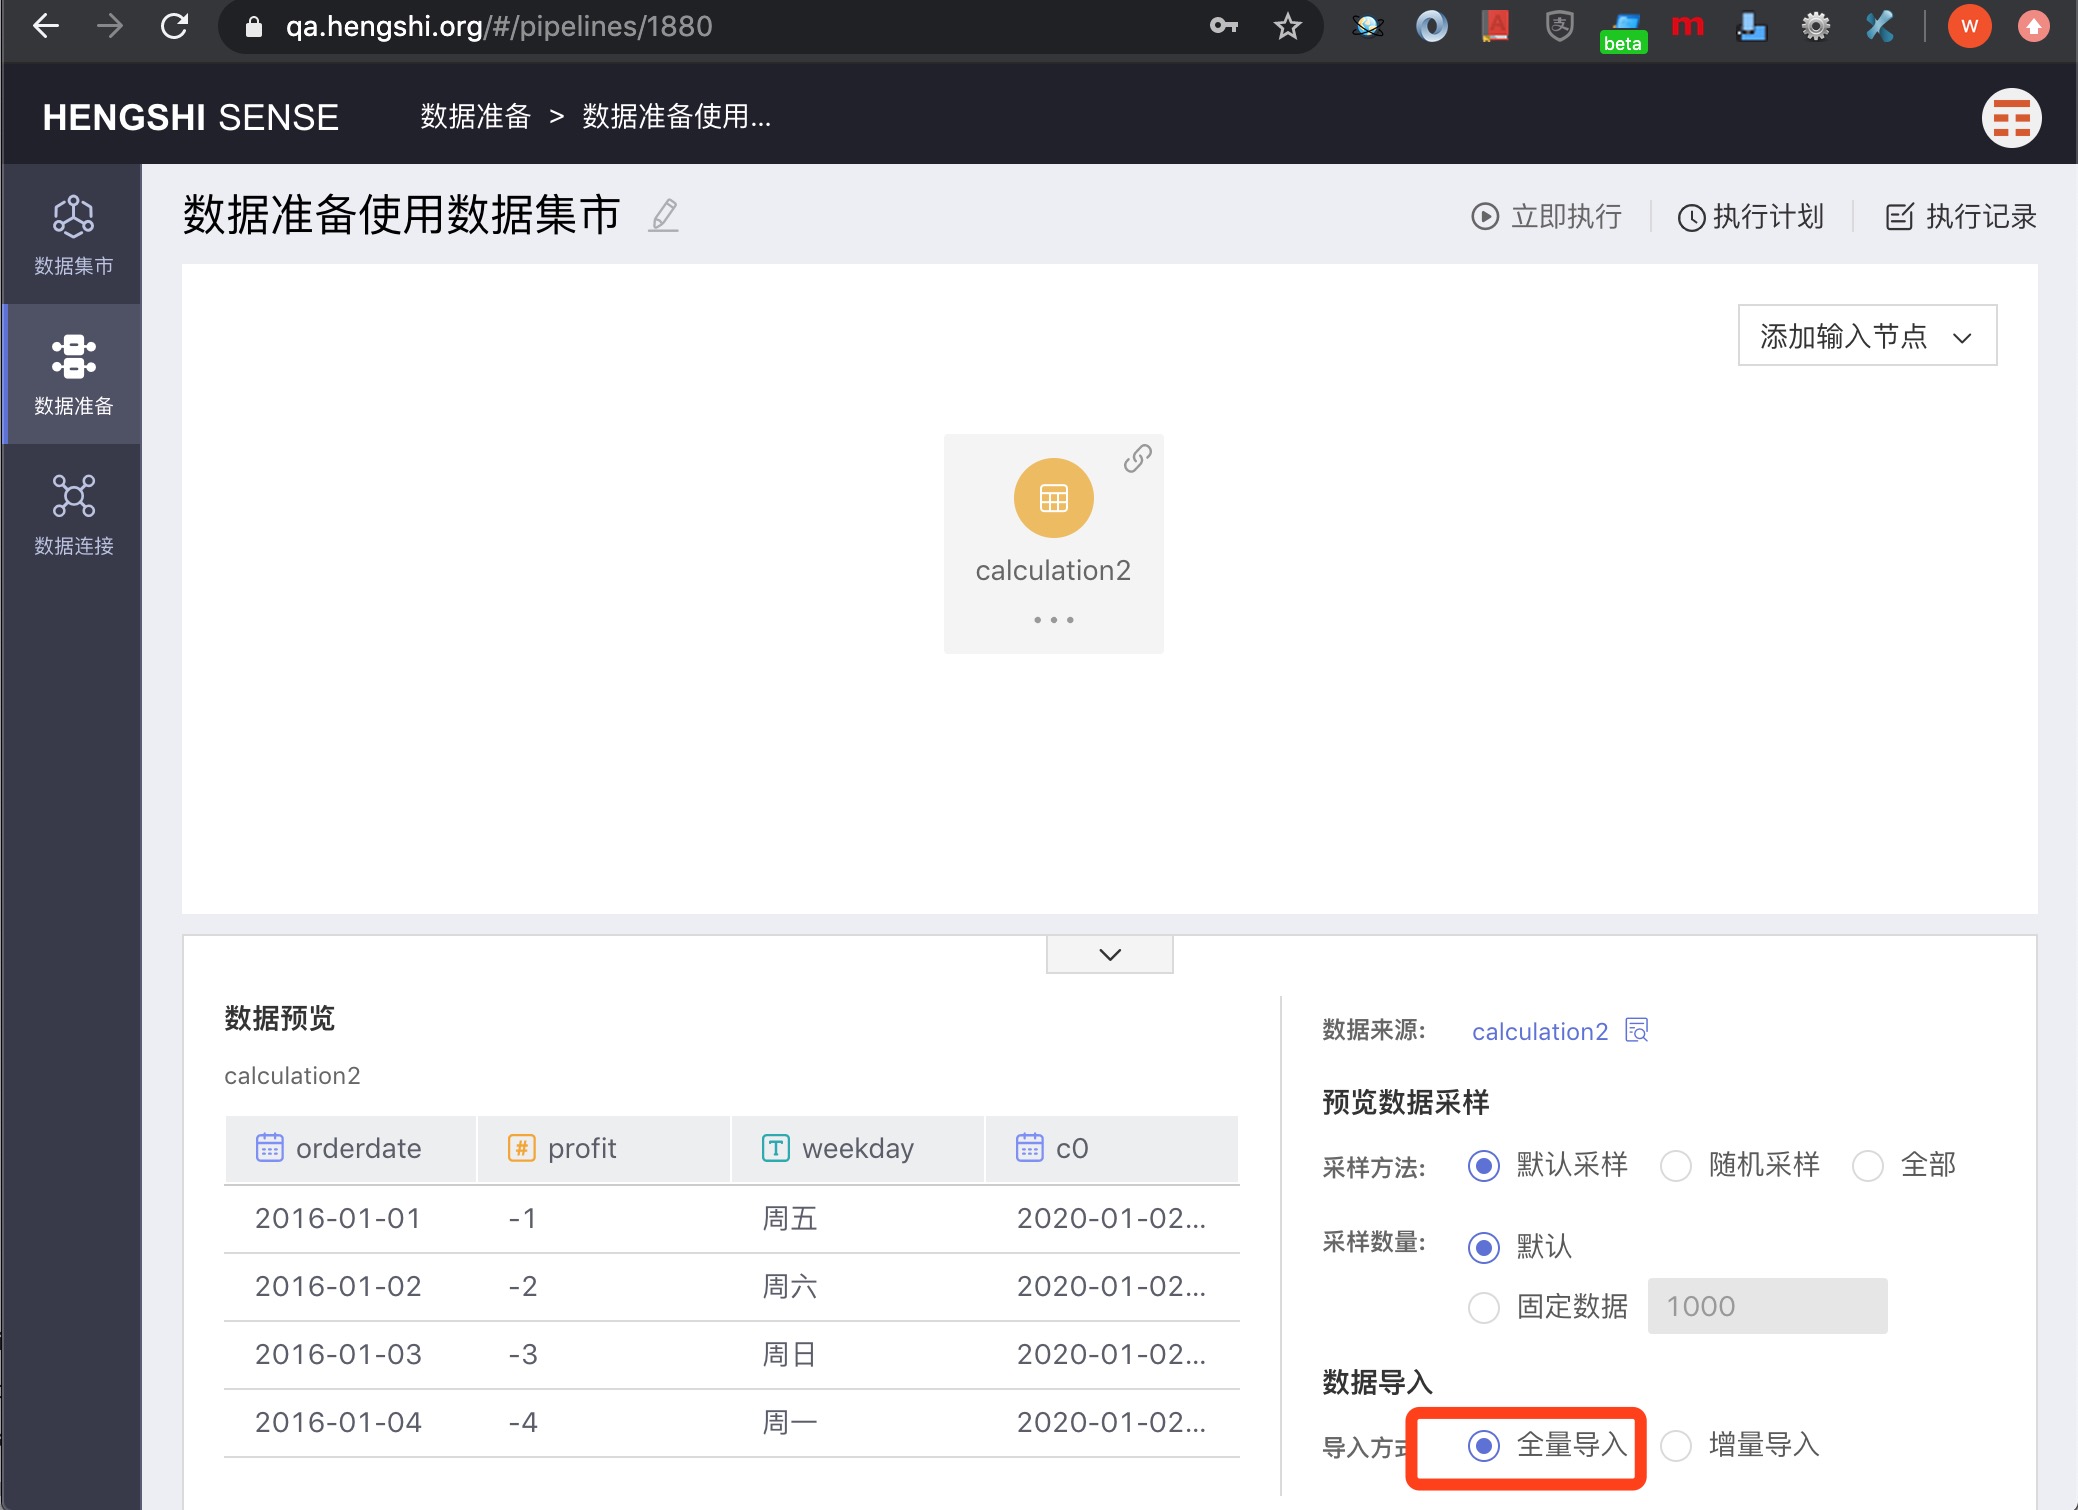
Data Import Methods
There are two data import methods: Full Import and Incremental Import.
Full Import
Full Import will import all the data every time.
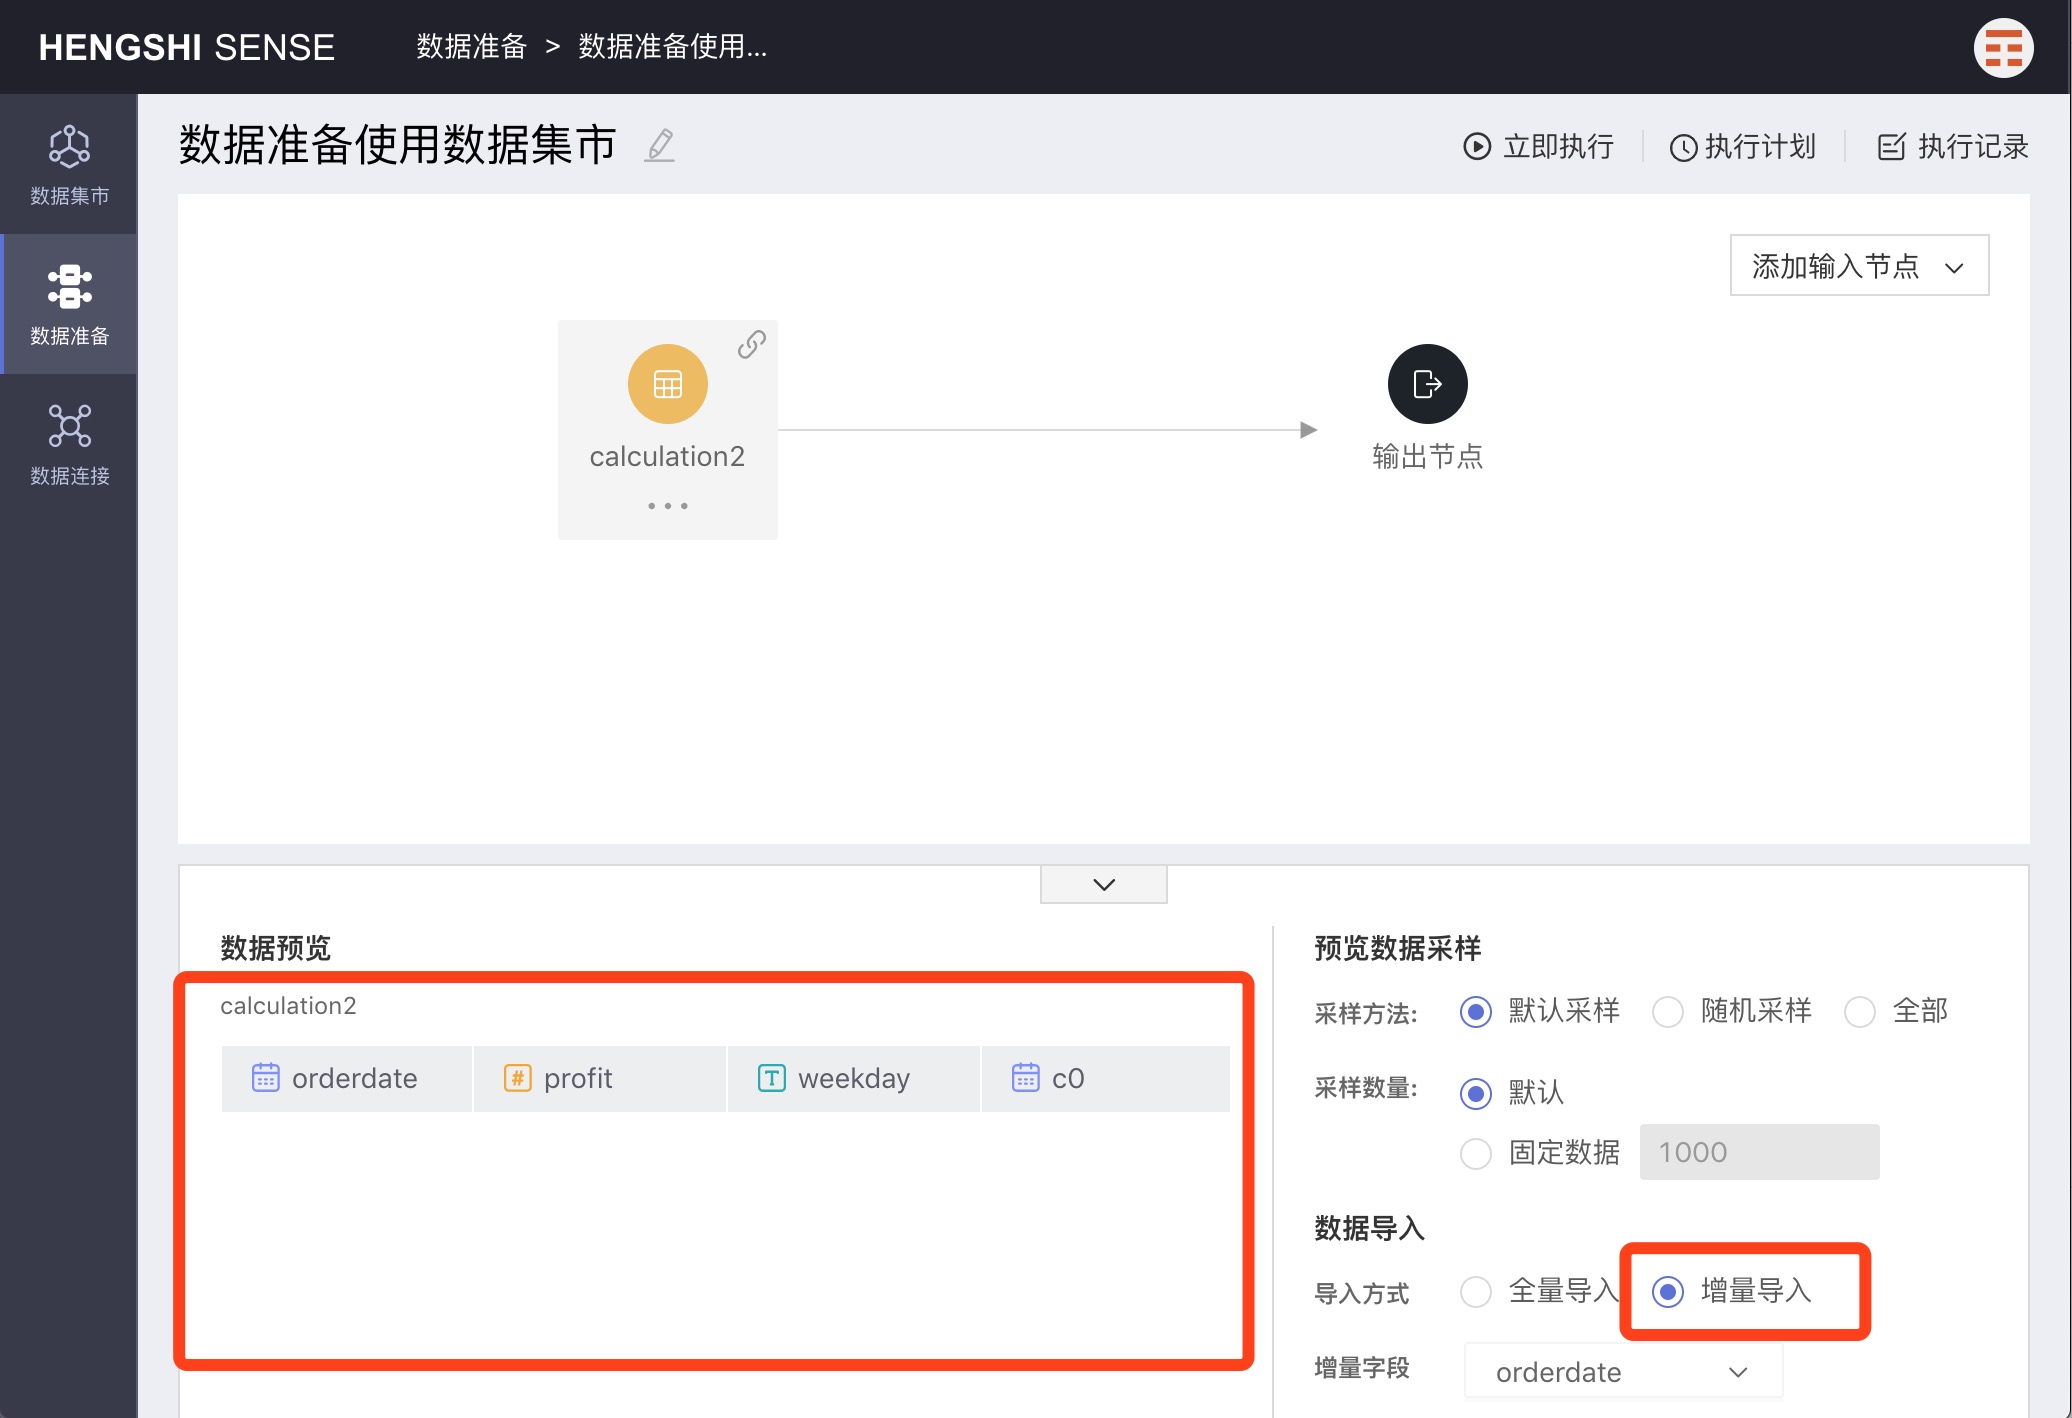
Incremental Import
Incremental Import requires selecting an Increment Field, and during import, only data with an Increment Field value greater than the maximum value of that field in the currently imported data will be imported.

When incrementally importing,
Preview Data Samplingwill only display data that is greater than the maximum value of the incremental field in the output table—that is, the data to be imported. If there is no data in the input table larger than the maximum incremental field value, the preview data will be empty.
Output Nodes
Select the input node to which you want to add an output node, click the three-dot menu of the node, and choose Add Output Node. The new output node is successfully added.

Click to select the added output node; the right side of the area below the interface displays the default settings of the output node: output destination, table name, and renaming strategy.
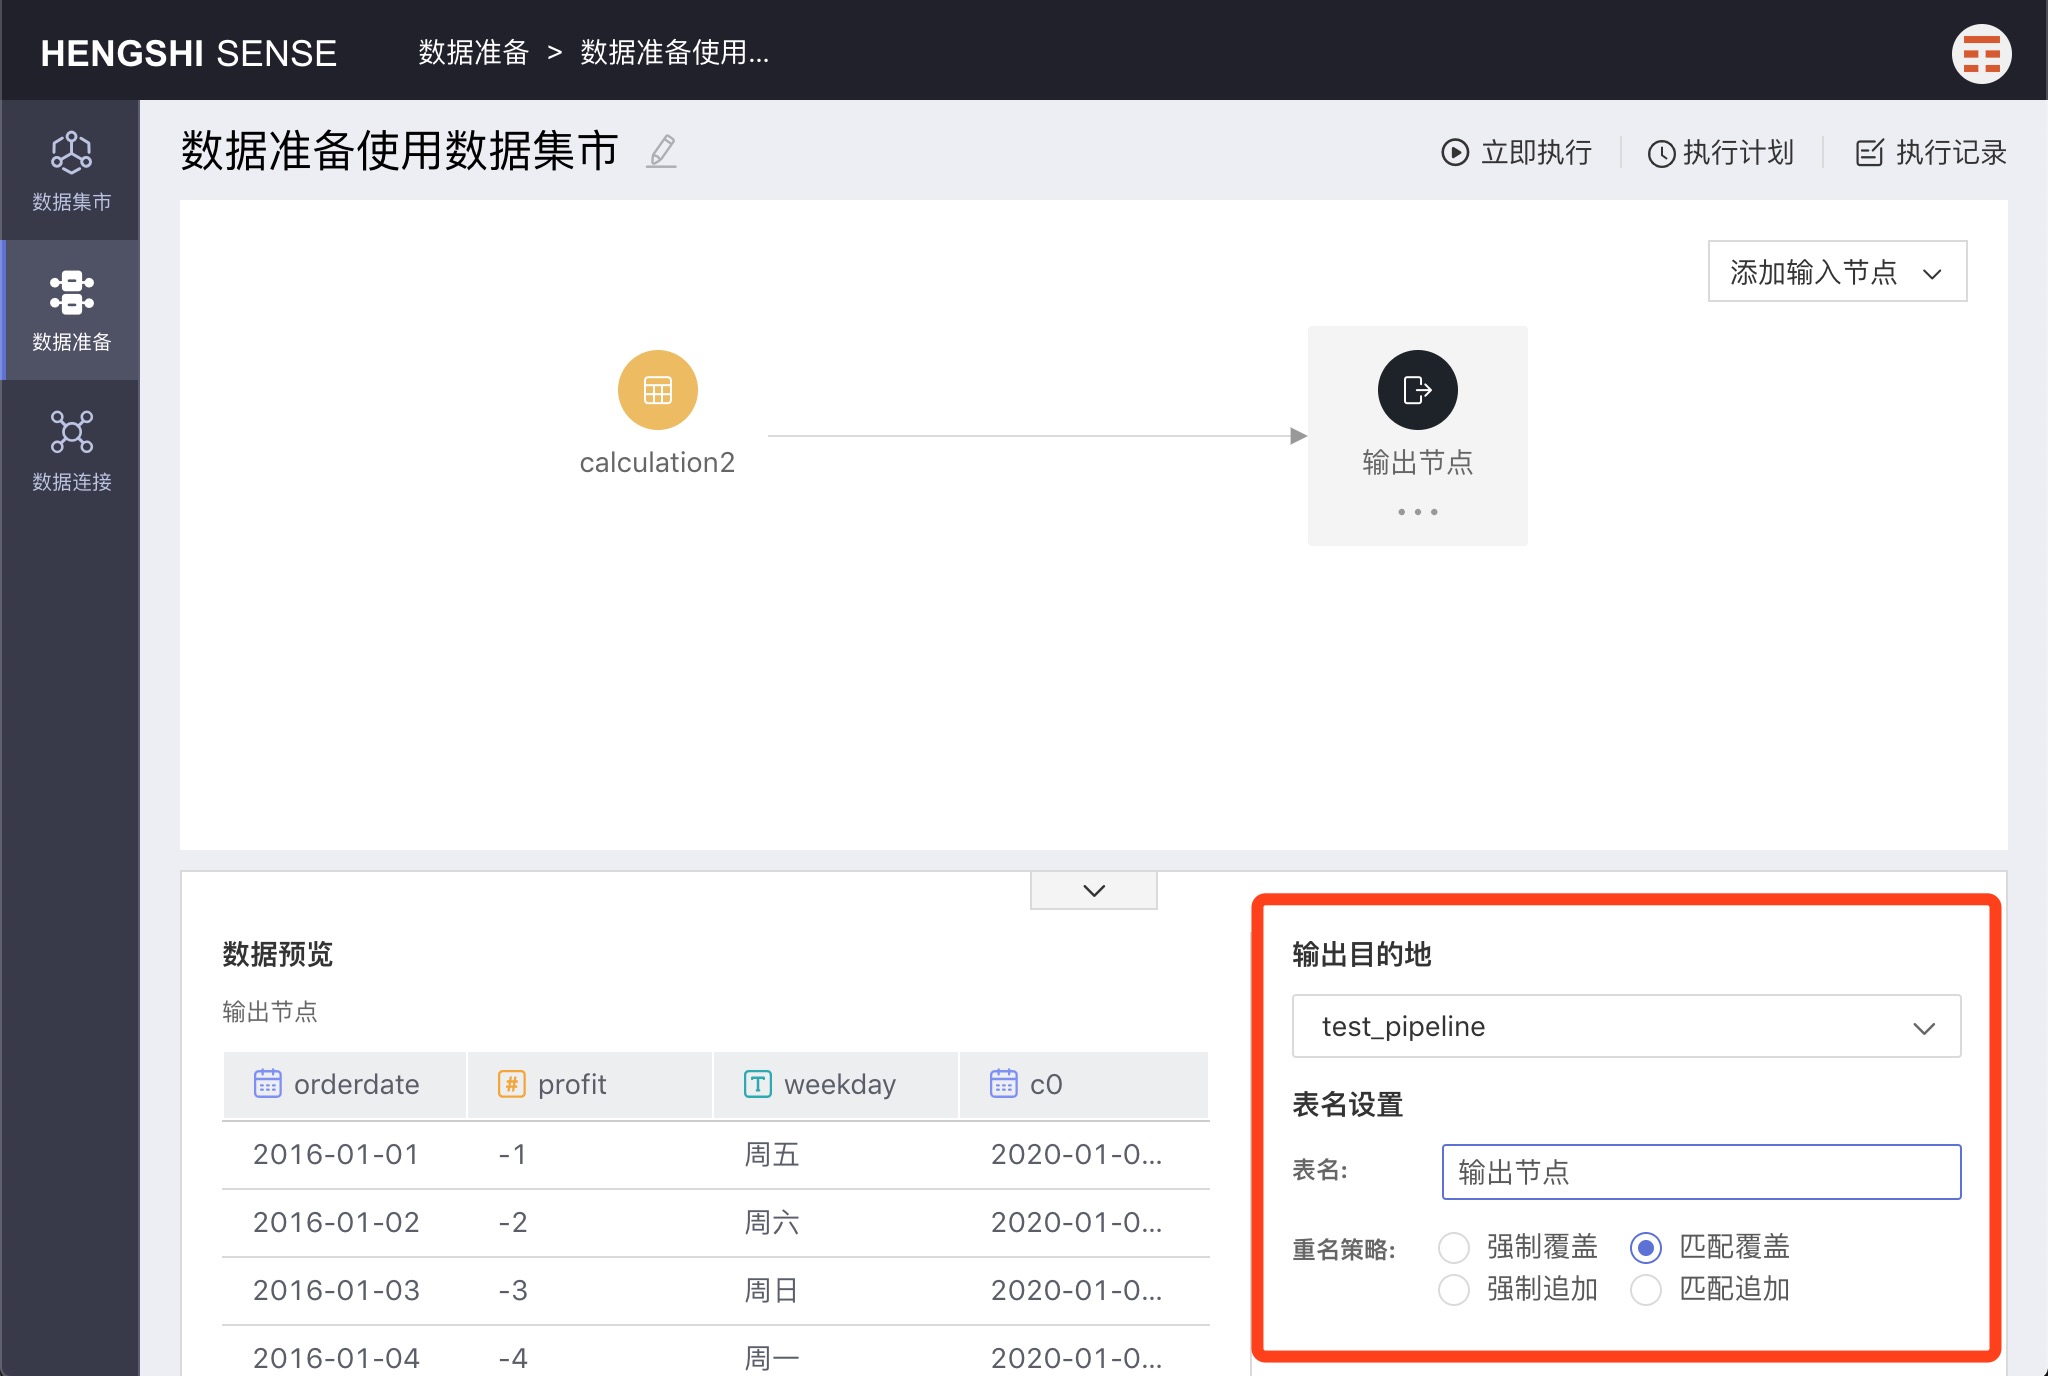
Output Destination
Modifiable, by default, it is the destination selected when creating the project. You can expand the dropdown to change it to a different path.
There are three kinds of data connections that can serve as output nodes: Greenplum, PostgreSQL, Amazon Redshift.
Table Name
Modifiable, it will be the name of the table generated for the input node in the database after the project is executed. By default, it appears as Output Node.
The current user must have read-write (RW) permission on the output directory or output table for the project to succeed.
Renaming Strategy
There are two scenarios for setting the output node's table name:
- The output node's chosen database already has a table with the same name as specified (the existing table will be modified upon project execution).
- The output node's chosen database does not have a table with the same name as specified (a new table will be created in the database upon project execution).
For the first scenario mentioned above, where an output table already exists, the system provides 4 renaming strategies for users to choose from:
The basis for matching is:
- Names and numbers of fields on both sides must be the same; anything extra on either side is considered a mismatch.
- Fields with the same name must have compatible original types when converted to Hengshi types. Within this backend, Hengshi types (number/text/date/boolean/json) are indicated by the type field.
Match and Overwrite
When matched, overwrite the output table; the project succeeds. If not matched, the project fails.
Match and Append
When matched, data are appended to the output table; the project succeeds. If not matched, the project fails.
Force Overwrite
No checks; forcefully overwrite the output table; the project succeeds.
Force Append
When selecting Force Append:
- If field names differ, append misaligned, with nulls in the empty positions; the project succeeds.
- If field names are the same, but field types are not compatible, such as the output table's field is numeric and the input table's field is string, the project fails.
- If field names are the same and types are compatible, such as the output table's field is text and the input table's type is numeric, the project succeeds.
Project Execution
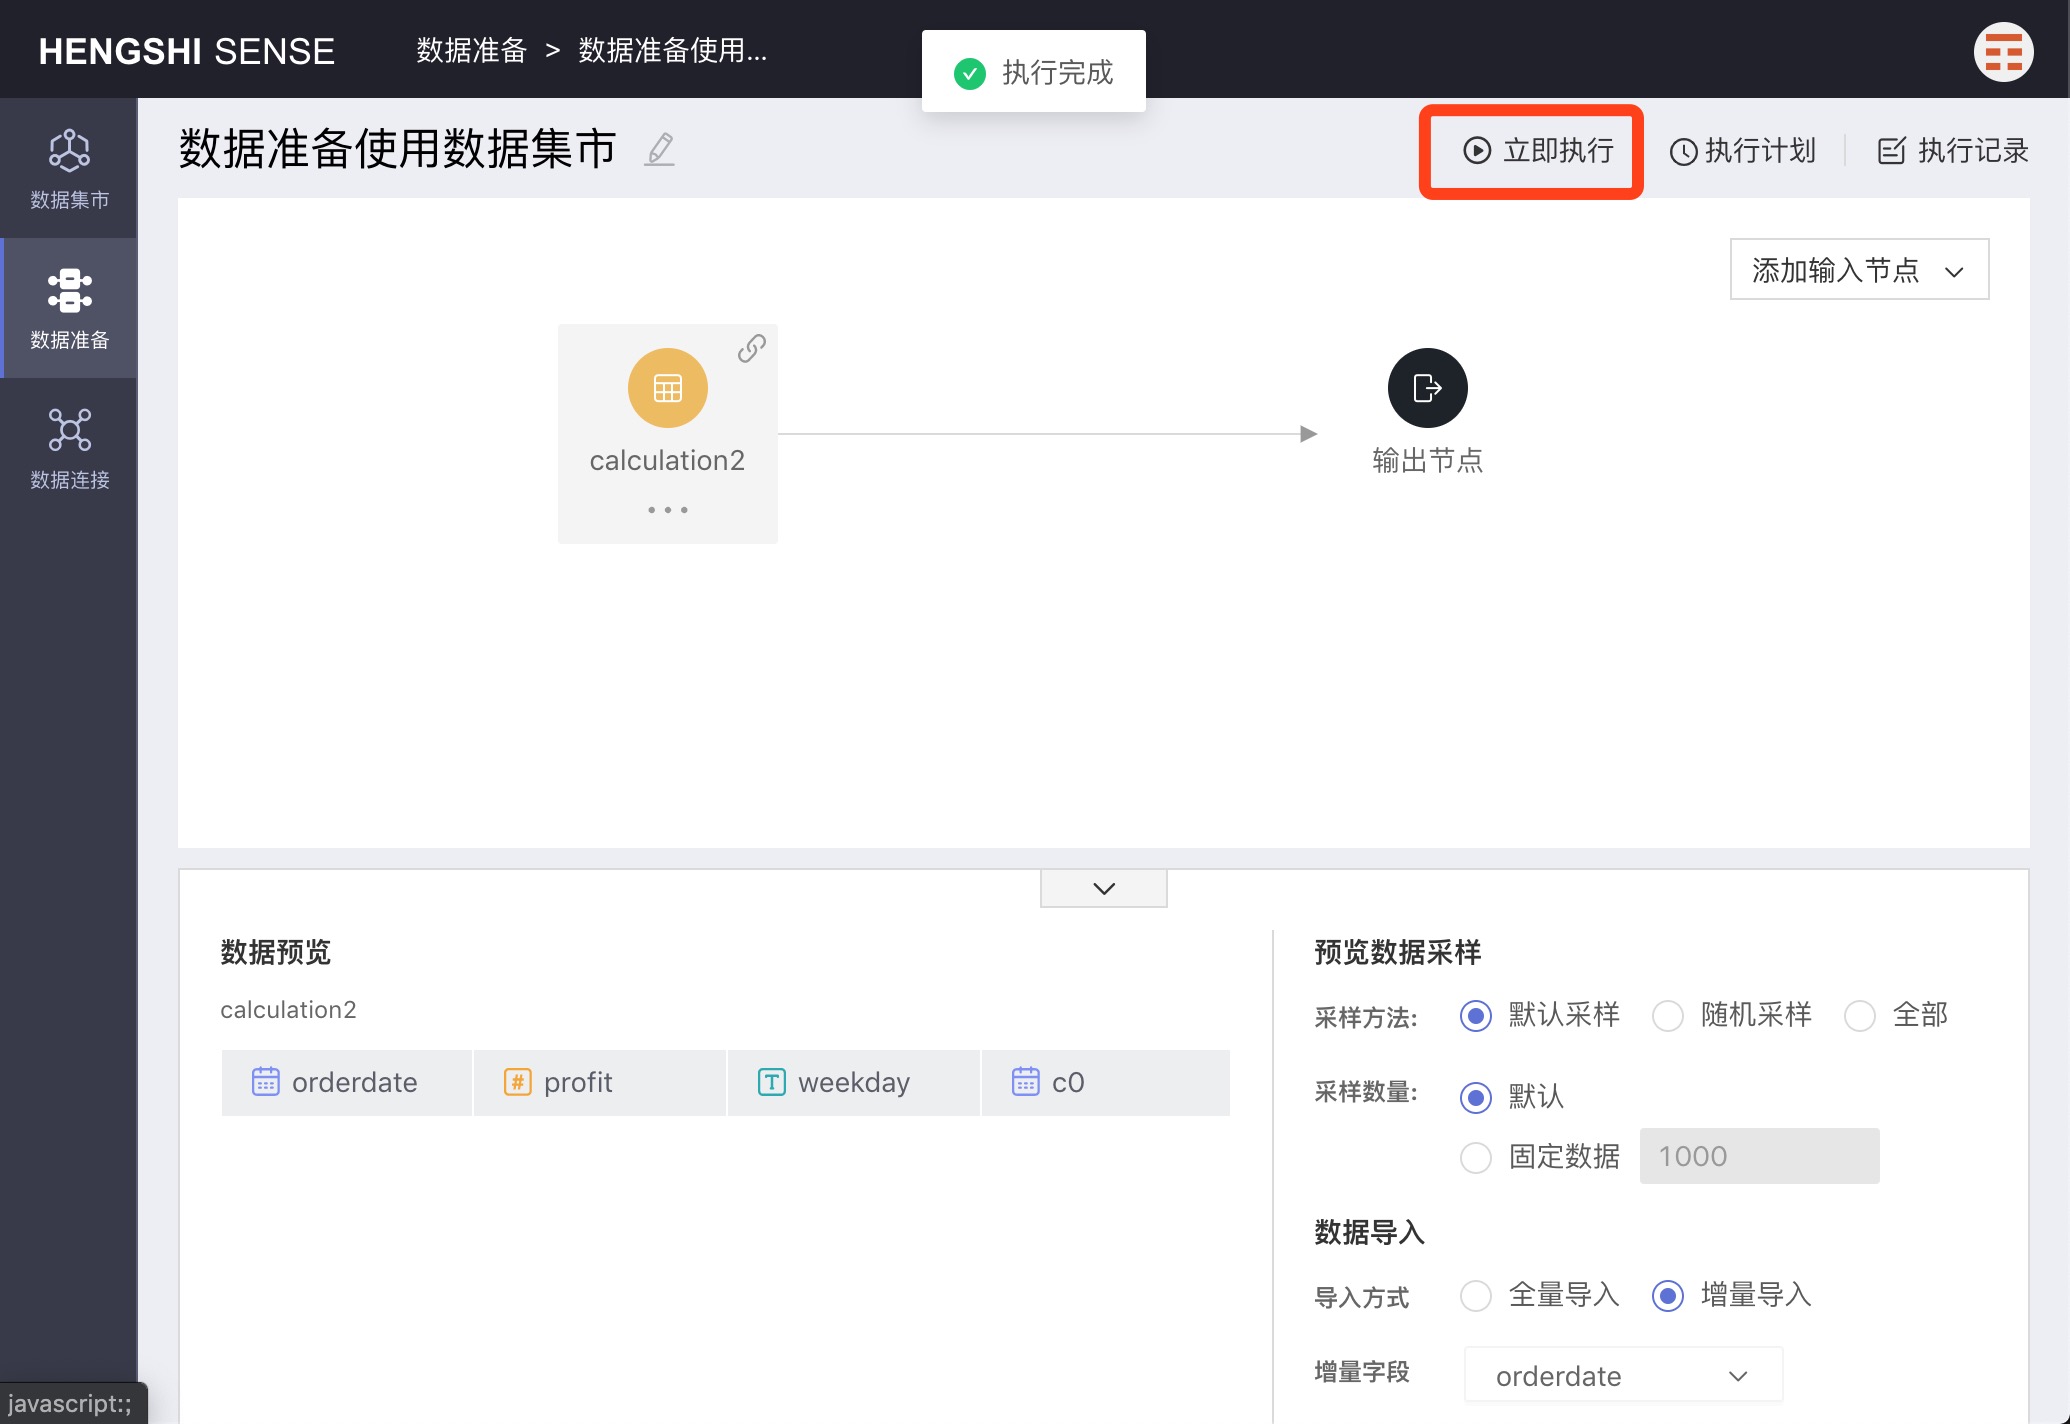
Immediate Execution
Click Immediate Execution to immediately execute the project; once completed, a completion notification will be displayed. Then click Execution Records to view detailed execution information.
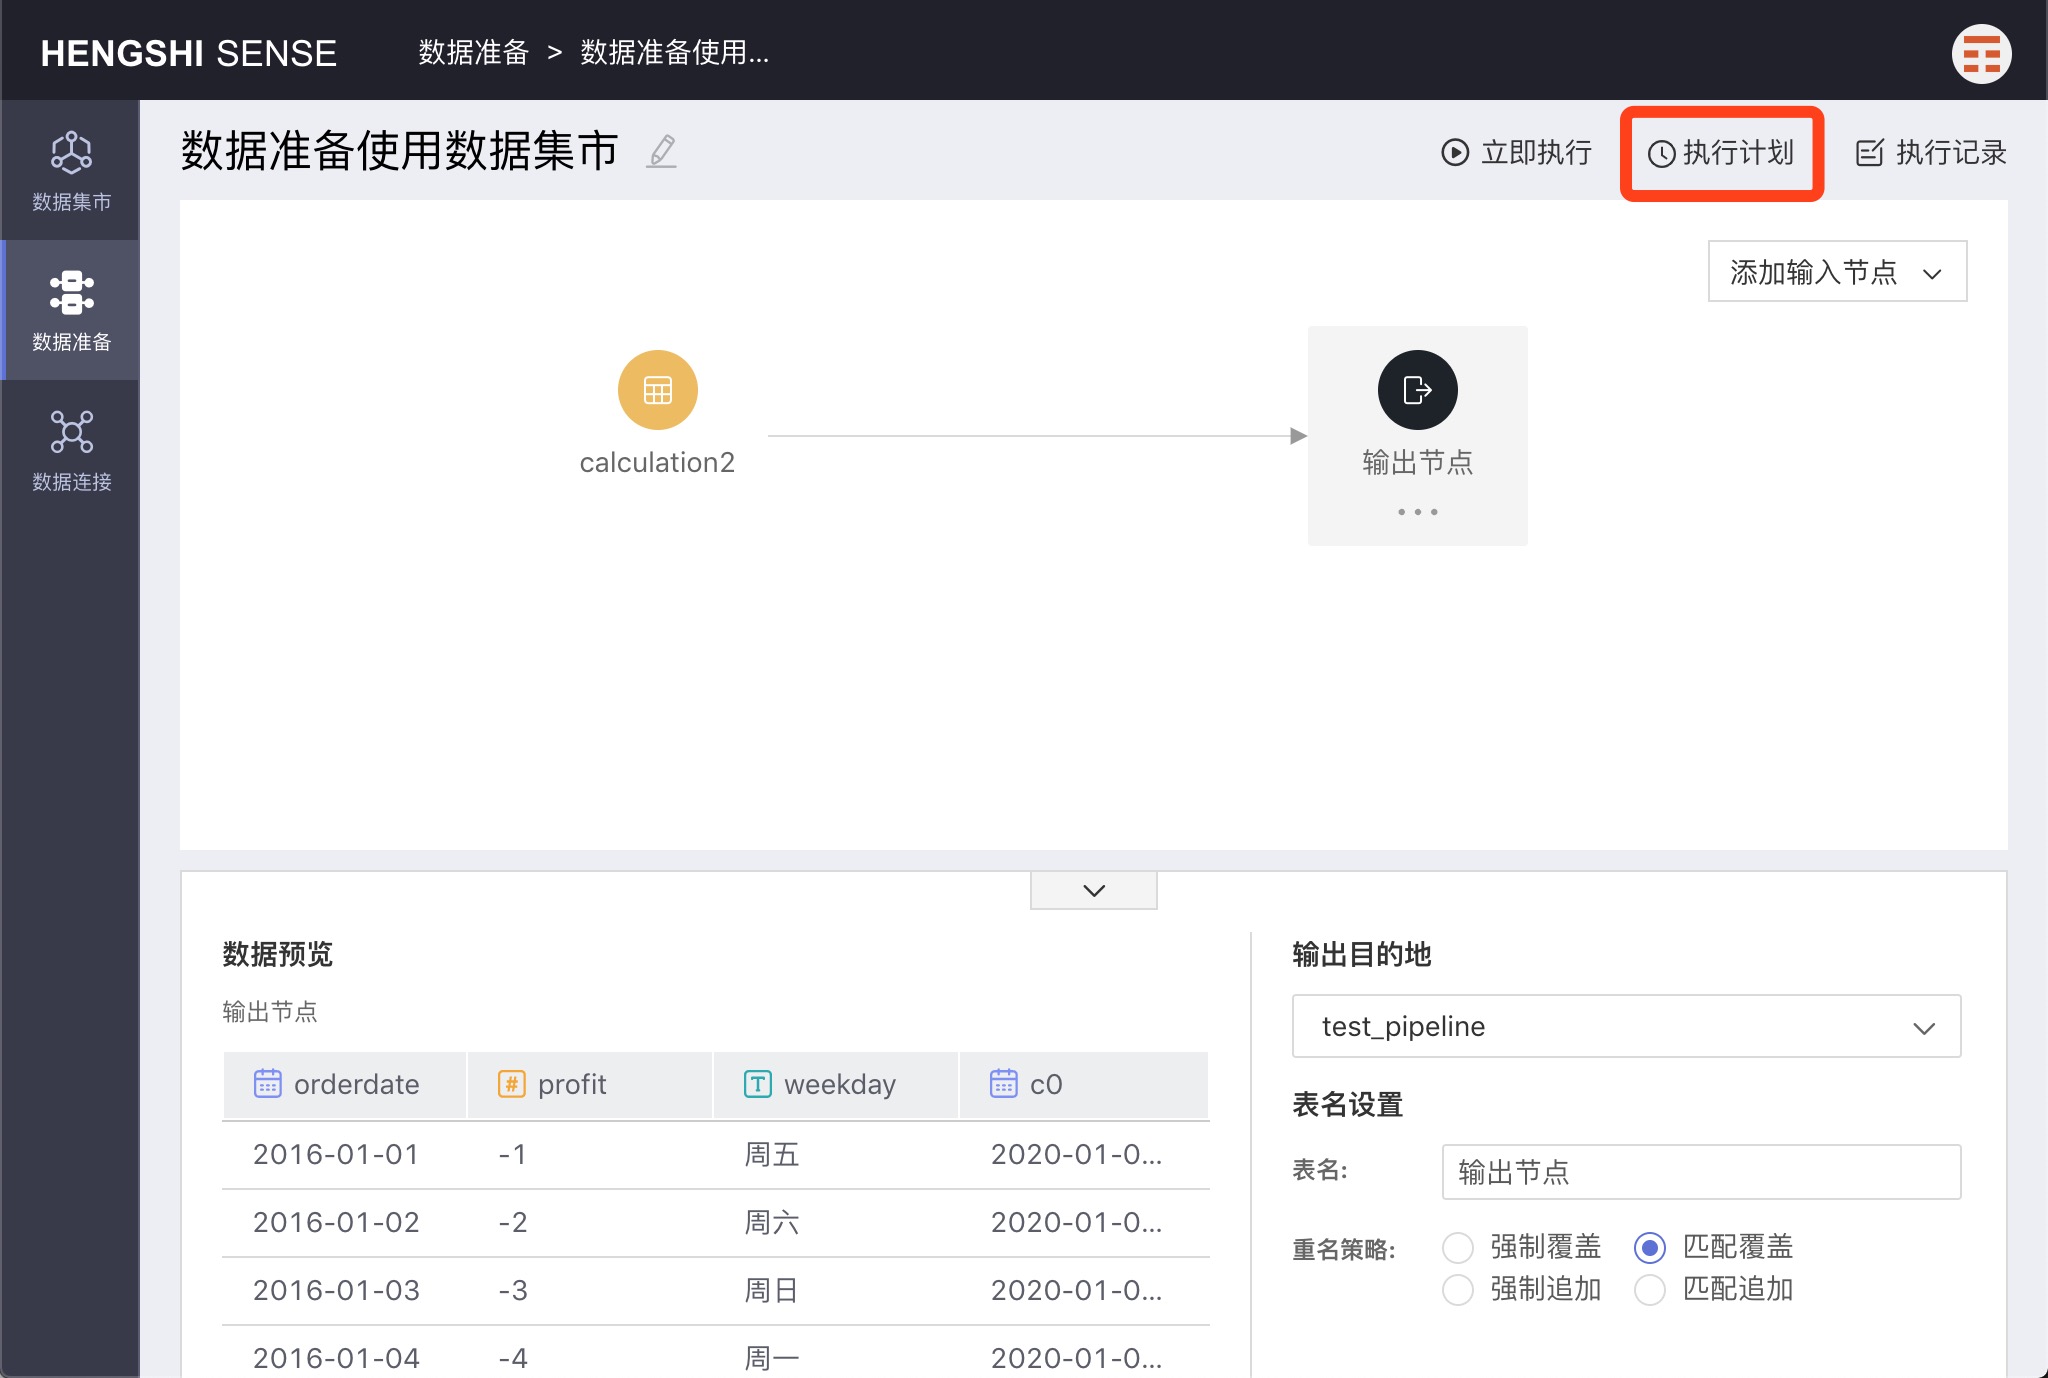
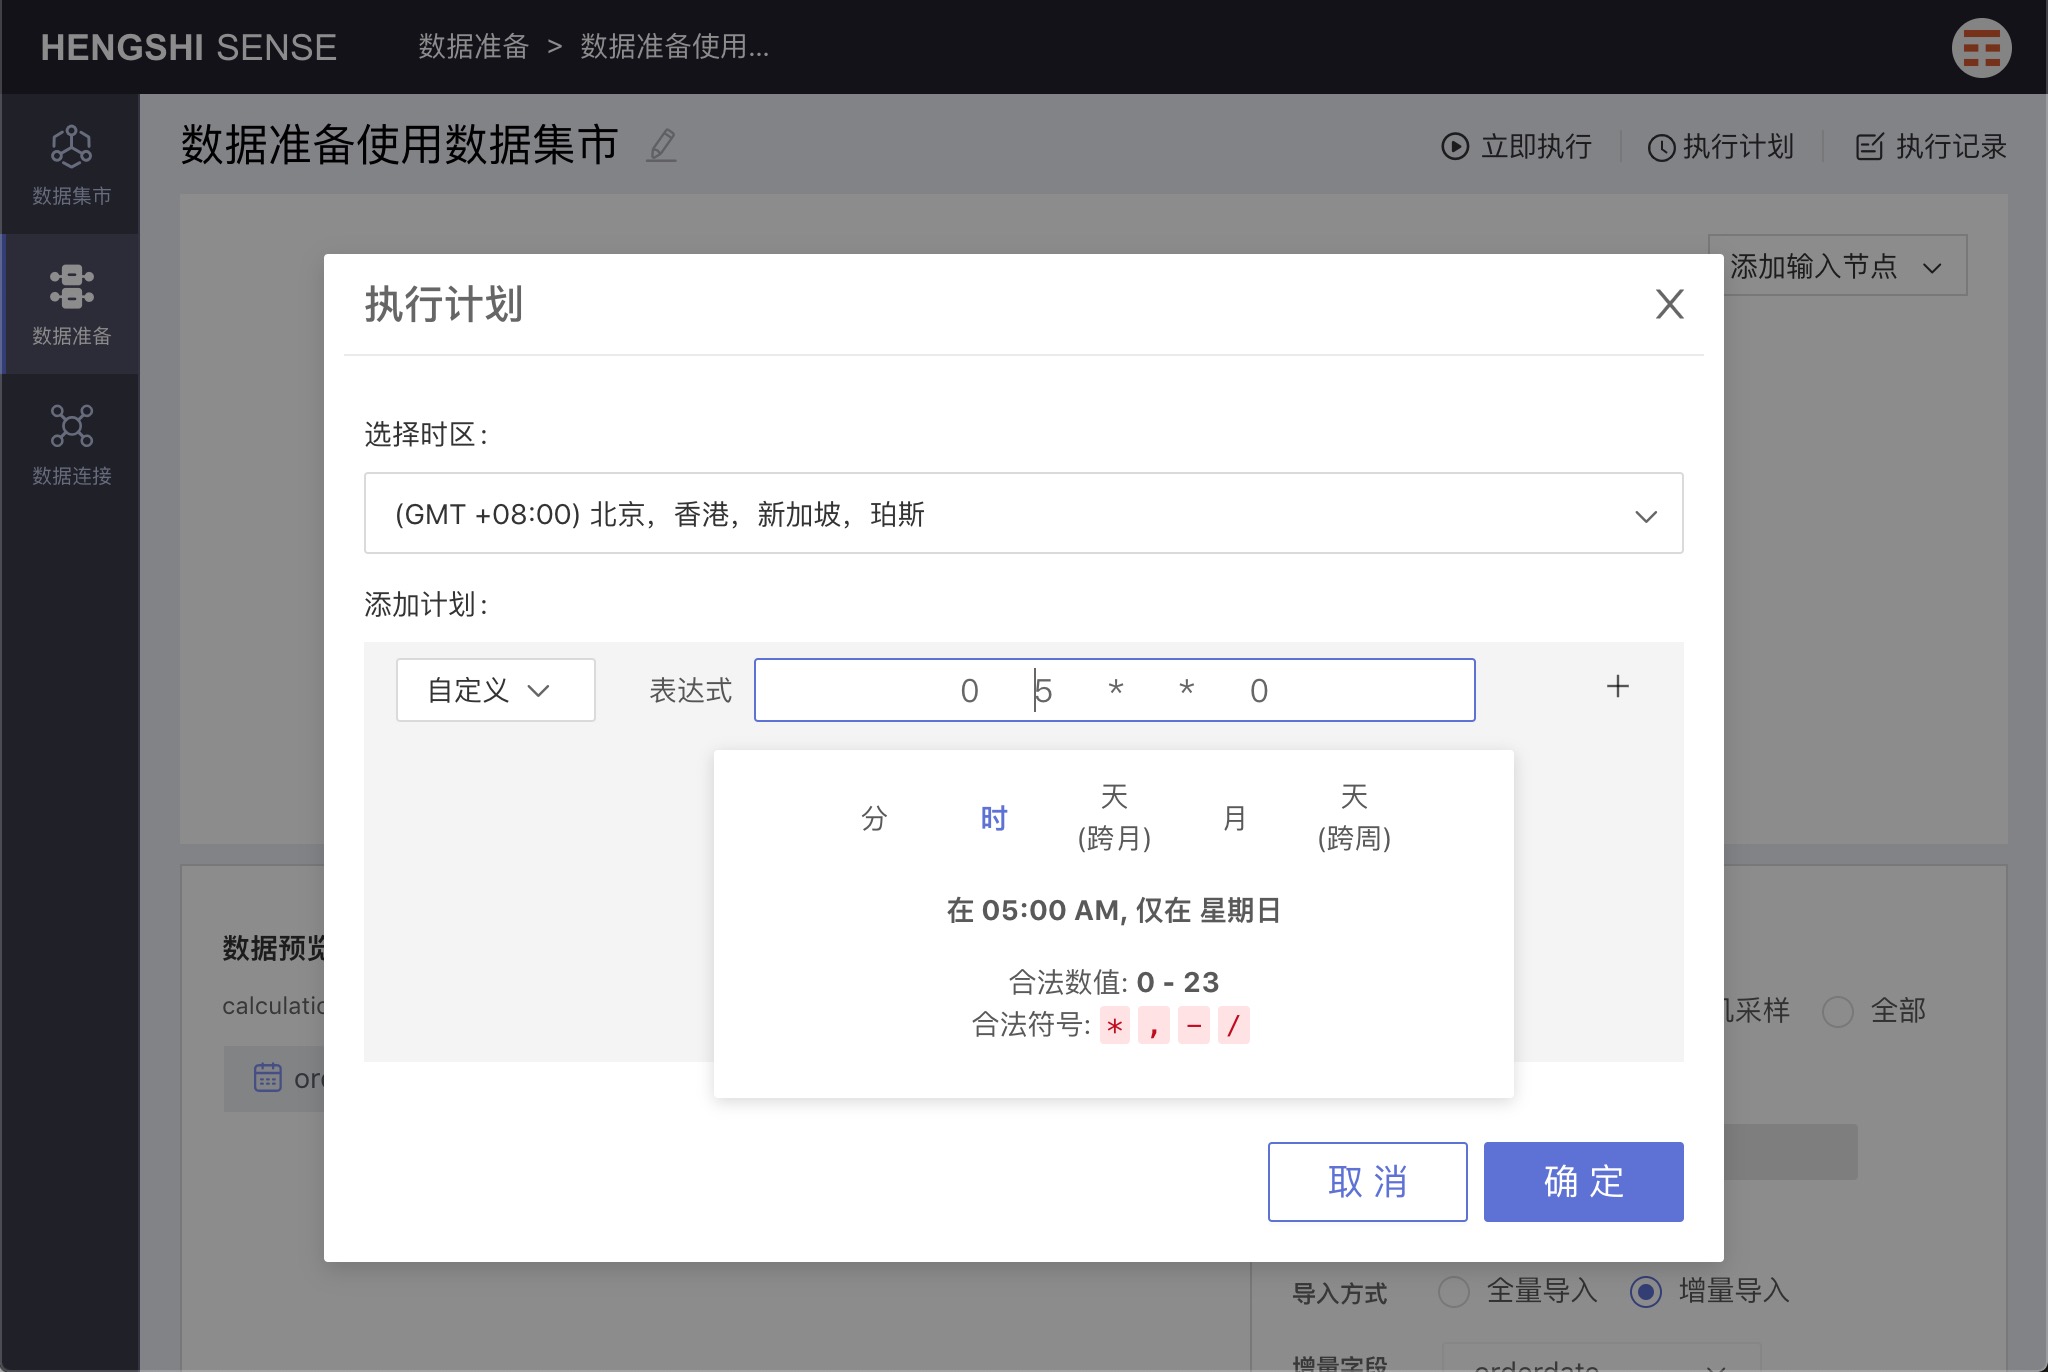
Execution Plan
Click Execution Plan in the upper right-hand corner to set the project's execution schedule.
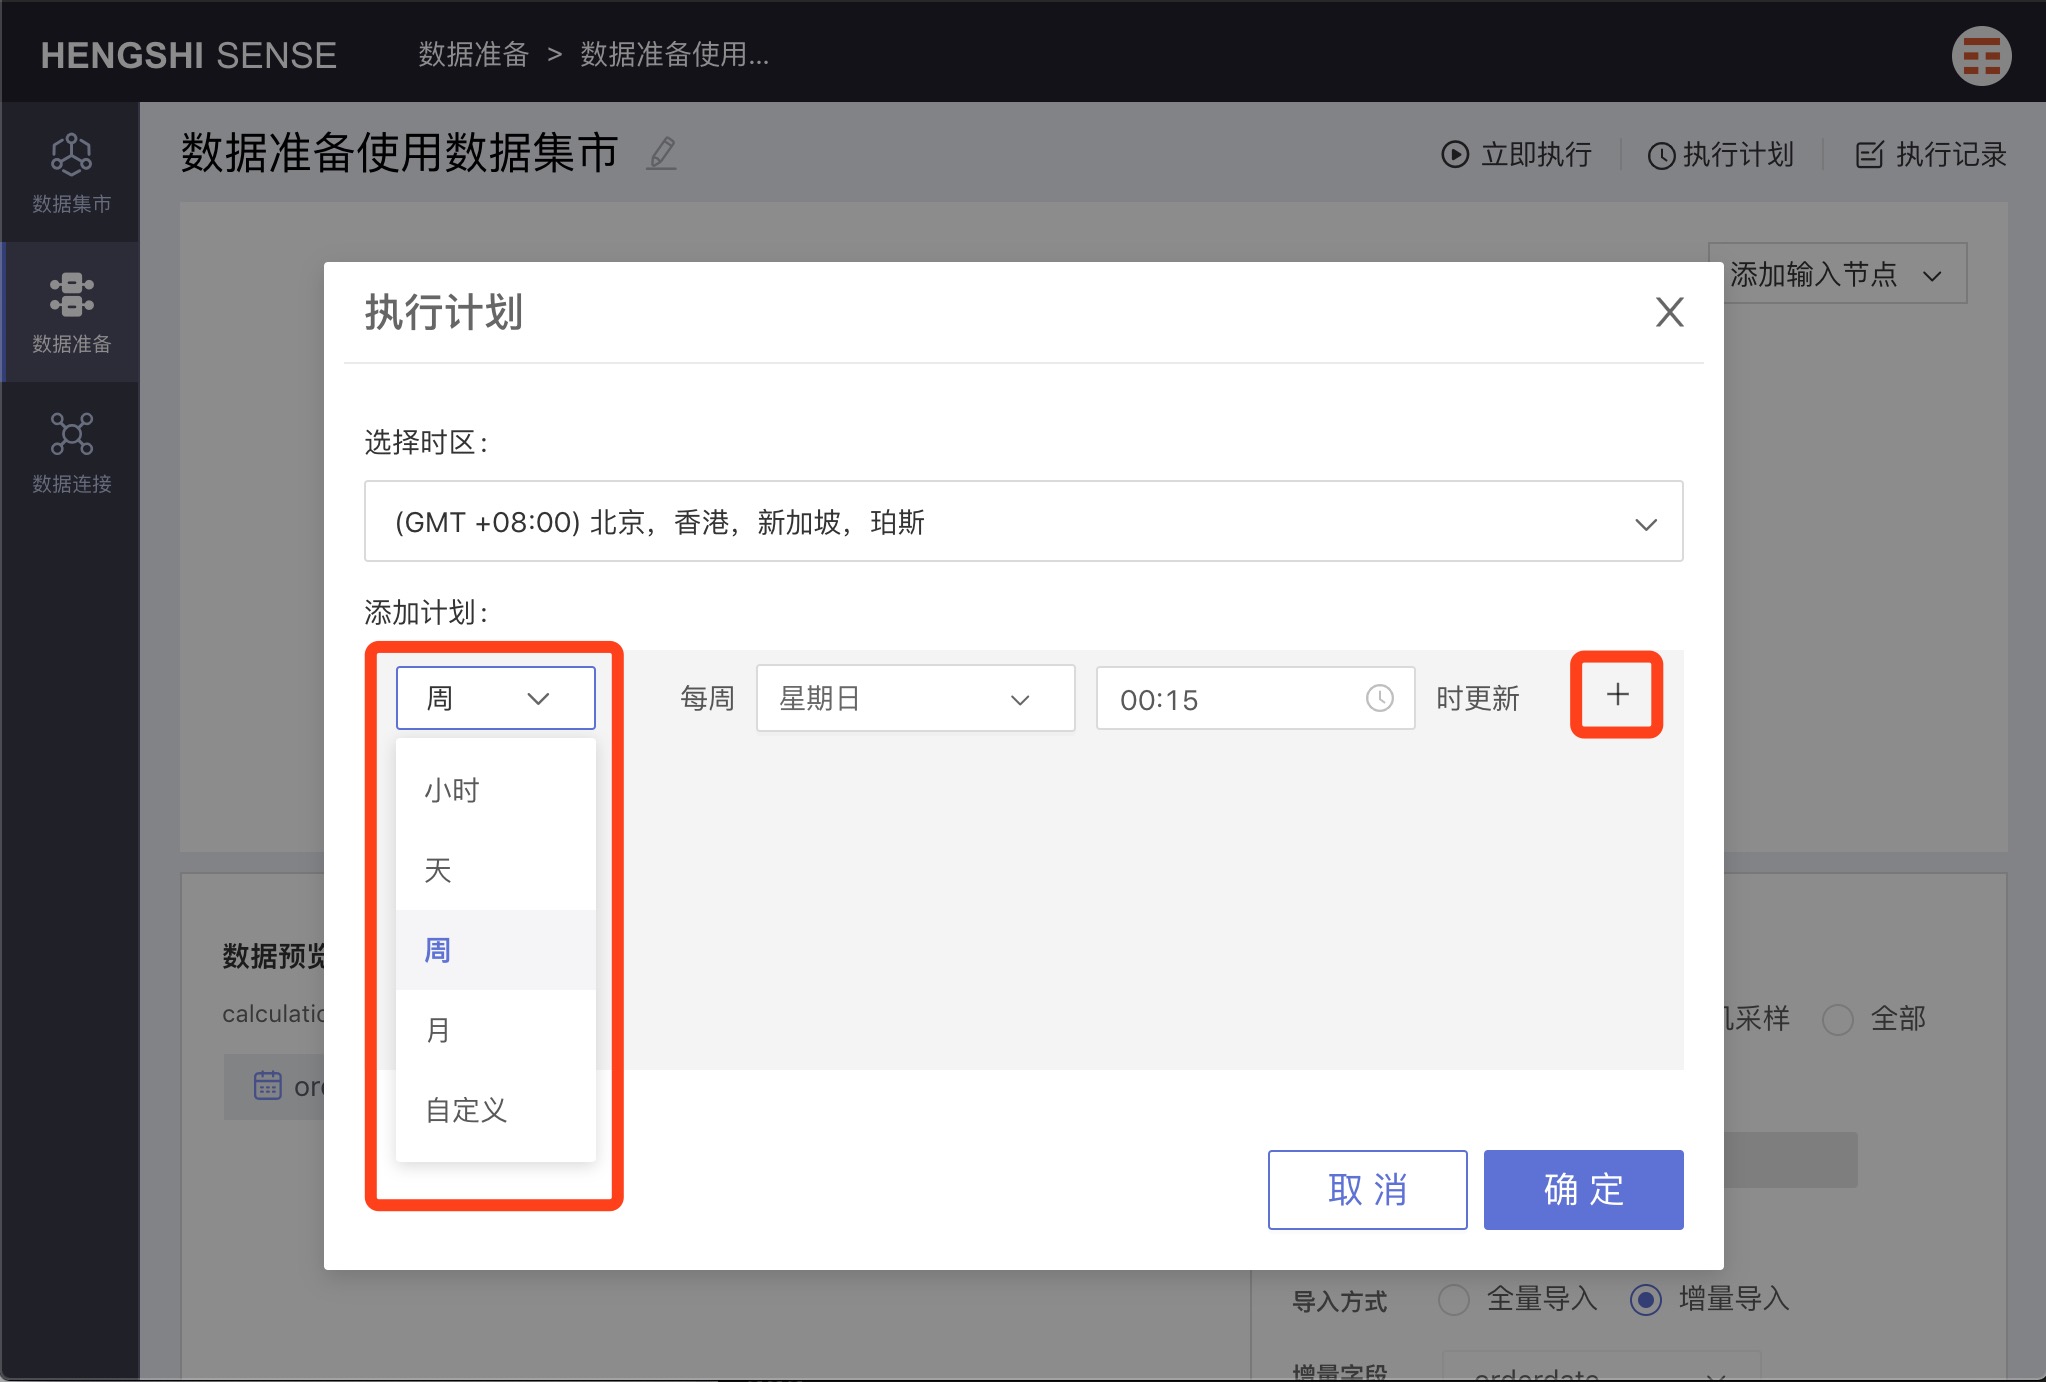
Click the + button after the schedule to add multiple plans.
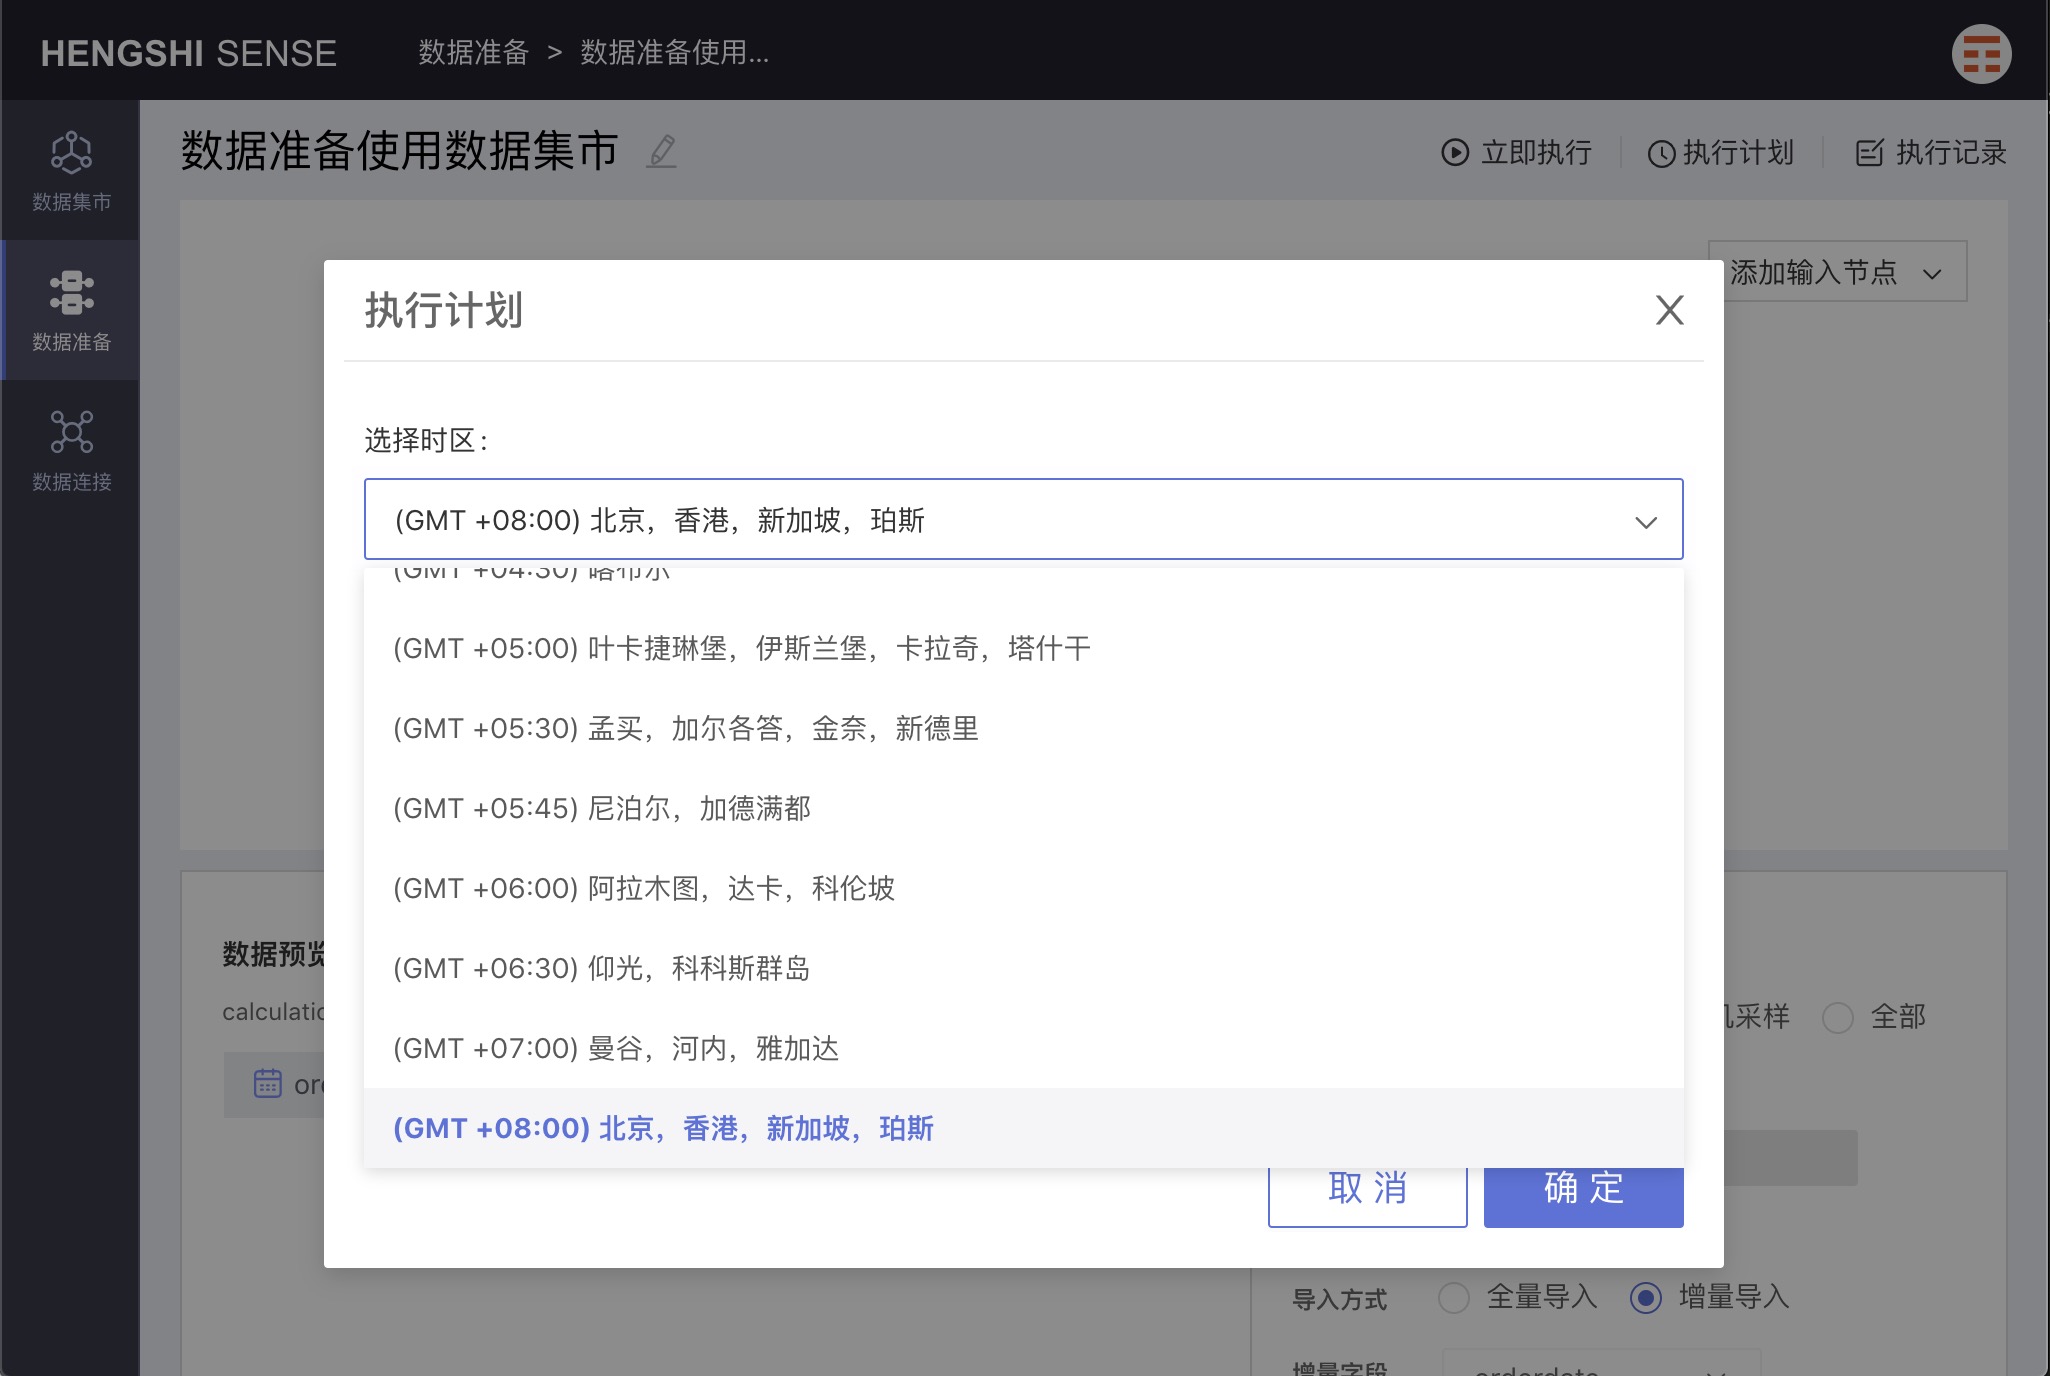
Select Timezone
Select the corresponding timezone.
Hourly
Choose hourly, and set which minute of every hour to update.
Daily
Choose daily, and you can set the specific time for updates each day.
Weekly
Choose weekly, and you can set the specific time for updates on selected days of the week.
Monthly
Choose monthly, and you can set the specific date and time for updates each month.
Custom
By selecting custom, you can set specific update times.
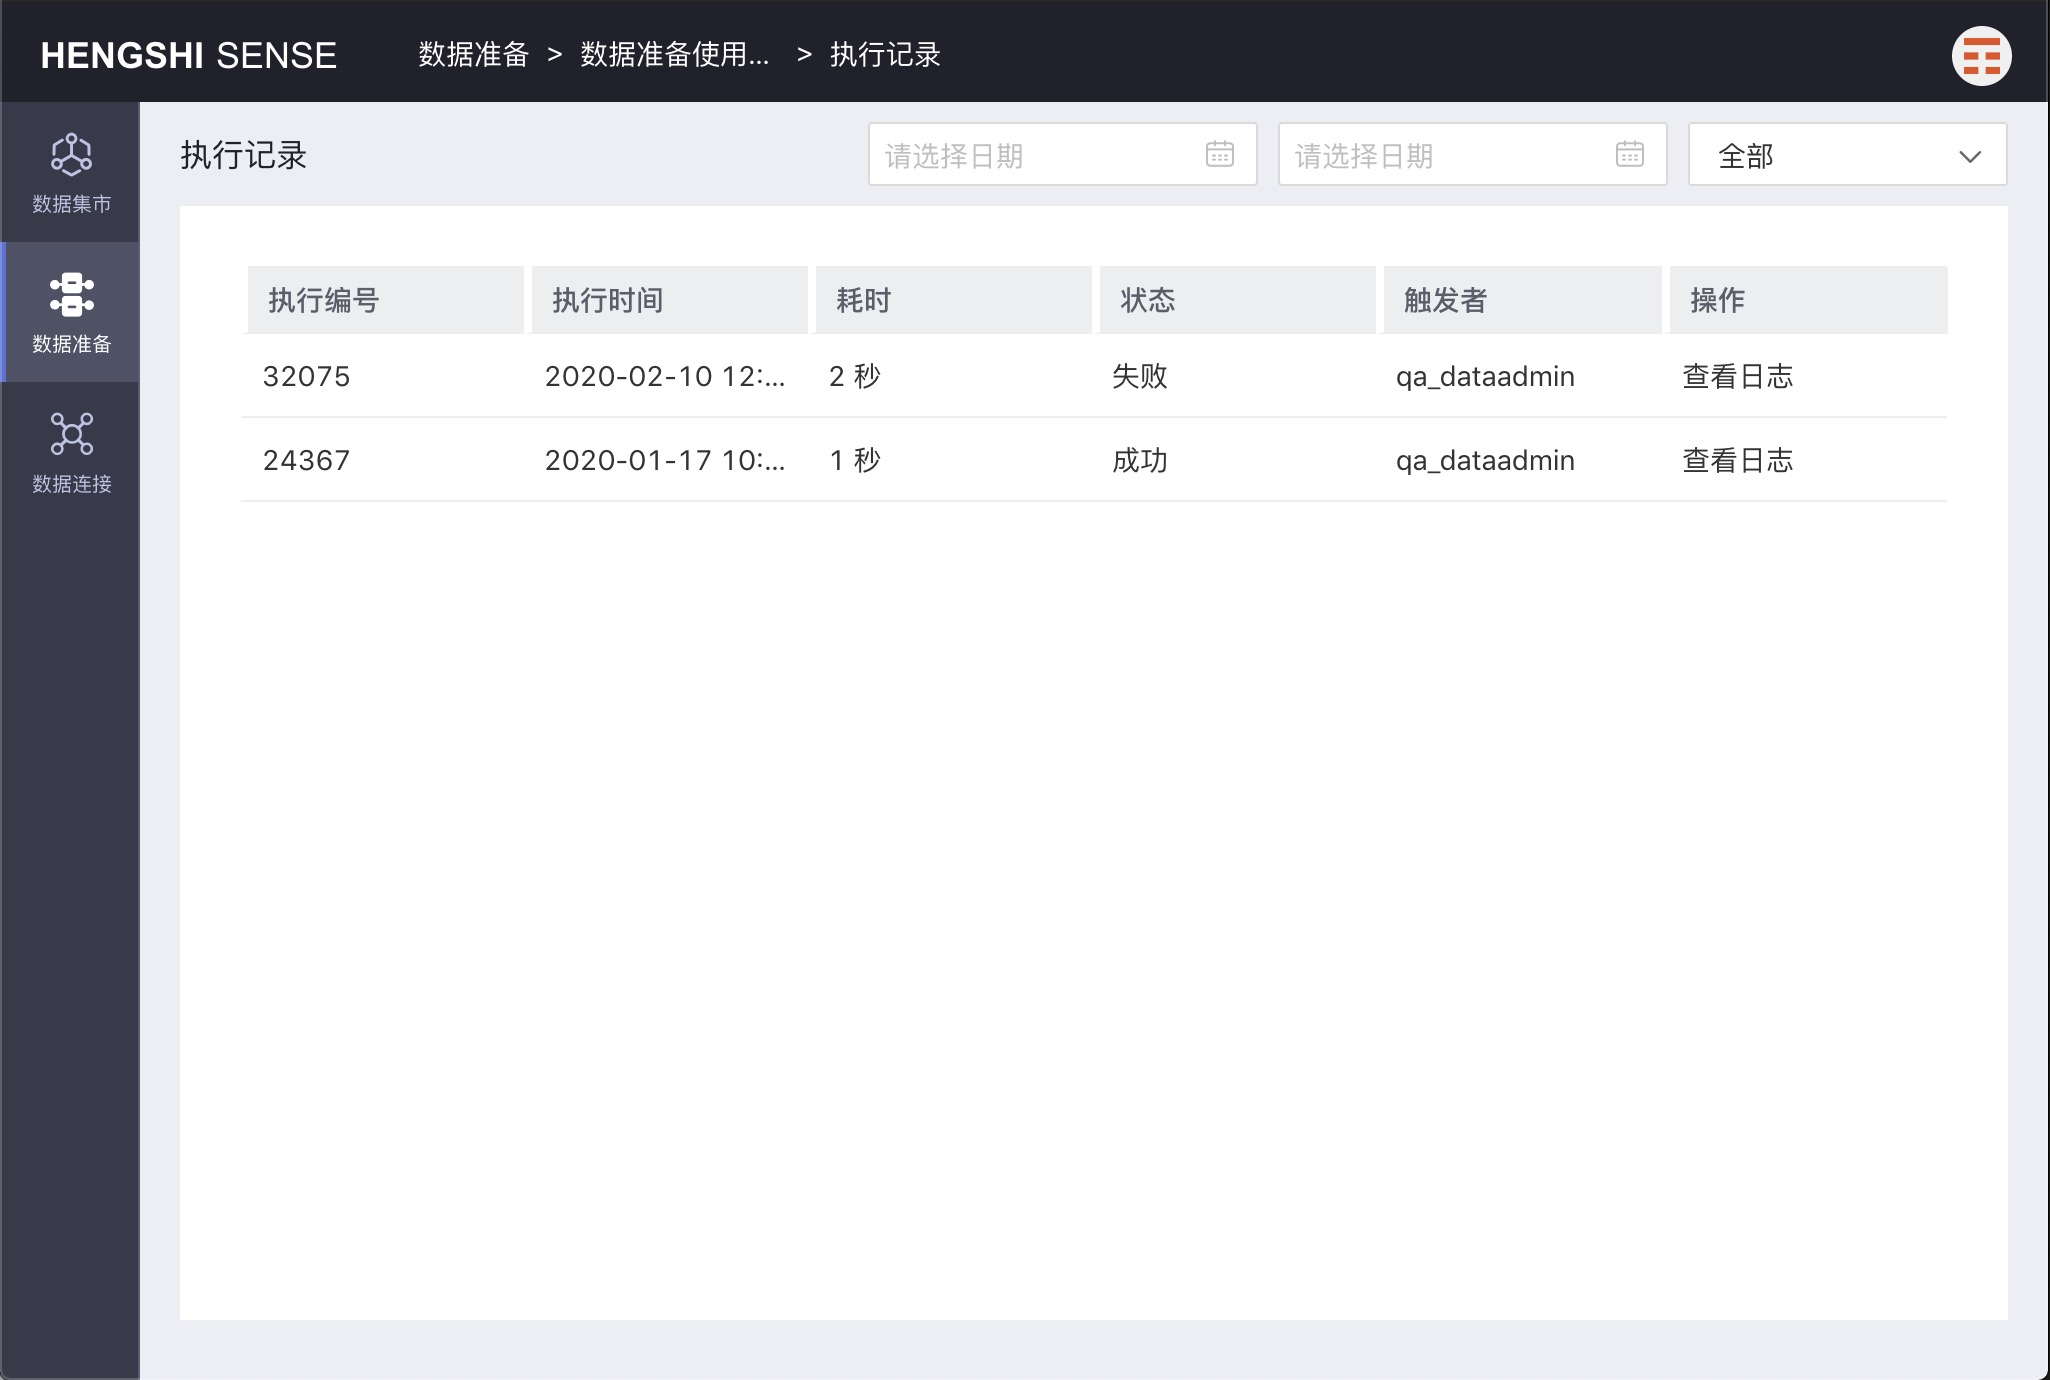
Execution Records
Click Execution Records in the upper right corner of the project to see all of the project's execution records.

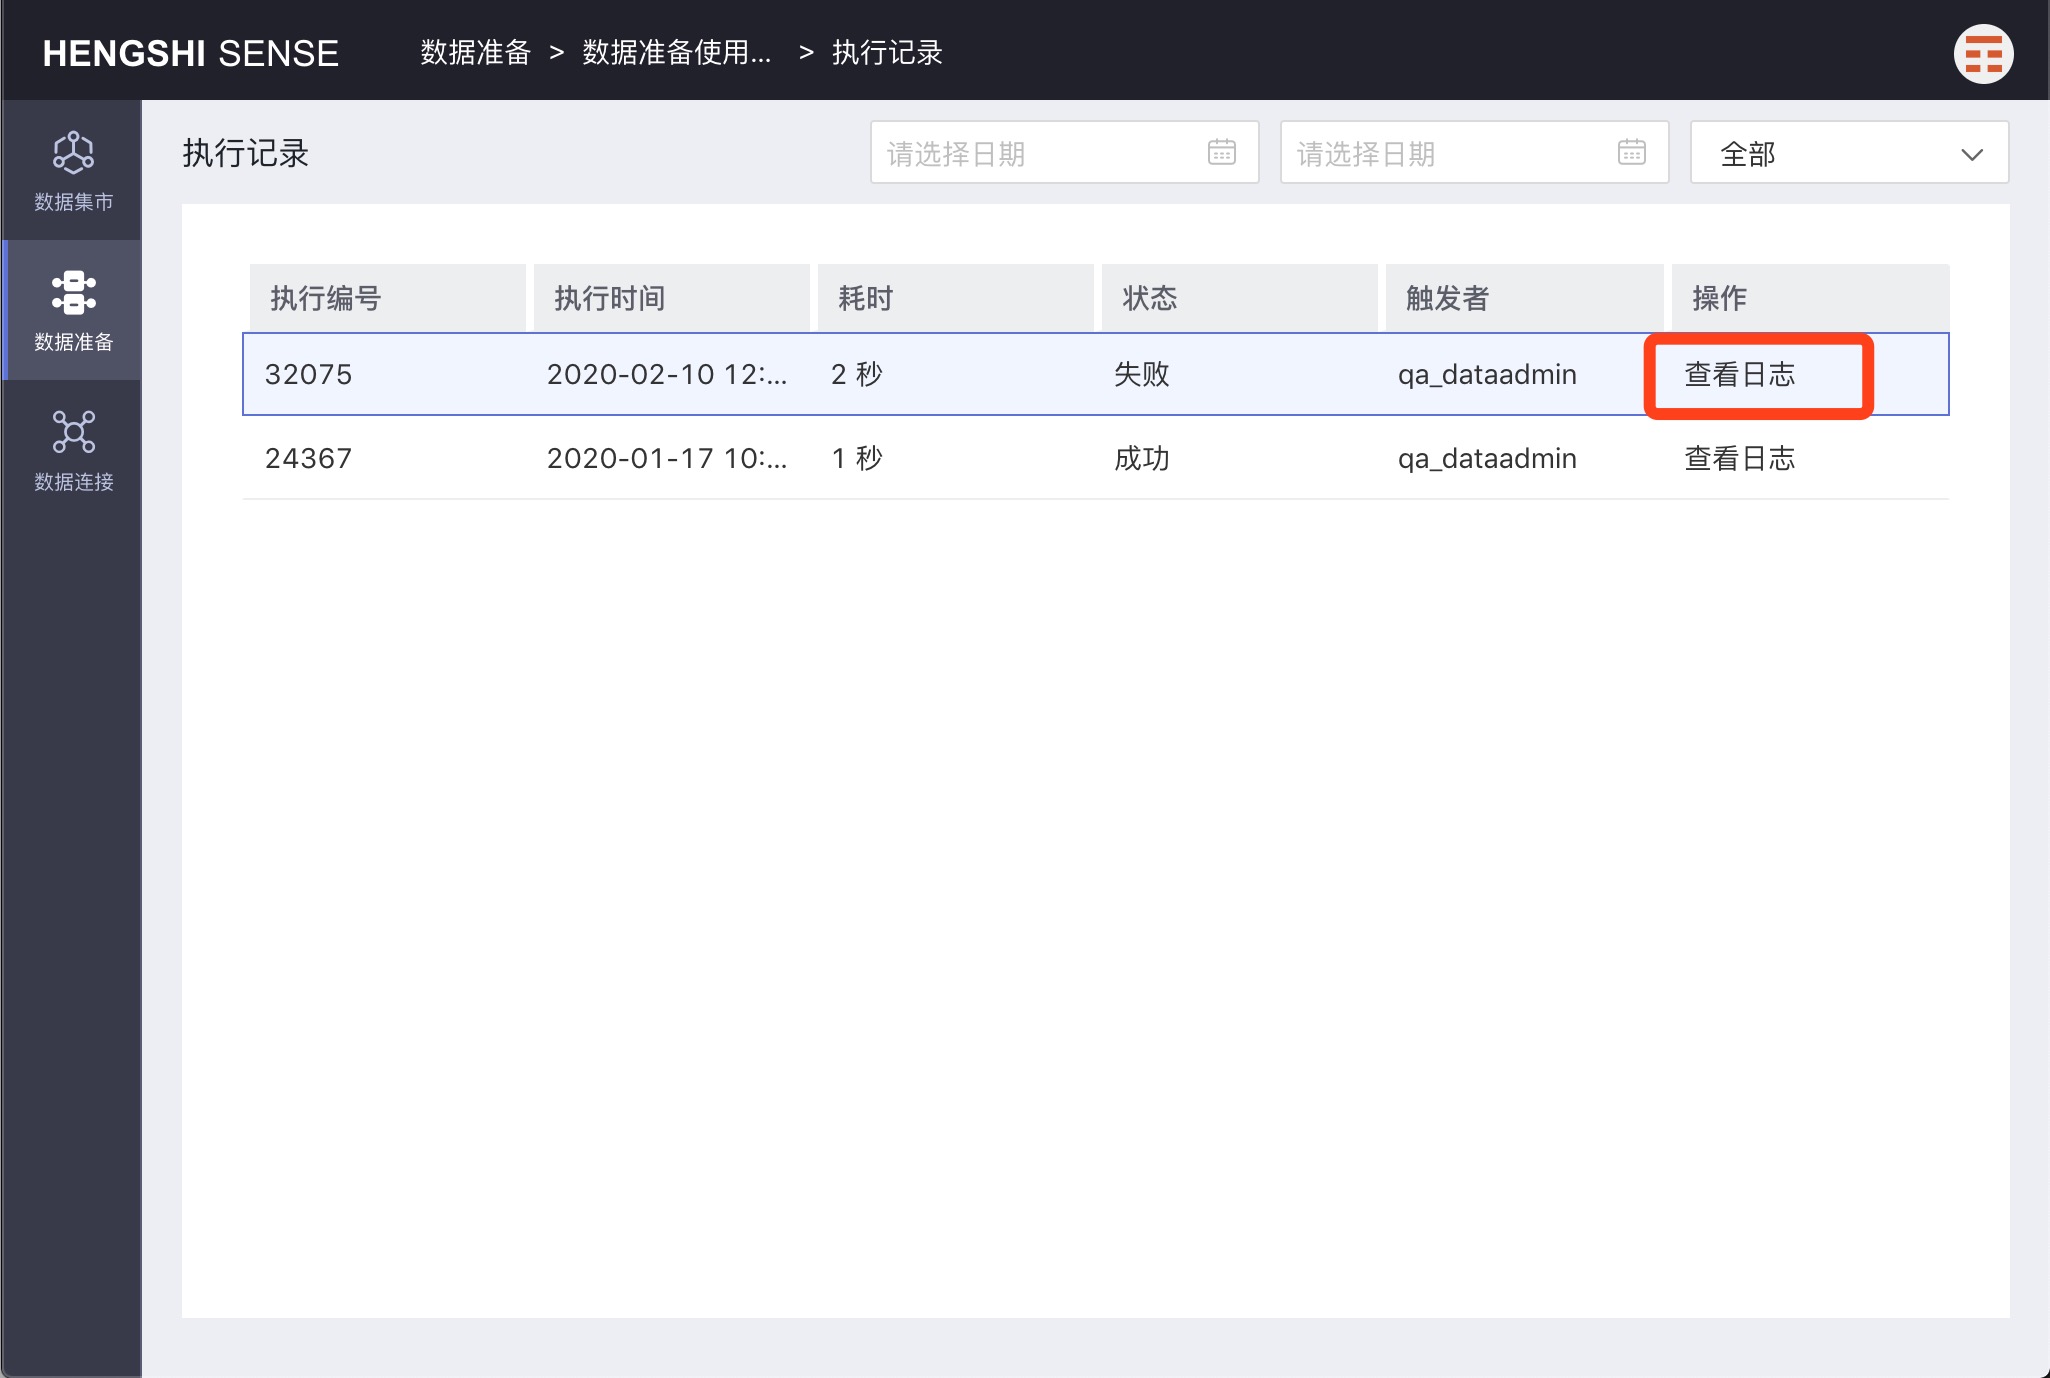
View Logs
Select a record, click View Logs of that record to view the project's execution logs.
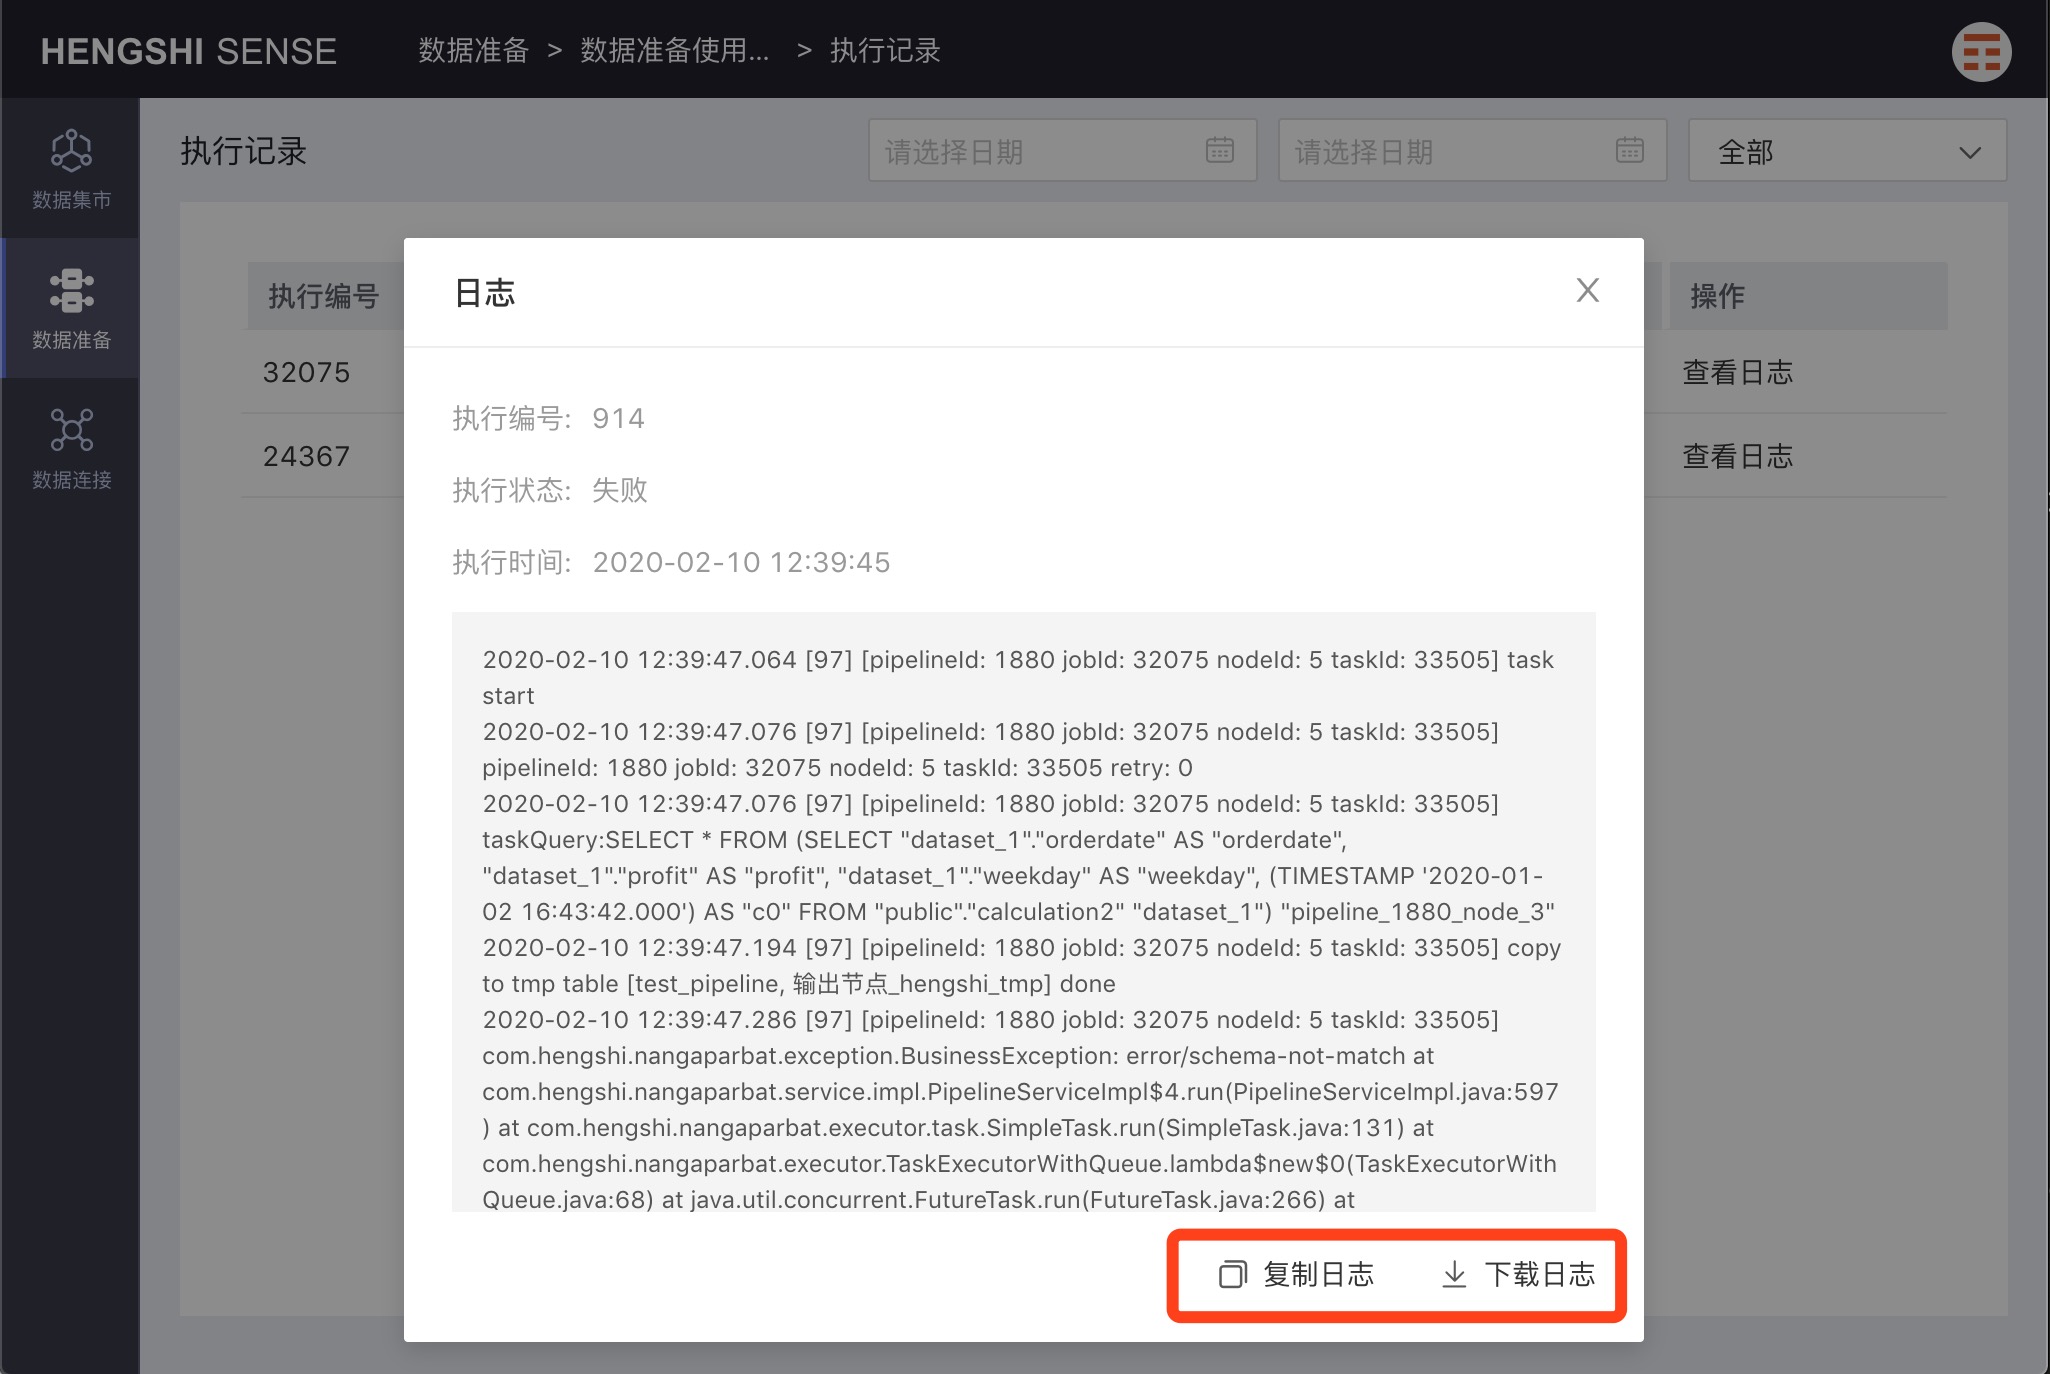
Copy Logs
Click Copy Logs in the log popup to copy the logs elsewhere.
Download Logs
Click Download Logs in the log popup to download text-based logs.
Search Logs
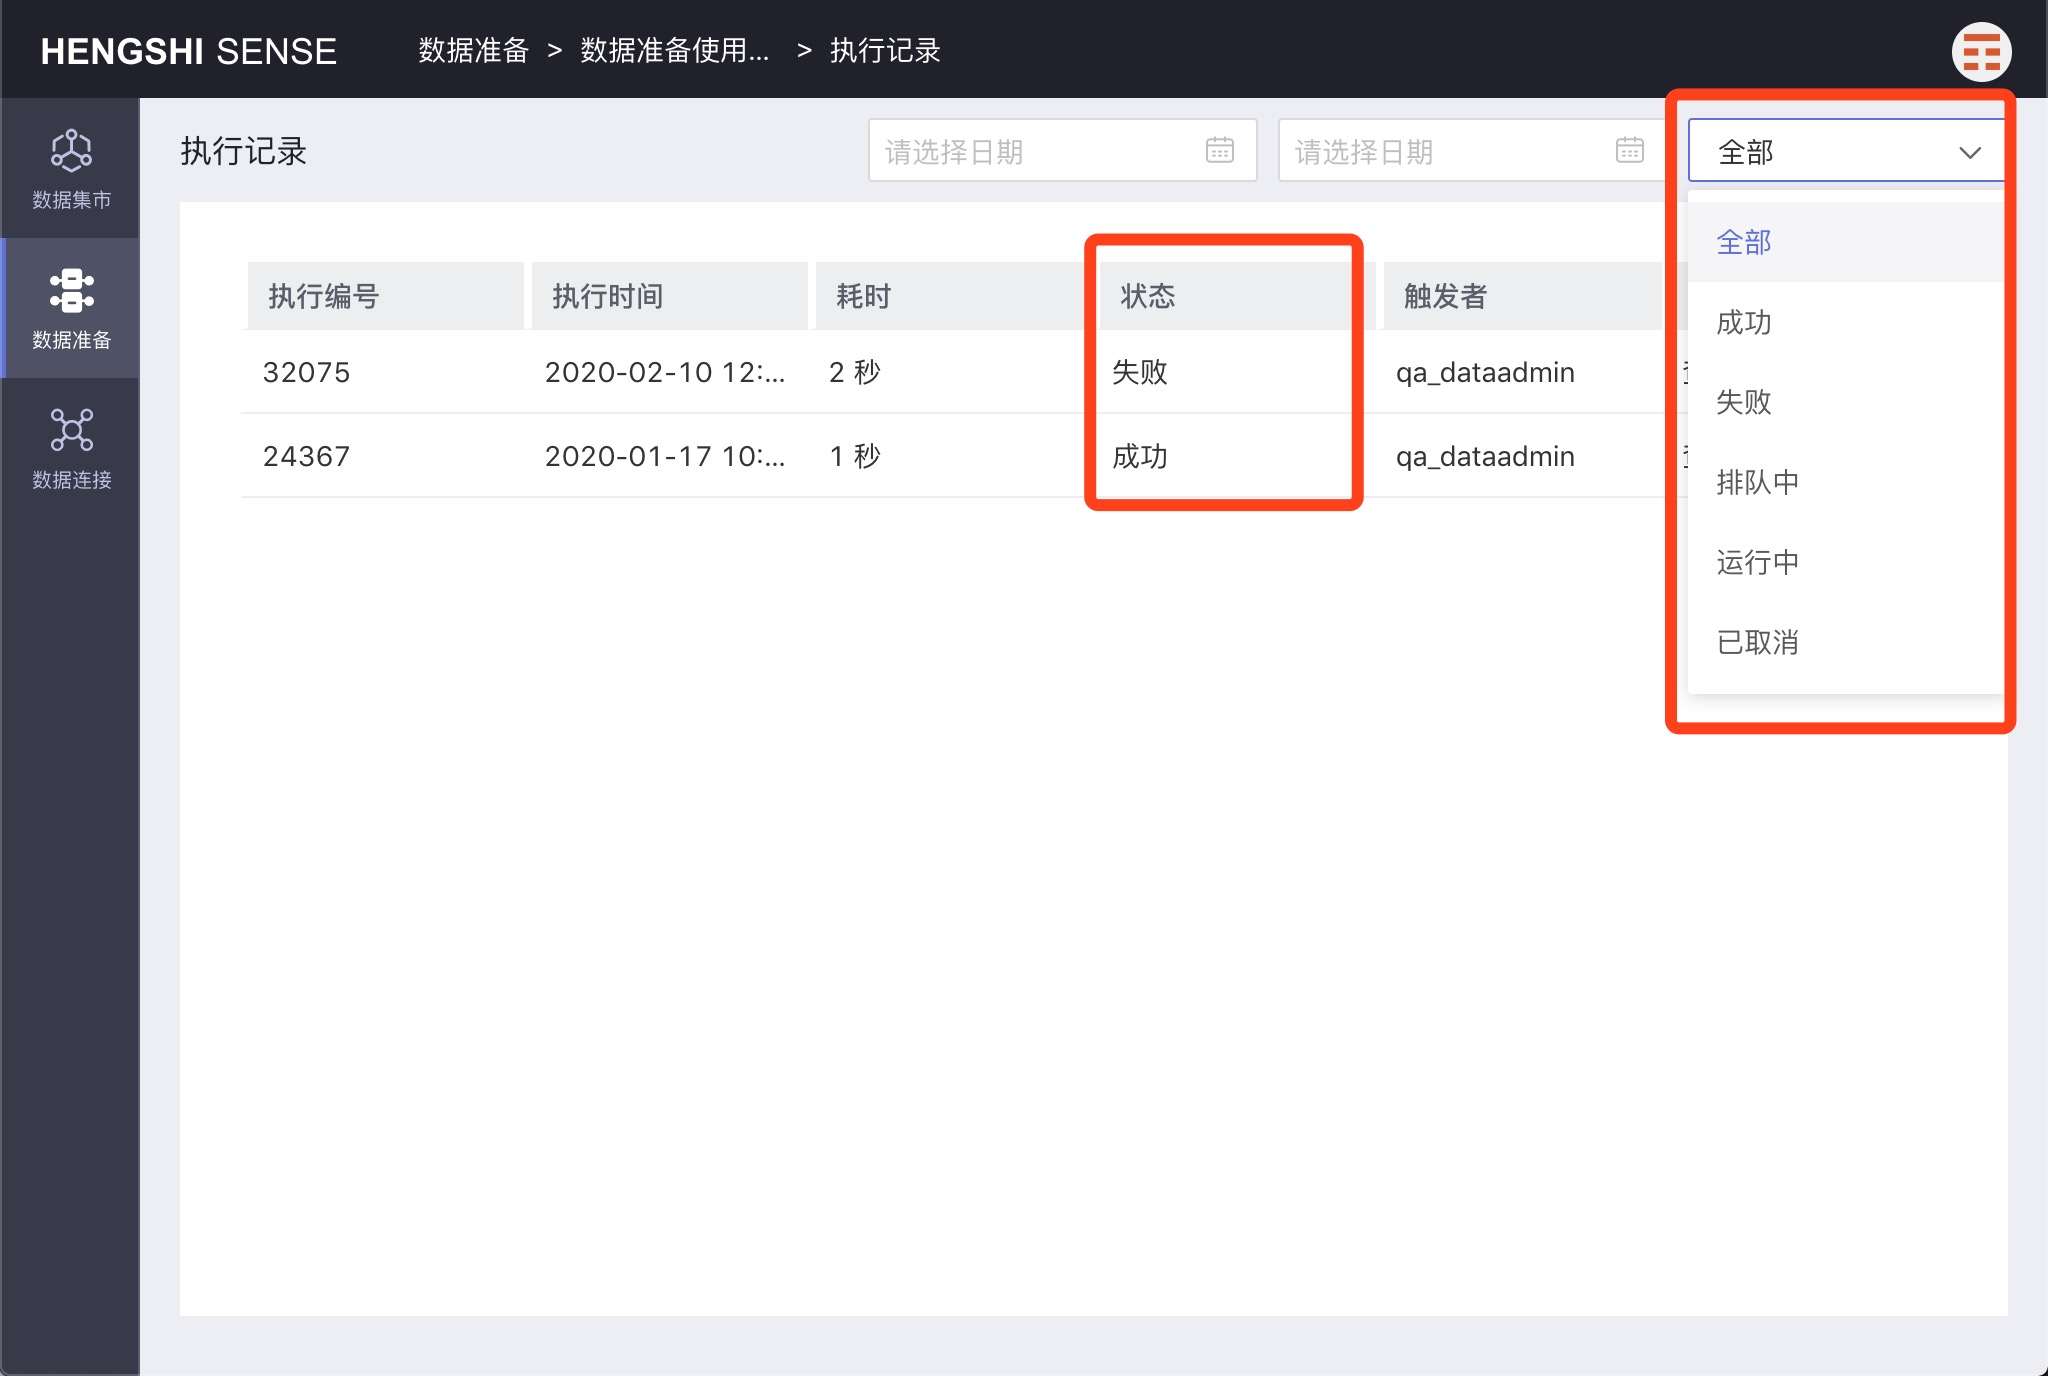
On the Execution Records page, you can search logs by execution time and status.
Search by Execution Time
Search for project execution records by execution time.
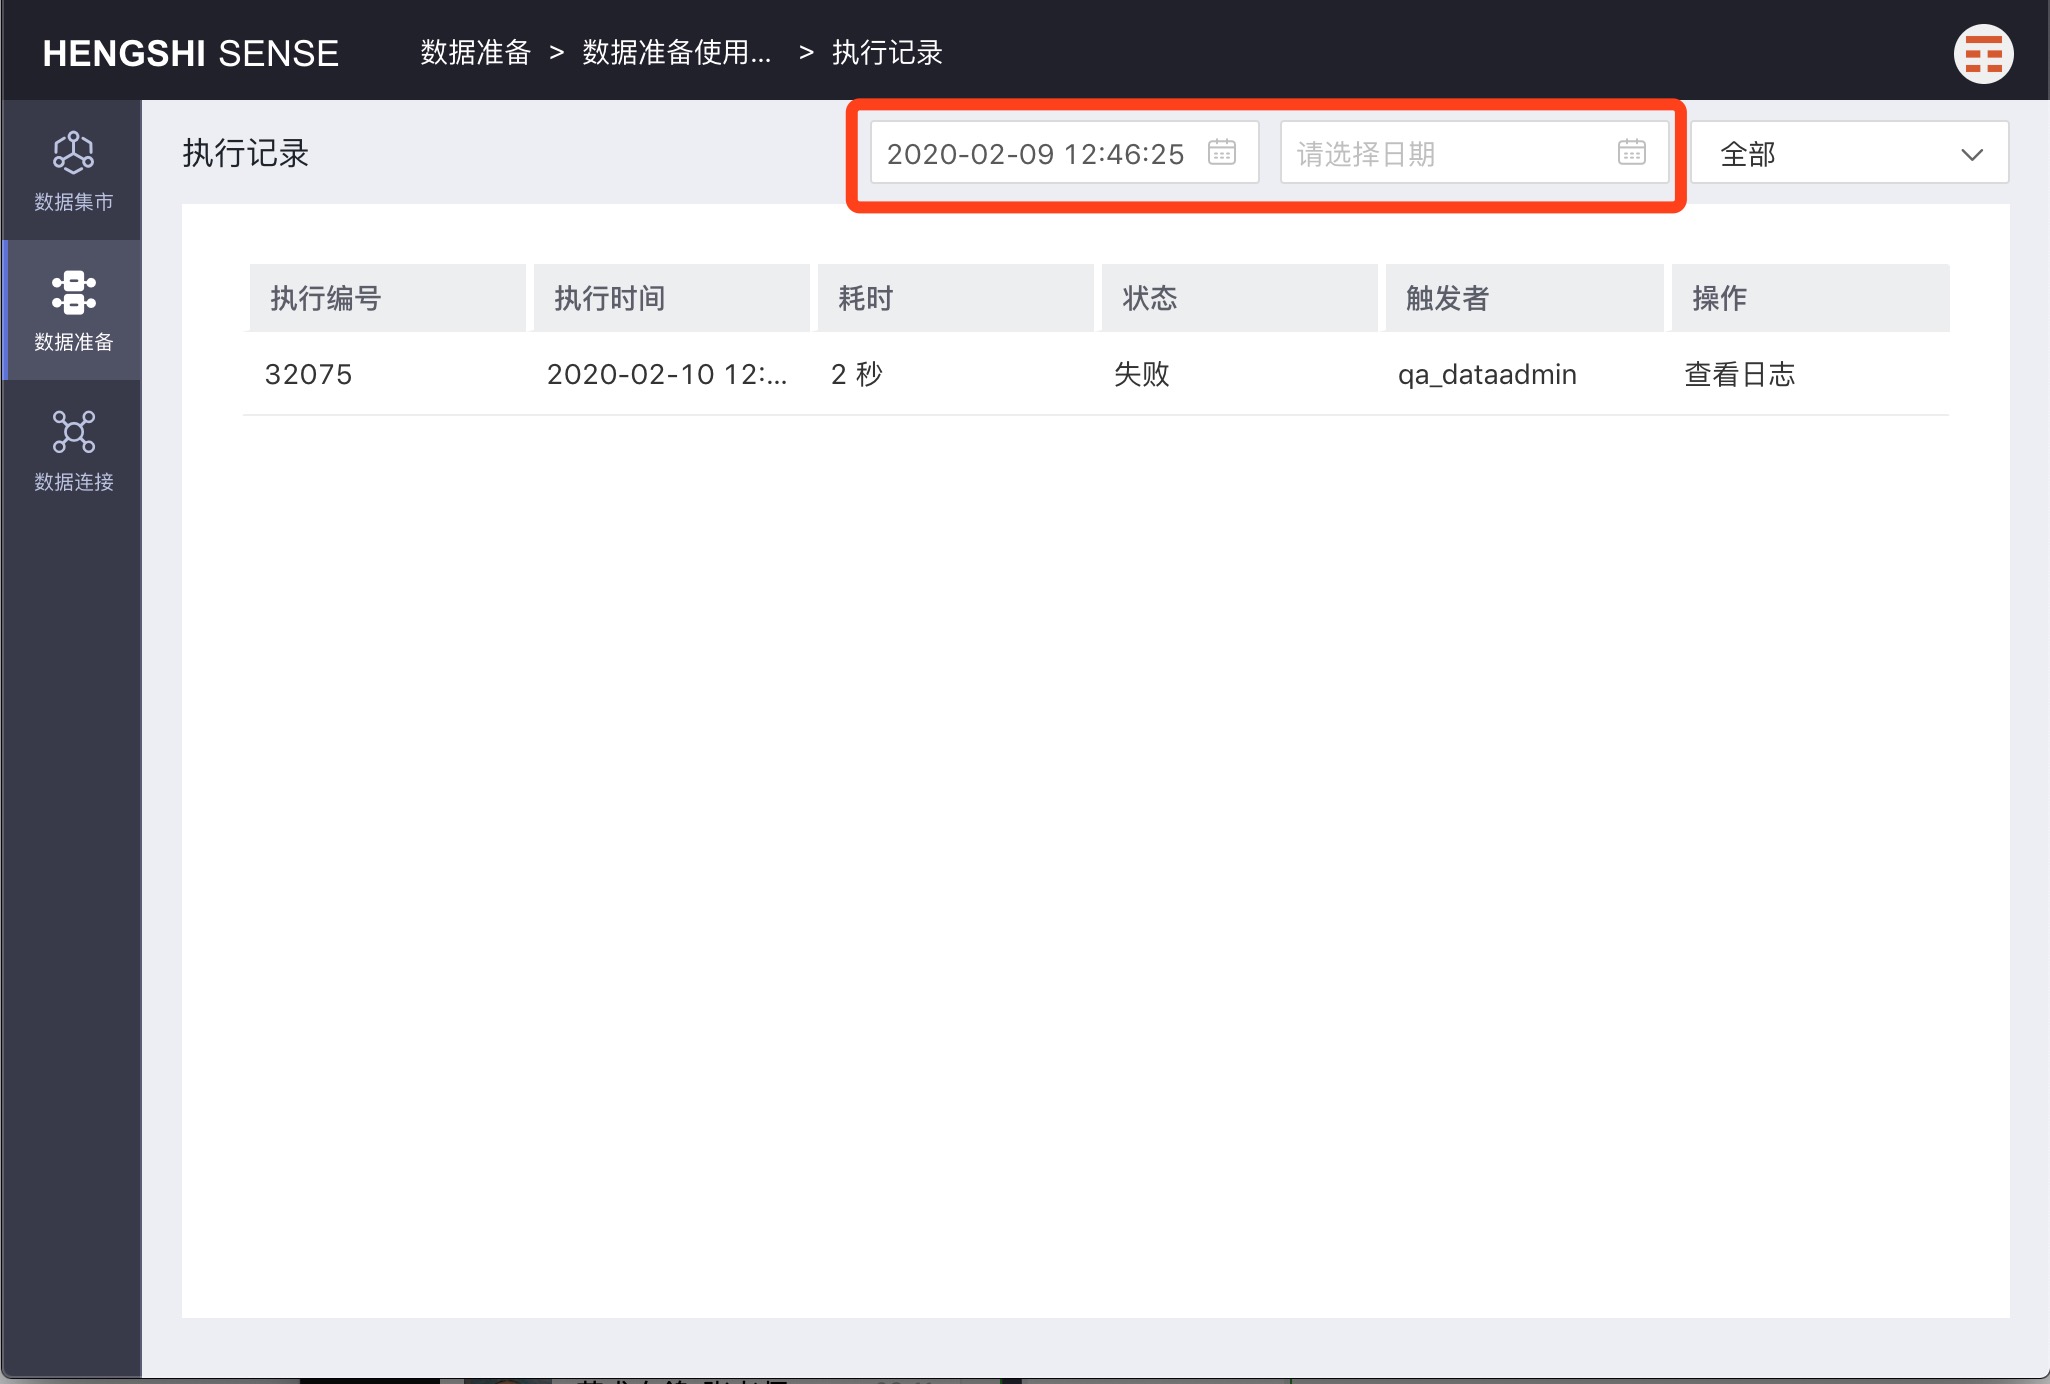
Search by Status
Search for project execution records by status.