Hengshi Documentation
Table of Contents generated with DocToc
QingCloud Quick Start Guide
The Hengshi Analysis Platform has been deployed on the QingCloud platform and is now available for public release. Deployment and operational instructions are as follows:
Deploying an Instance
In the QingCloud Appcenter, select
Hengshi Lite. Click onDeploy to QingCloudand choose a deployment region.In
Basic Settings, configure the name, description, and select the version.In the
Hengshi Analysis Node Settings, configure the number of CPUs, memory size, node resource type, and data disk size.- A minimum of 2 CPU cores and 2GB of memory is required.
- The data disk is used to store user-uploaded file data, with a configurable range of 10G-1000G. The default is 50G, which can be configured according to usage needs, mainly based on the expected size and number of files that users may upload.
- The current version is the Standalone version with a node count of 1, which cannot be modified.
In
Network Settings, select a private network.
Creating Resources
After submitting the instance configuration above, the creation of cluster resources begins.
During the creation process, you can refresh your browser to view changes in node status and service status. If there is an anomaly in the node status or service status, try redeploying the instance.
After the cluster is created, you can assign a public IP to the cluster VPC and configure port forwarding. When setting up port forwarding rules, export the internal network port
3000.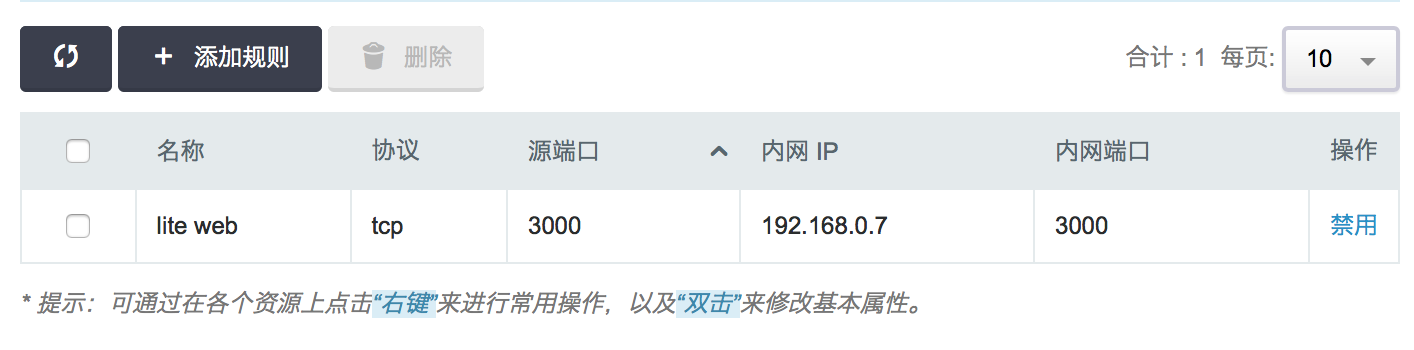
Also, in the firewall outbound rules, allow port
3000.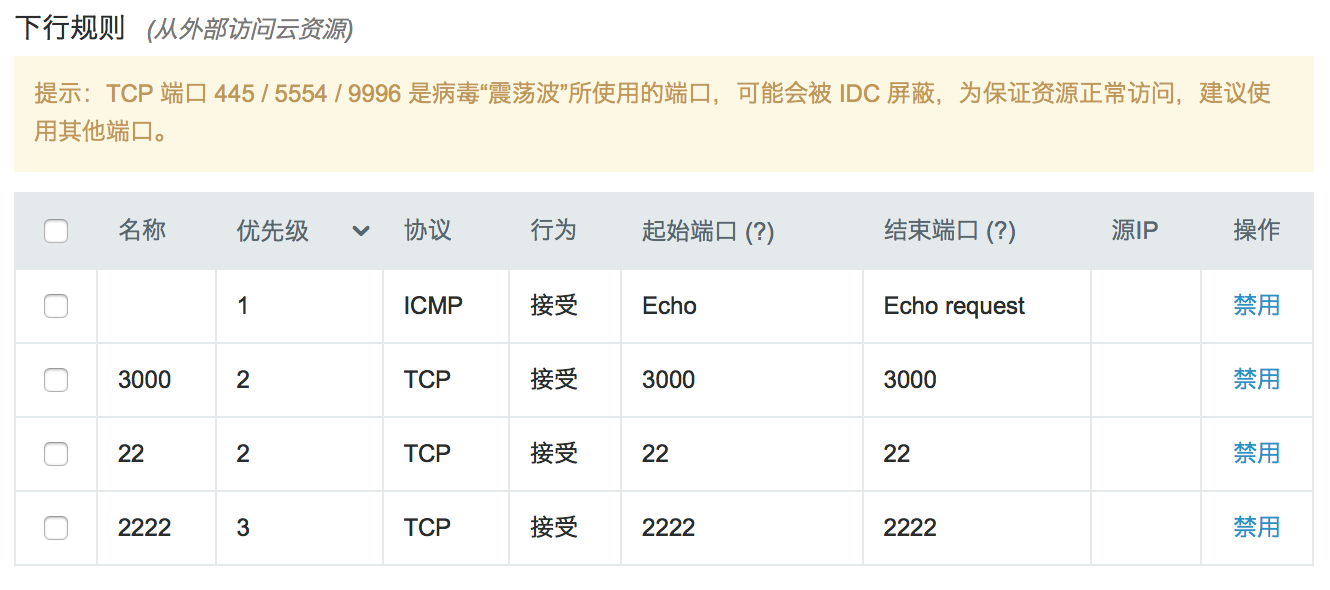
After modification takes effect, you can access the page via
http://<Public IP>:3000/. You can also use the VPN service of VPC to access the private IP by importing the VPN configuration file.
After the system deployment is completed, you can refer to Quick Start for further operations.