Hengshi Documentation
Initialization and Subsequent Operations of the HENGSHI SENSE 3.0 Version System
After successful installation of the system, the initial state is as shown in the image below. It is necessary to first create a system administrator:

Enter a username, email, and password, and click create. The system administrator account is successfully created.
After the system administrator is created successfully, the page redirects to the login page, as shown in the image below:

Enter the username or email and password of the system administrator that was created and click login to enter the system.
After the system administrator logs into the system, the page is shown as below, where various system settings can be configured:
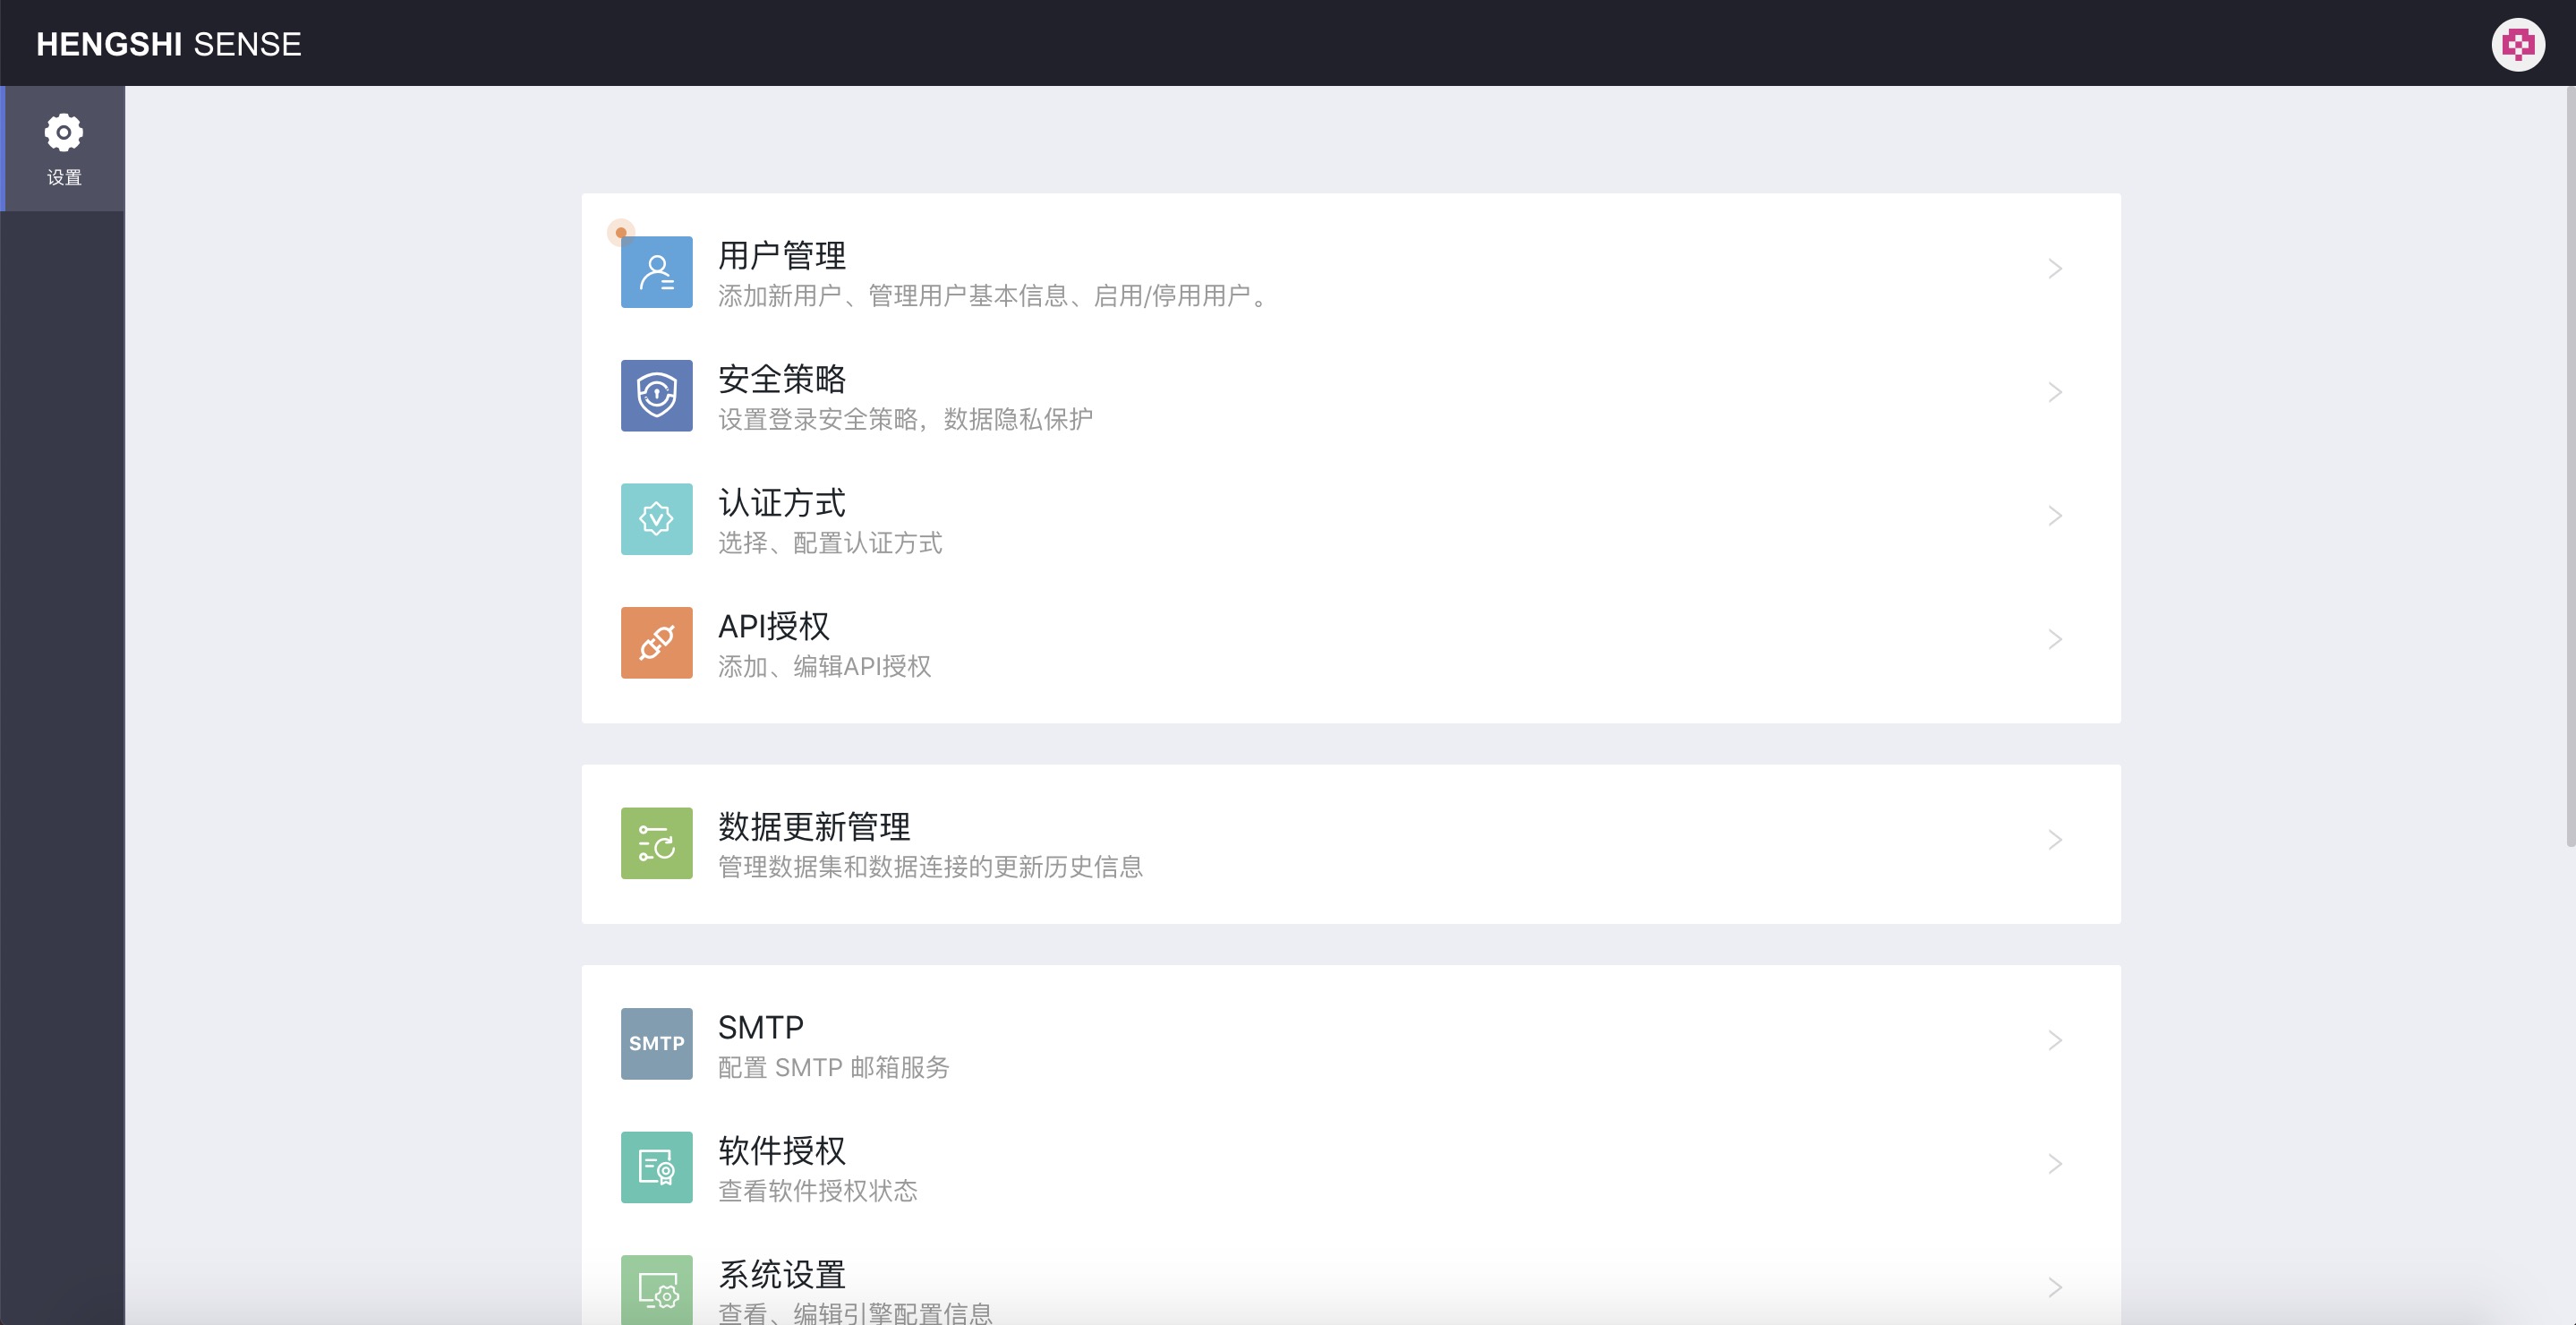
First: Configuring Users
Version Information: User configuration information. The content of this section has not changed in version 3.0 and can refer to the content of this section for version 2.X user configuration.
First, add users among various configuration items, with information prompts as shown in the image below:
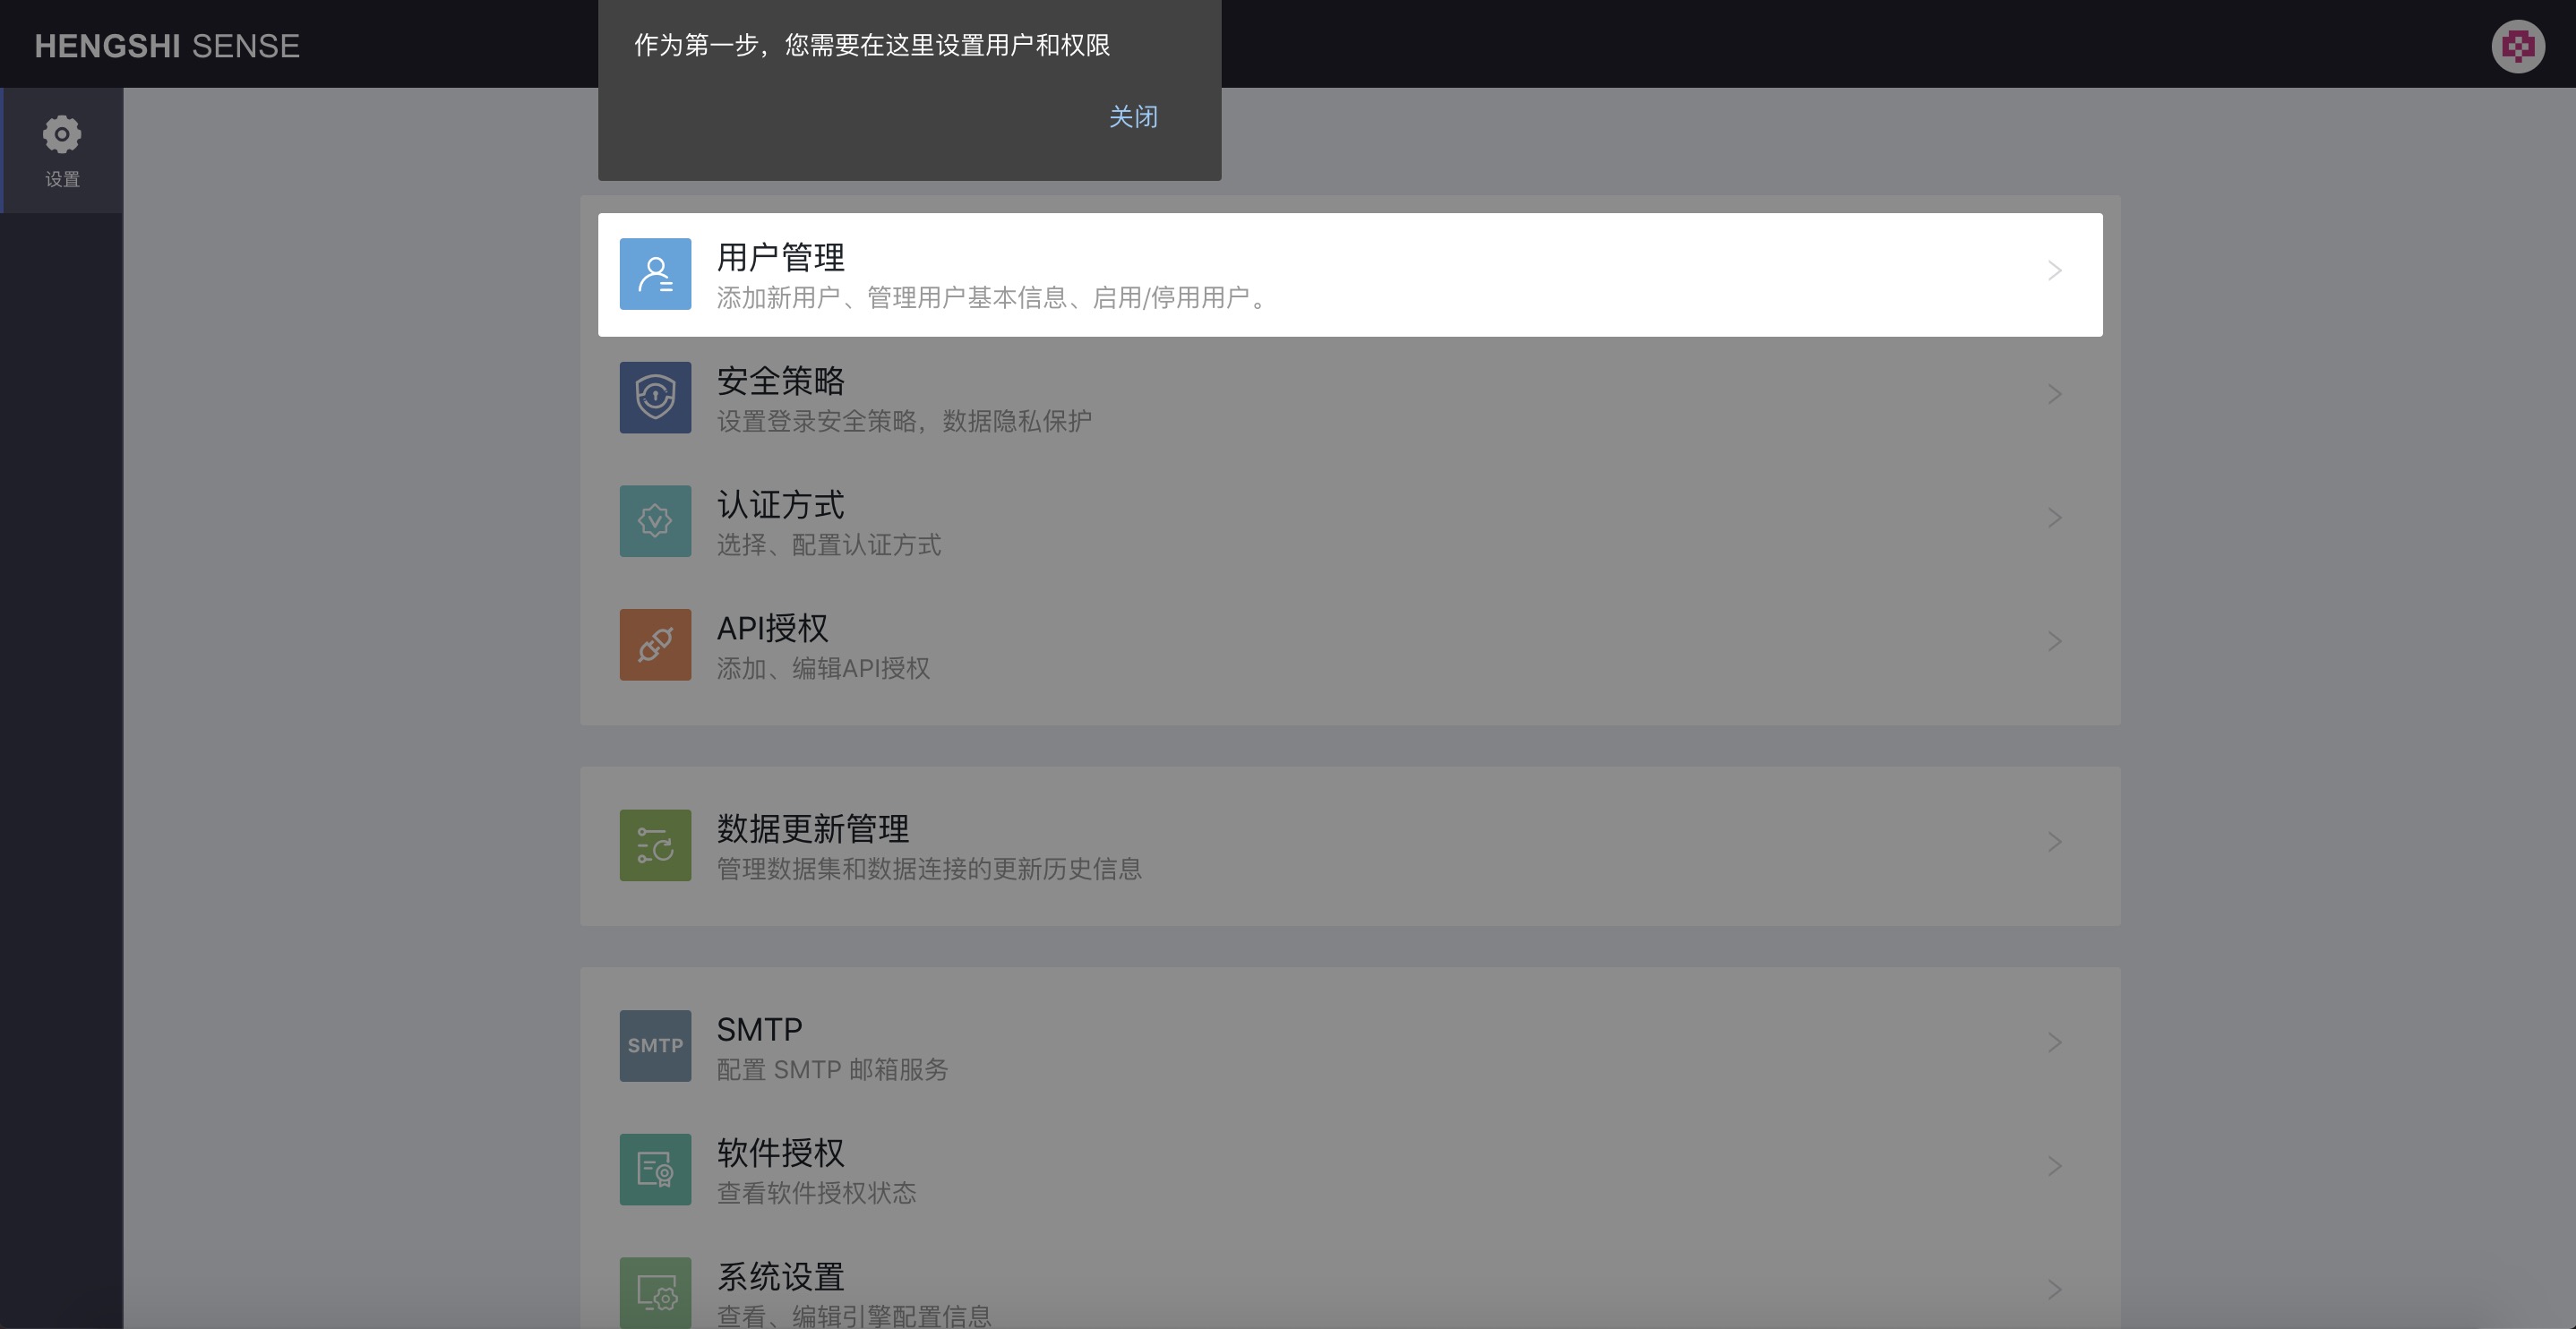
Creating New Users
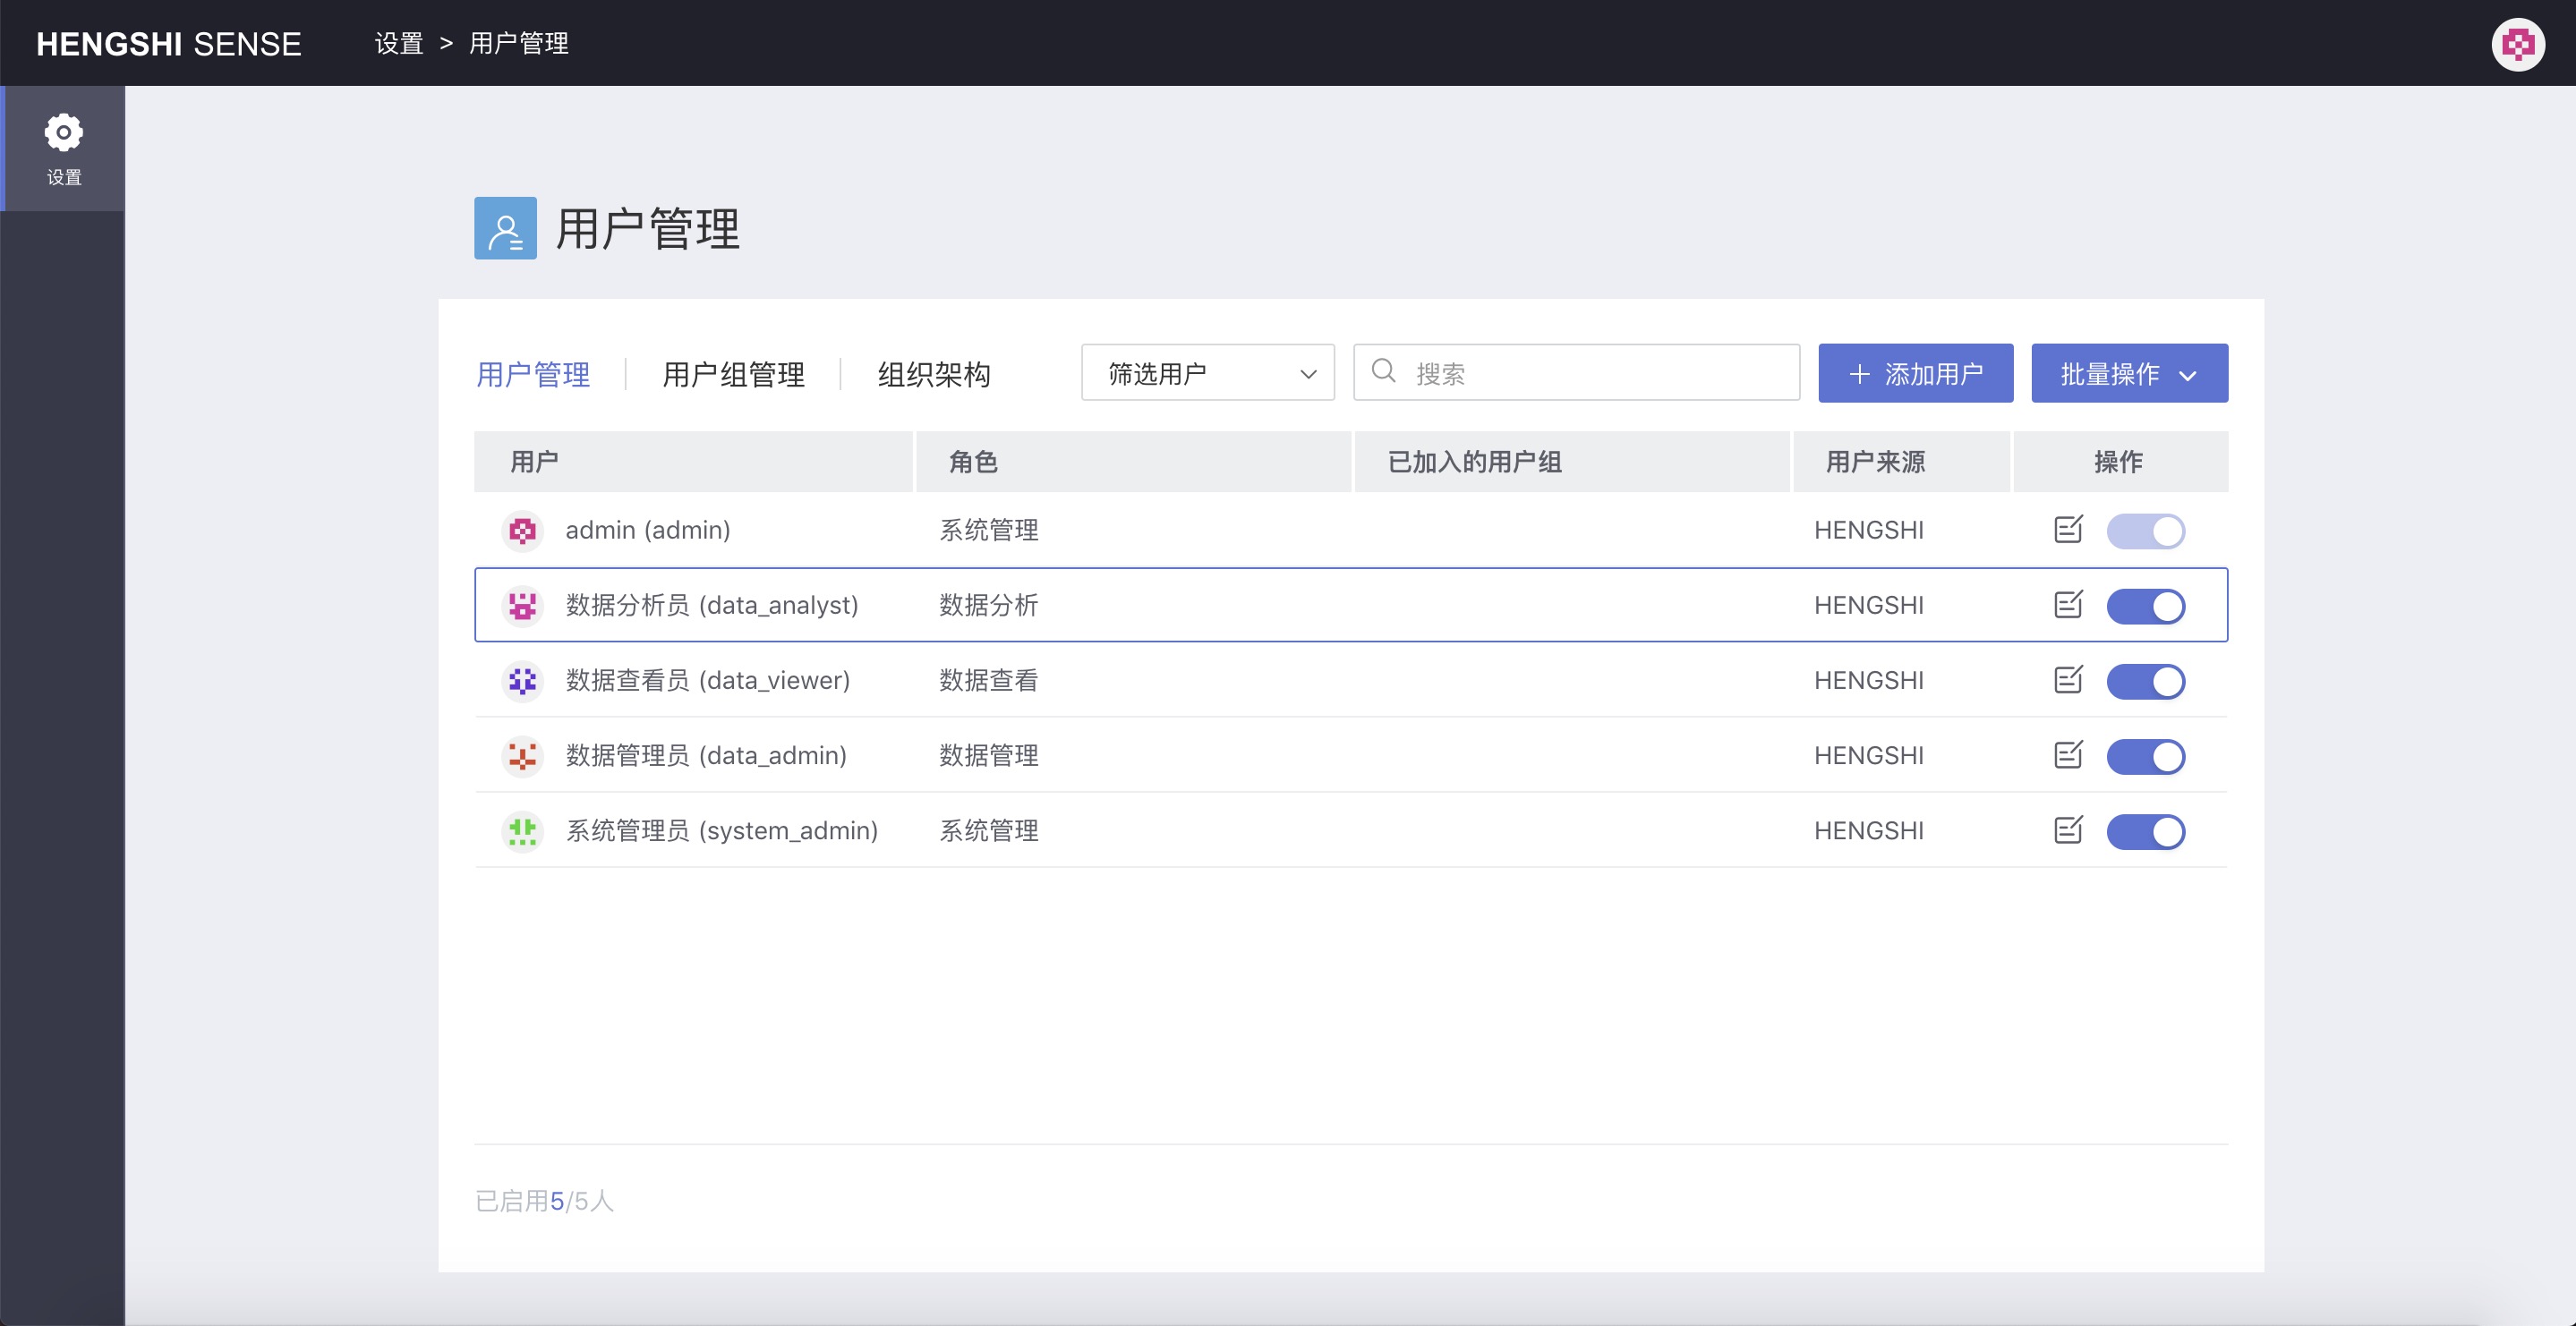
Click the User Management button to configure users:

As shown in the above image, click Add User to add a new user, and the Add User information setting window pops up:

As shown above, the required fields are username, password, and role:
- Login name is a required field, indicating the uniqueness of a user. Subsequently, the system can be accessed by username + password.
- Email is a required field, indicating the uniqueness of a user. Subsequently, the system can be accessed by email + password.
- Role is a required field; by default,
Data Analysisis selected, but you can select one or multiple roles for the user by checking the checkboxes in front of each role. When adding a user, an initial password is generated.
Optional fields are username, phone number, and remark information:
- Username: Display name shown in various prompts; not unique.
- Phone number: Not unique.
- Remark information.
Additionally, when creating a new user, the system generates an initial password for the user. Click the Copy button to copy this password.
Restrictions:
- Login name: Cannot contain special characters or start with a number, and must not be duplicated.
- Email: Must enter a correct email address, and it must not be duplicated.
Note:
- Initial password: User identity must be verified by username + password or email + password when logging in.
- User role: The default value is Data Analysis, which needs to be revised to a suitable role.
As mentioned above, after configuring the user information, click Add to successfully create the user. In the current system, create four users based on different role functions:
- data_analyst: Data Analyst
- data_viewer: Data Viewer
- data_admin: Data Administrator
- system_admin: System Administrator
Modifying Users
Modify User Information
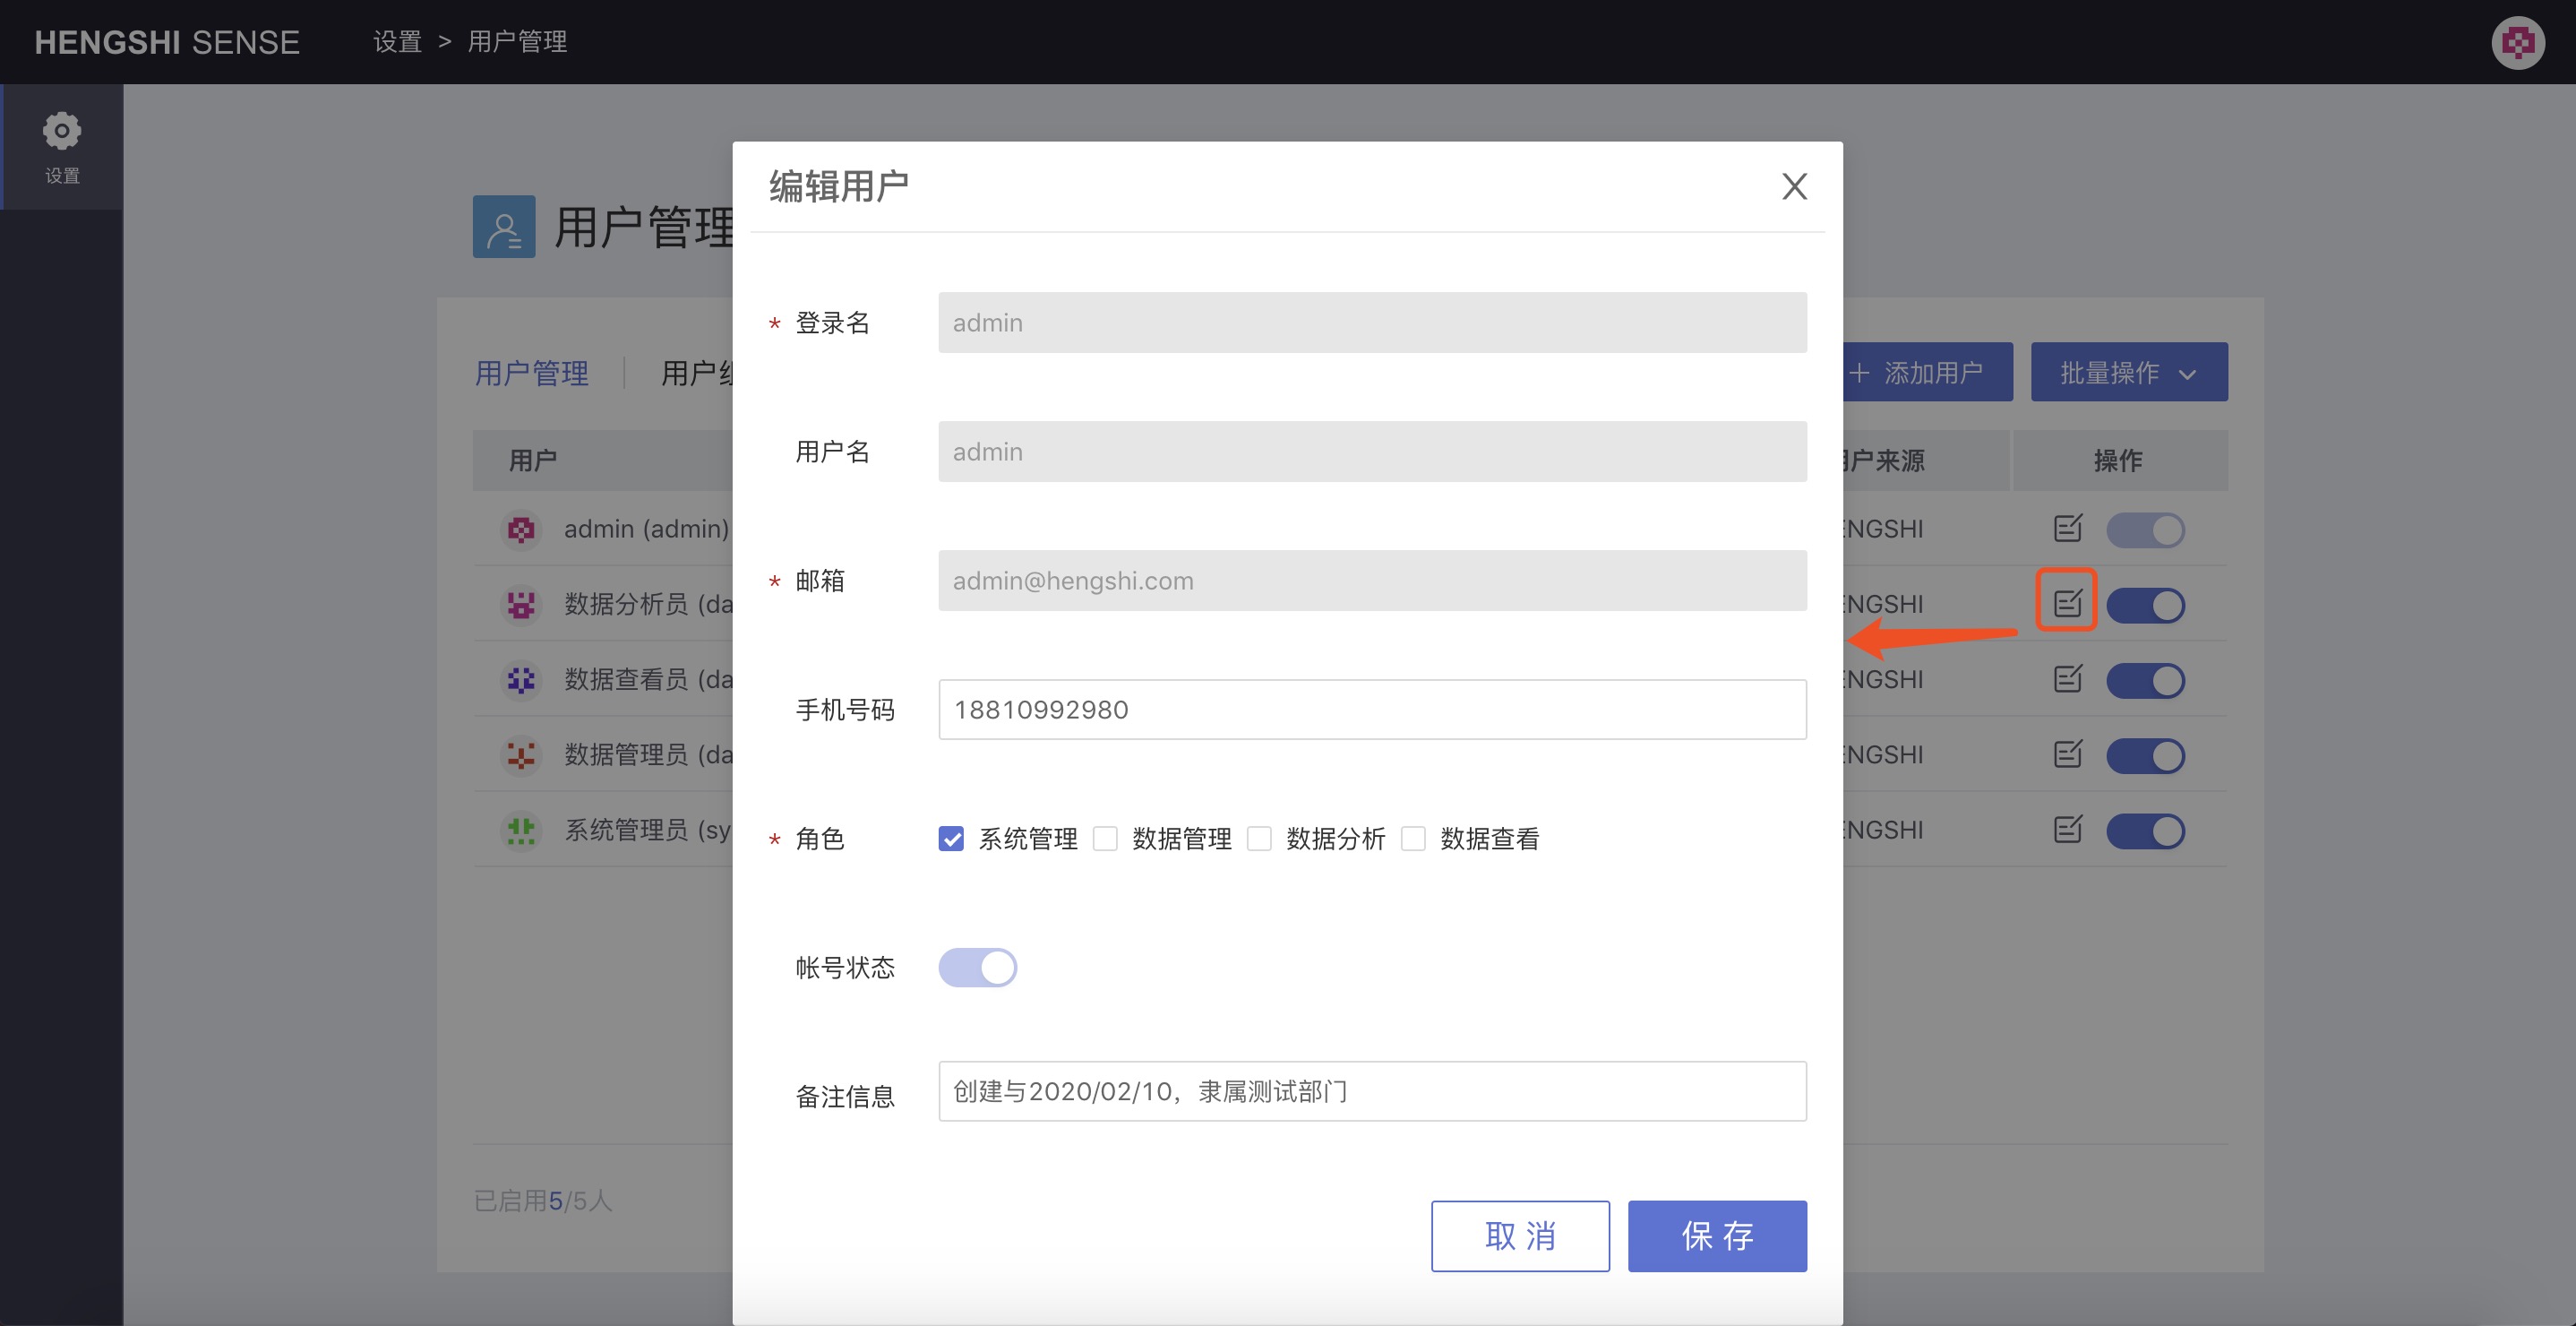
Modifiable: phone number, account status (disabled/enabled), remark information.
User Enable/Disable
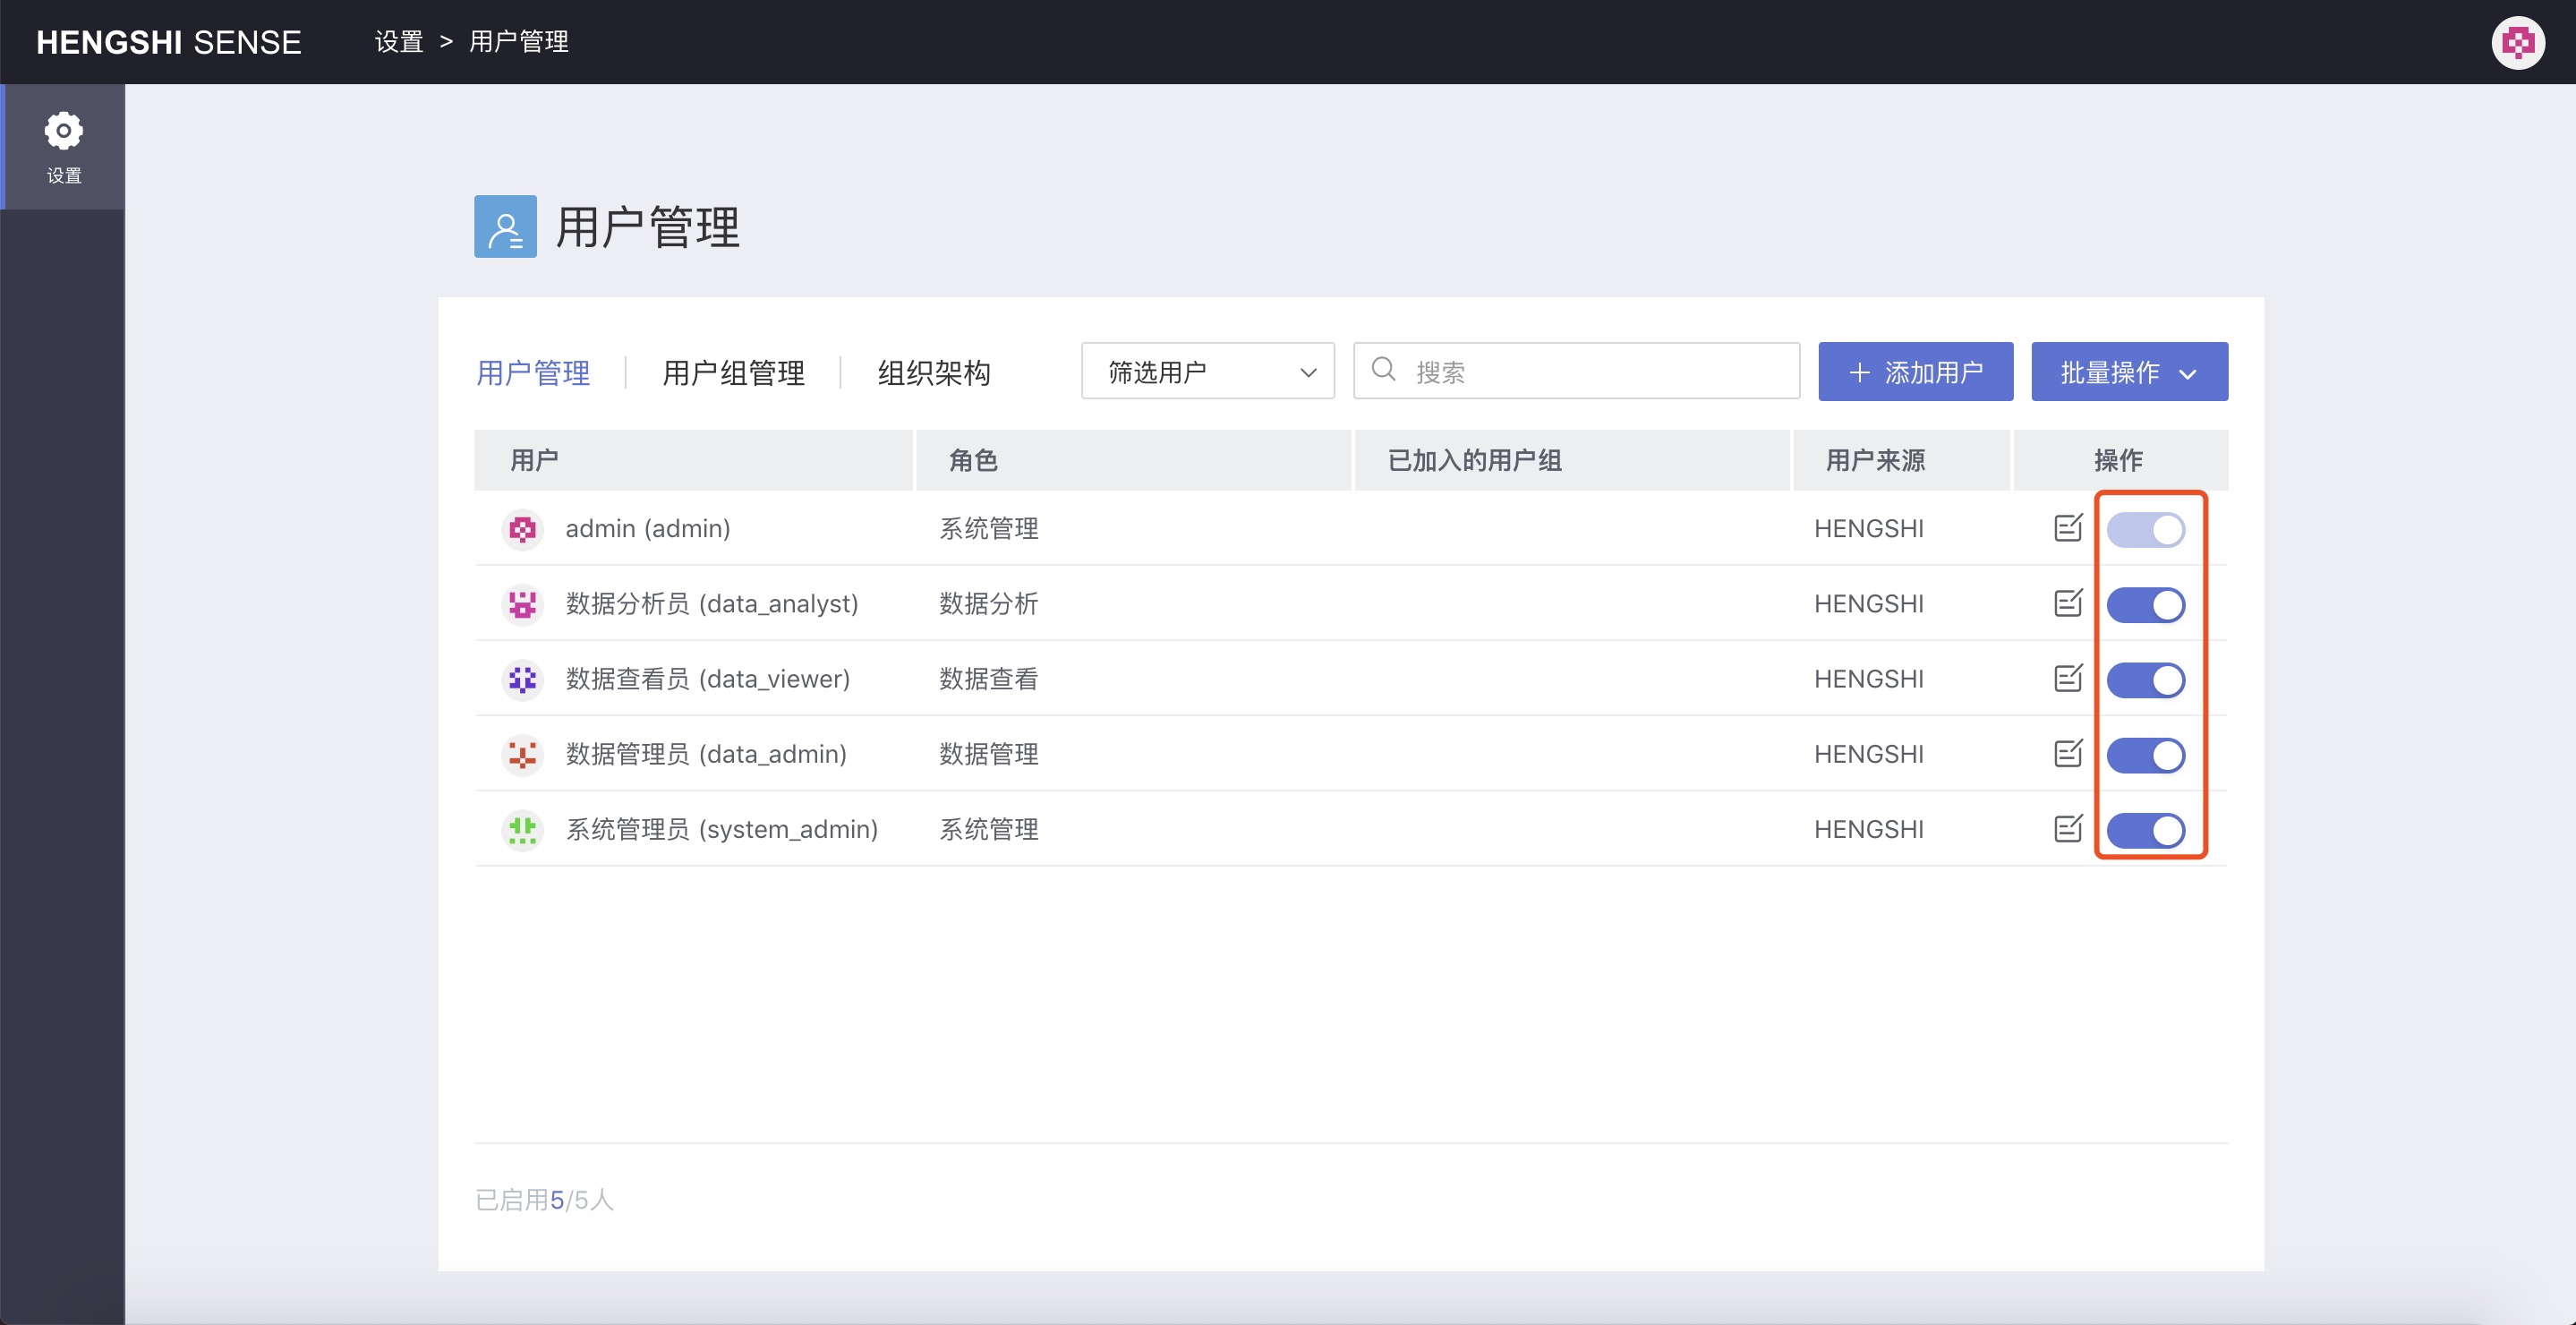
Clicking the enable/disable button in
Operationscan enable or disable the account. This has the same meaning as theAccount Statusedited during user info modification.Batch Operations
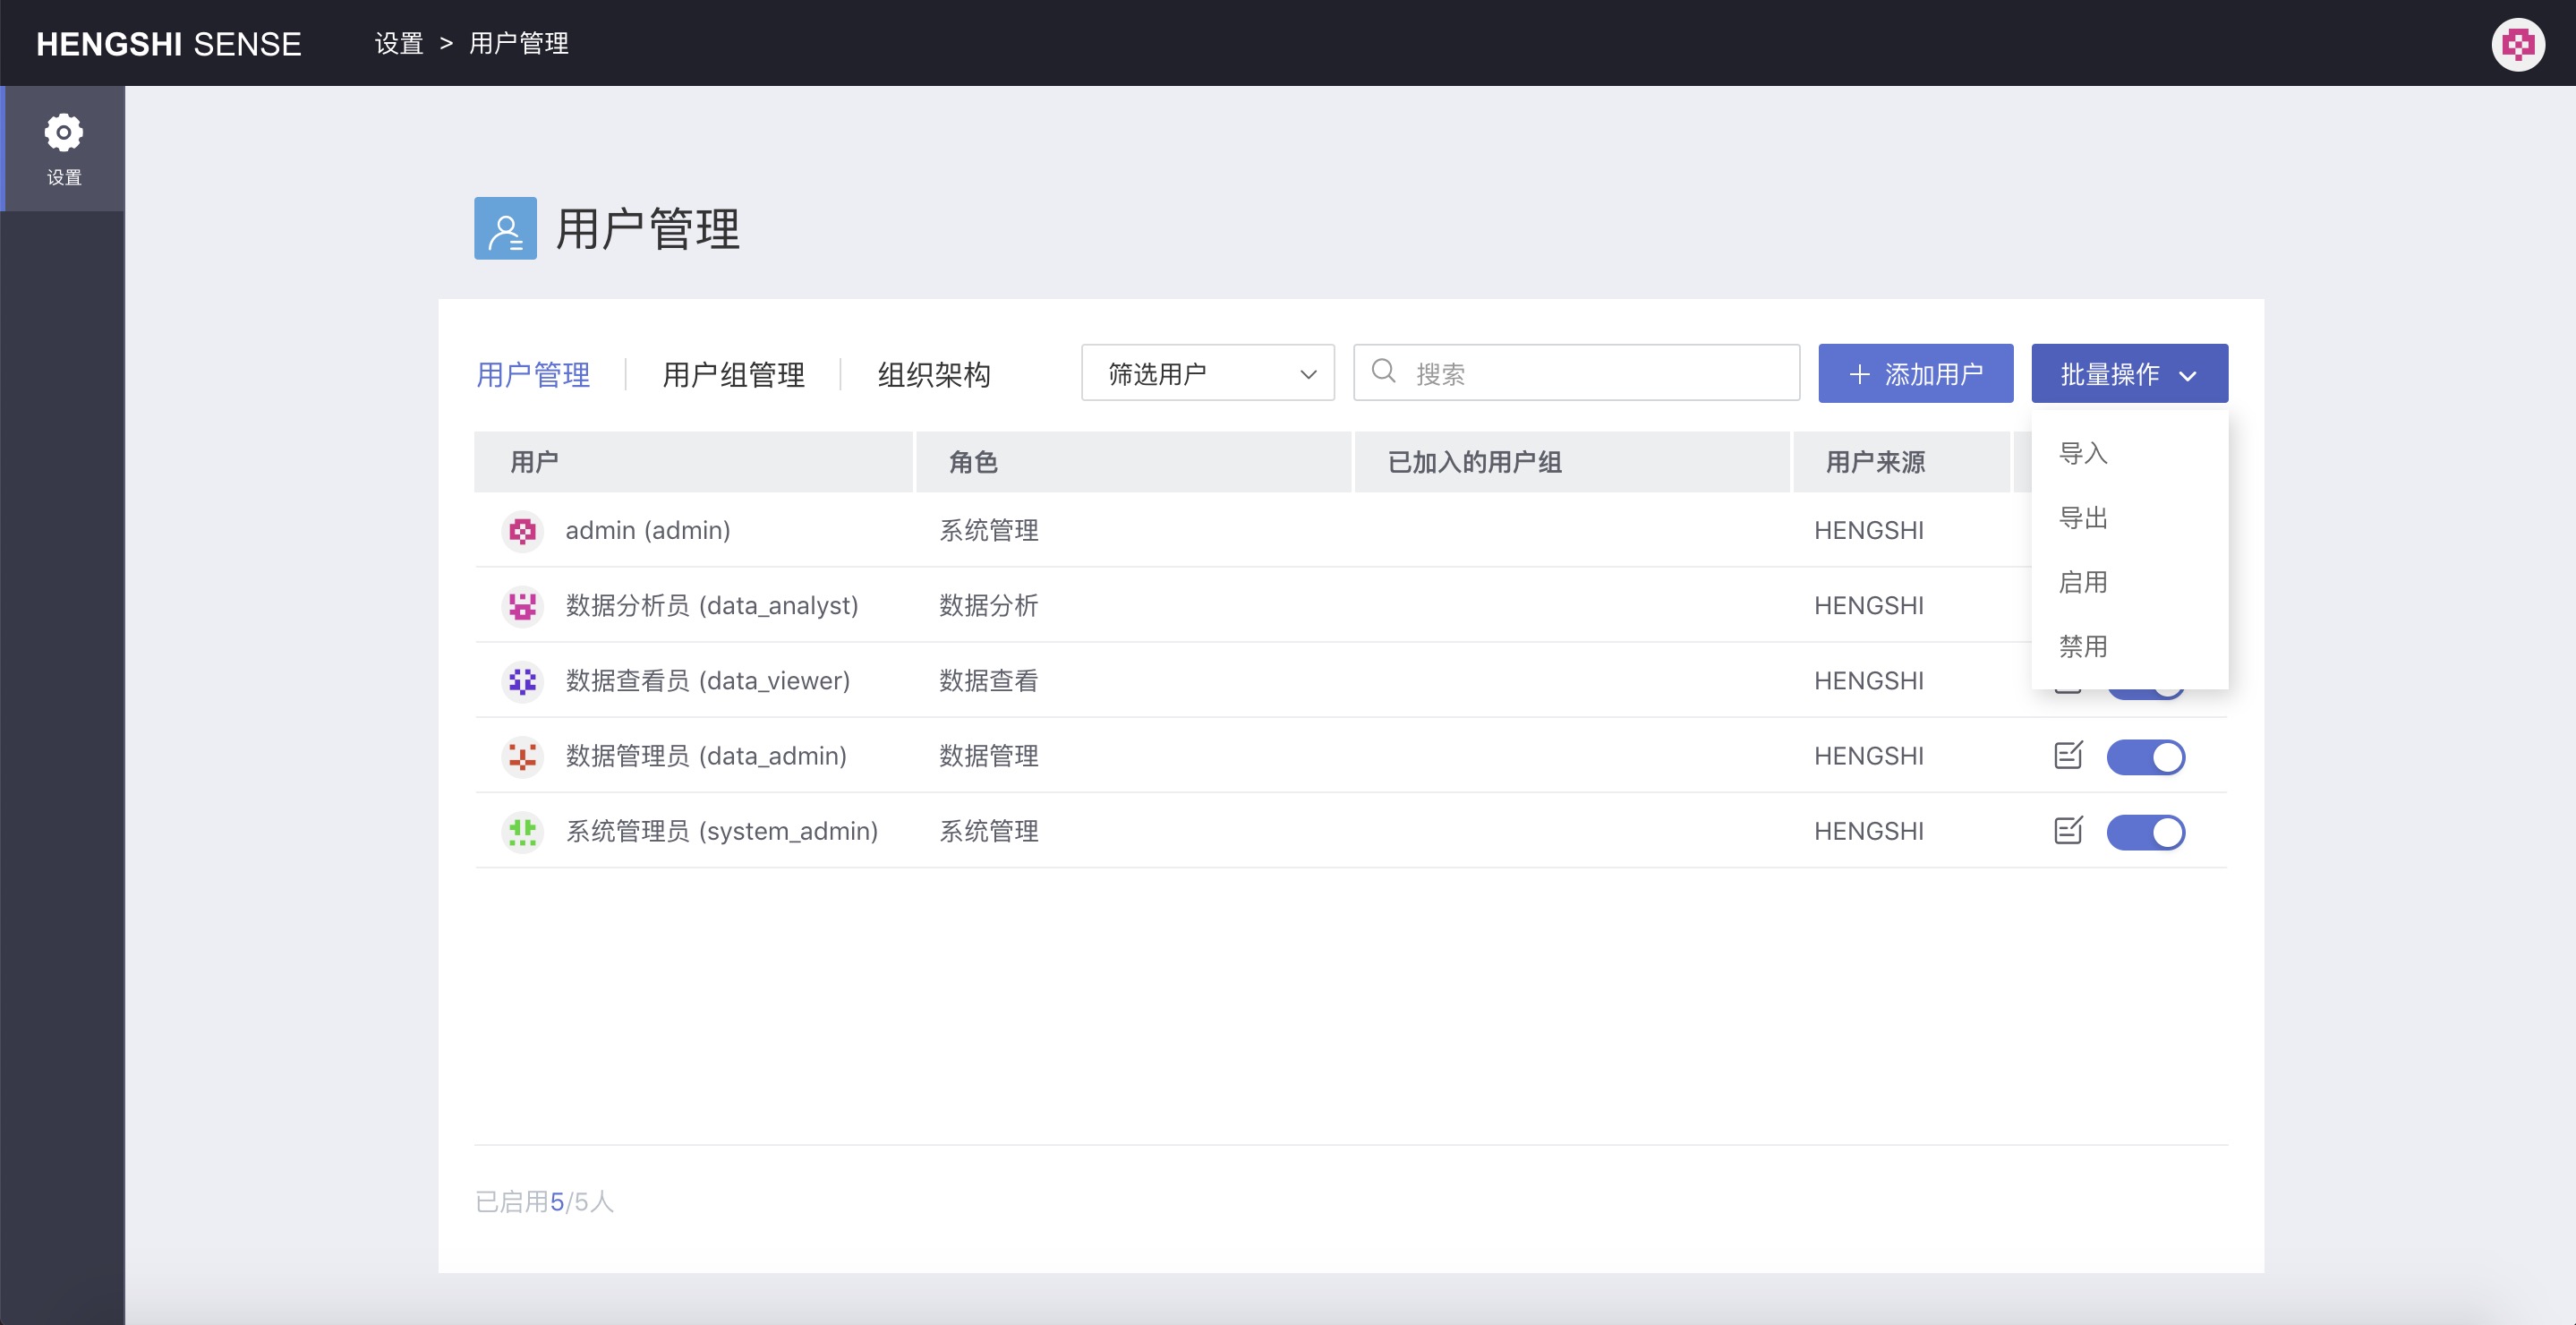
Import, Export: Users can be exported in bulk, and users can be uploaded in bulk. For specific operations, see User Management and Batch Operations.
For batch import operations of users, take note:
- Information that can be modified:
- Username (name)
- User attributes ()
- User group information (organizations)
- User password (password)
- Role (roles)
- User information that cannot be updated:
- Username (login_name)
- Email (Email)
- Update principle when uploading:
- If either login_name or email matches an existing user:
- Ignore that row of information from the uploaded file.
- If neither login_name nor email matches an existing user:
- If the uploaded file contains an id:
- If the id does not match any existing user: create a new user.
- If the id matches an existing user: update modifiable information.
- If the uploaded file does not contain an id column:
- Create a new user.
- If the password column in the upload file is empty:
- For new users created: the default password is 'hs2019'.
- For users being updated: maintain the existing password in the database.
- Upload Suggestions:
- Don't include the id column to prevent newly created user IDs from being the same as existing users, resulting in user information updates.
Enable, Disable: The filtered users can be enabled or disabled in bulk.
New User Login
When a user logs into the system for the first time, the password must be reset. Here is an example with the user data_analyst:
Enter the username and password in the login window:

After clicking login, you are redirected to the login page, as shown below:
Second: Data Connections
Version Information: Data connections. The content of this section has not changed in version 3.0 and can also refer to version 2.X for user configuration.
Before carrying out a series of data processing operations, you first need to create a new data connection. Data connections can only be configured by users with the Data Management role. Other role accounts cannot create connections.
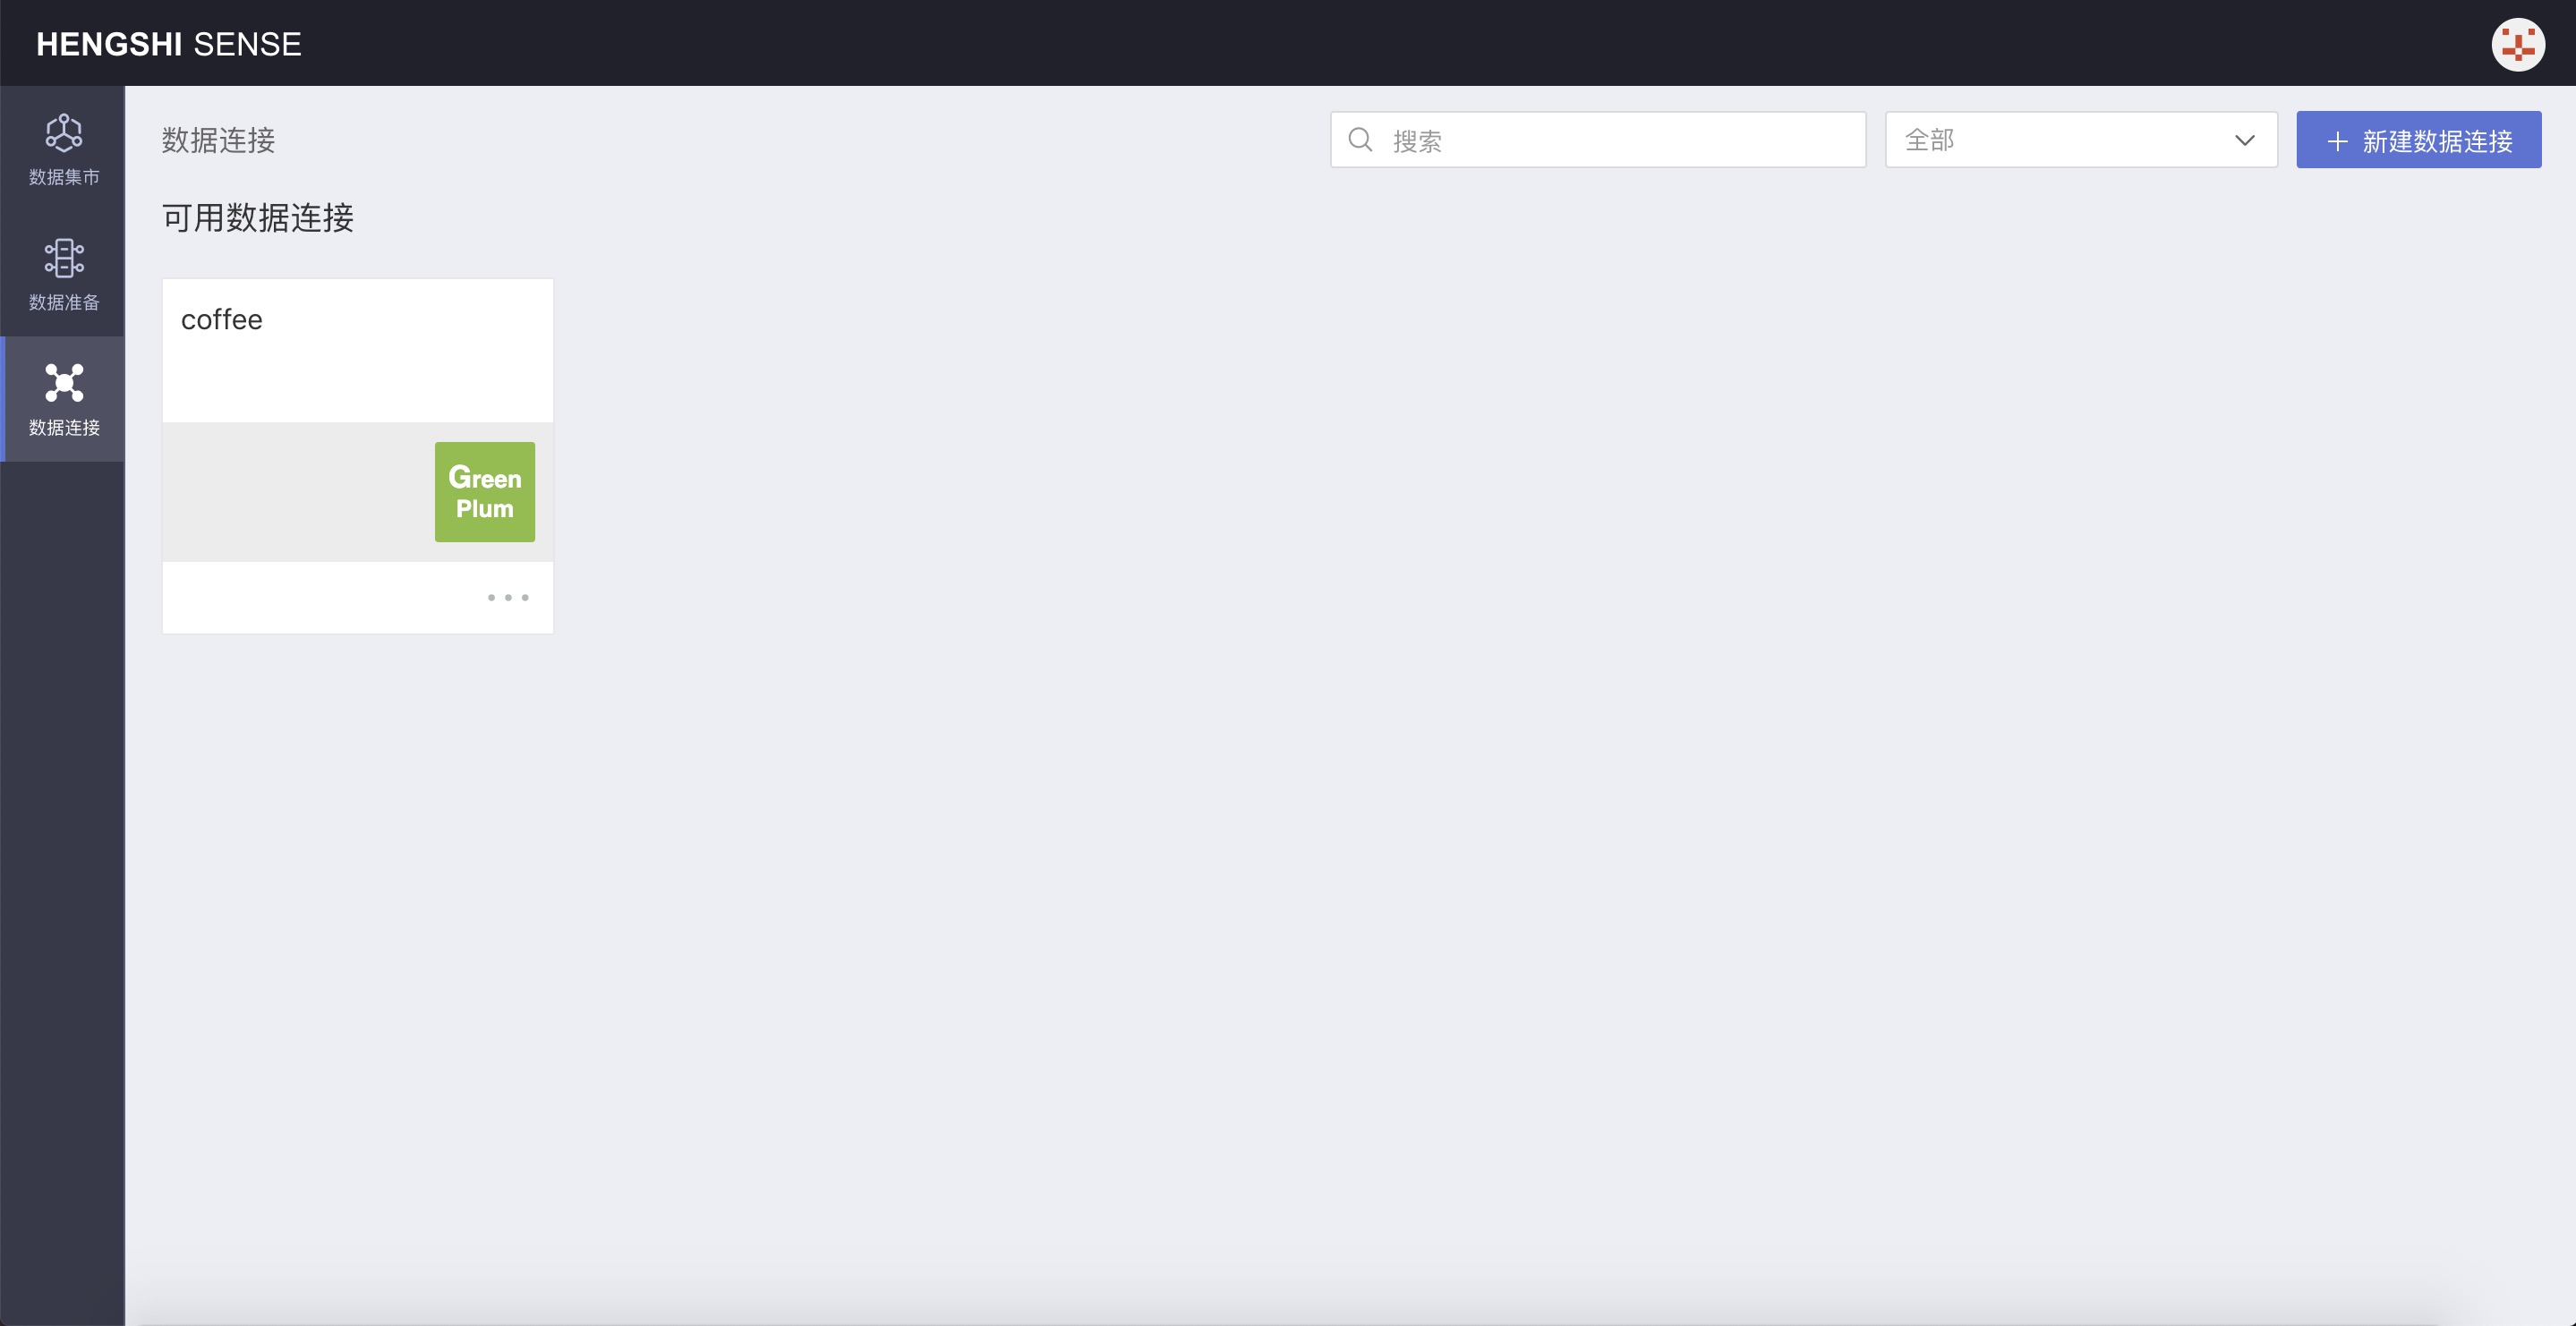
Below, using the Data Administrator (data_admin) as an example, after logging into the system, click Data Connections:
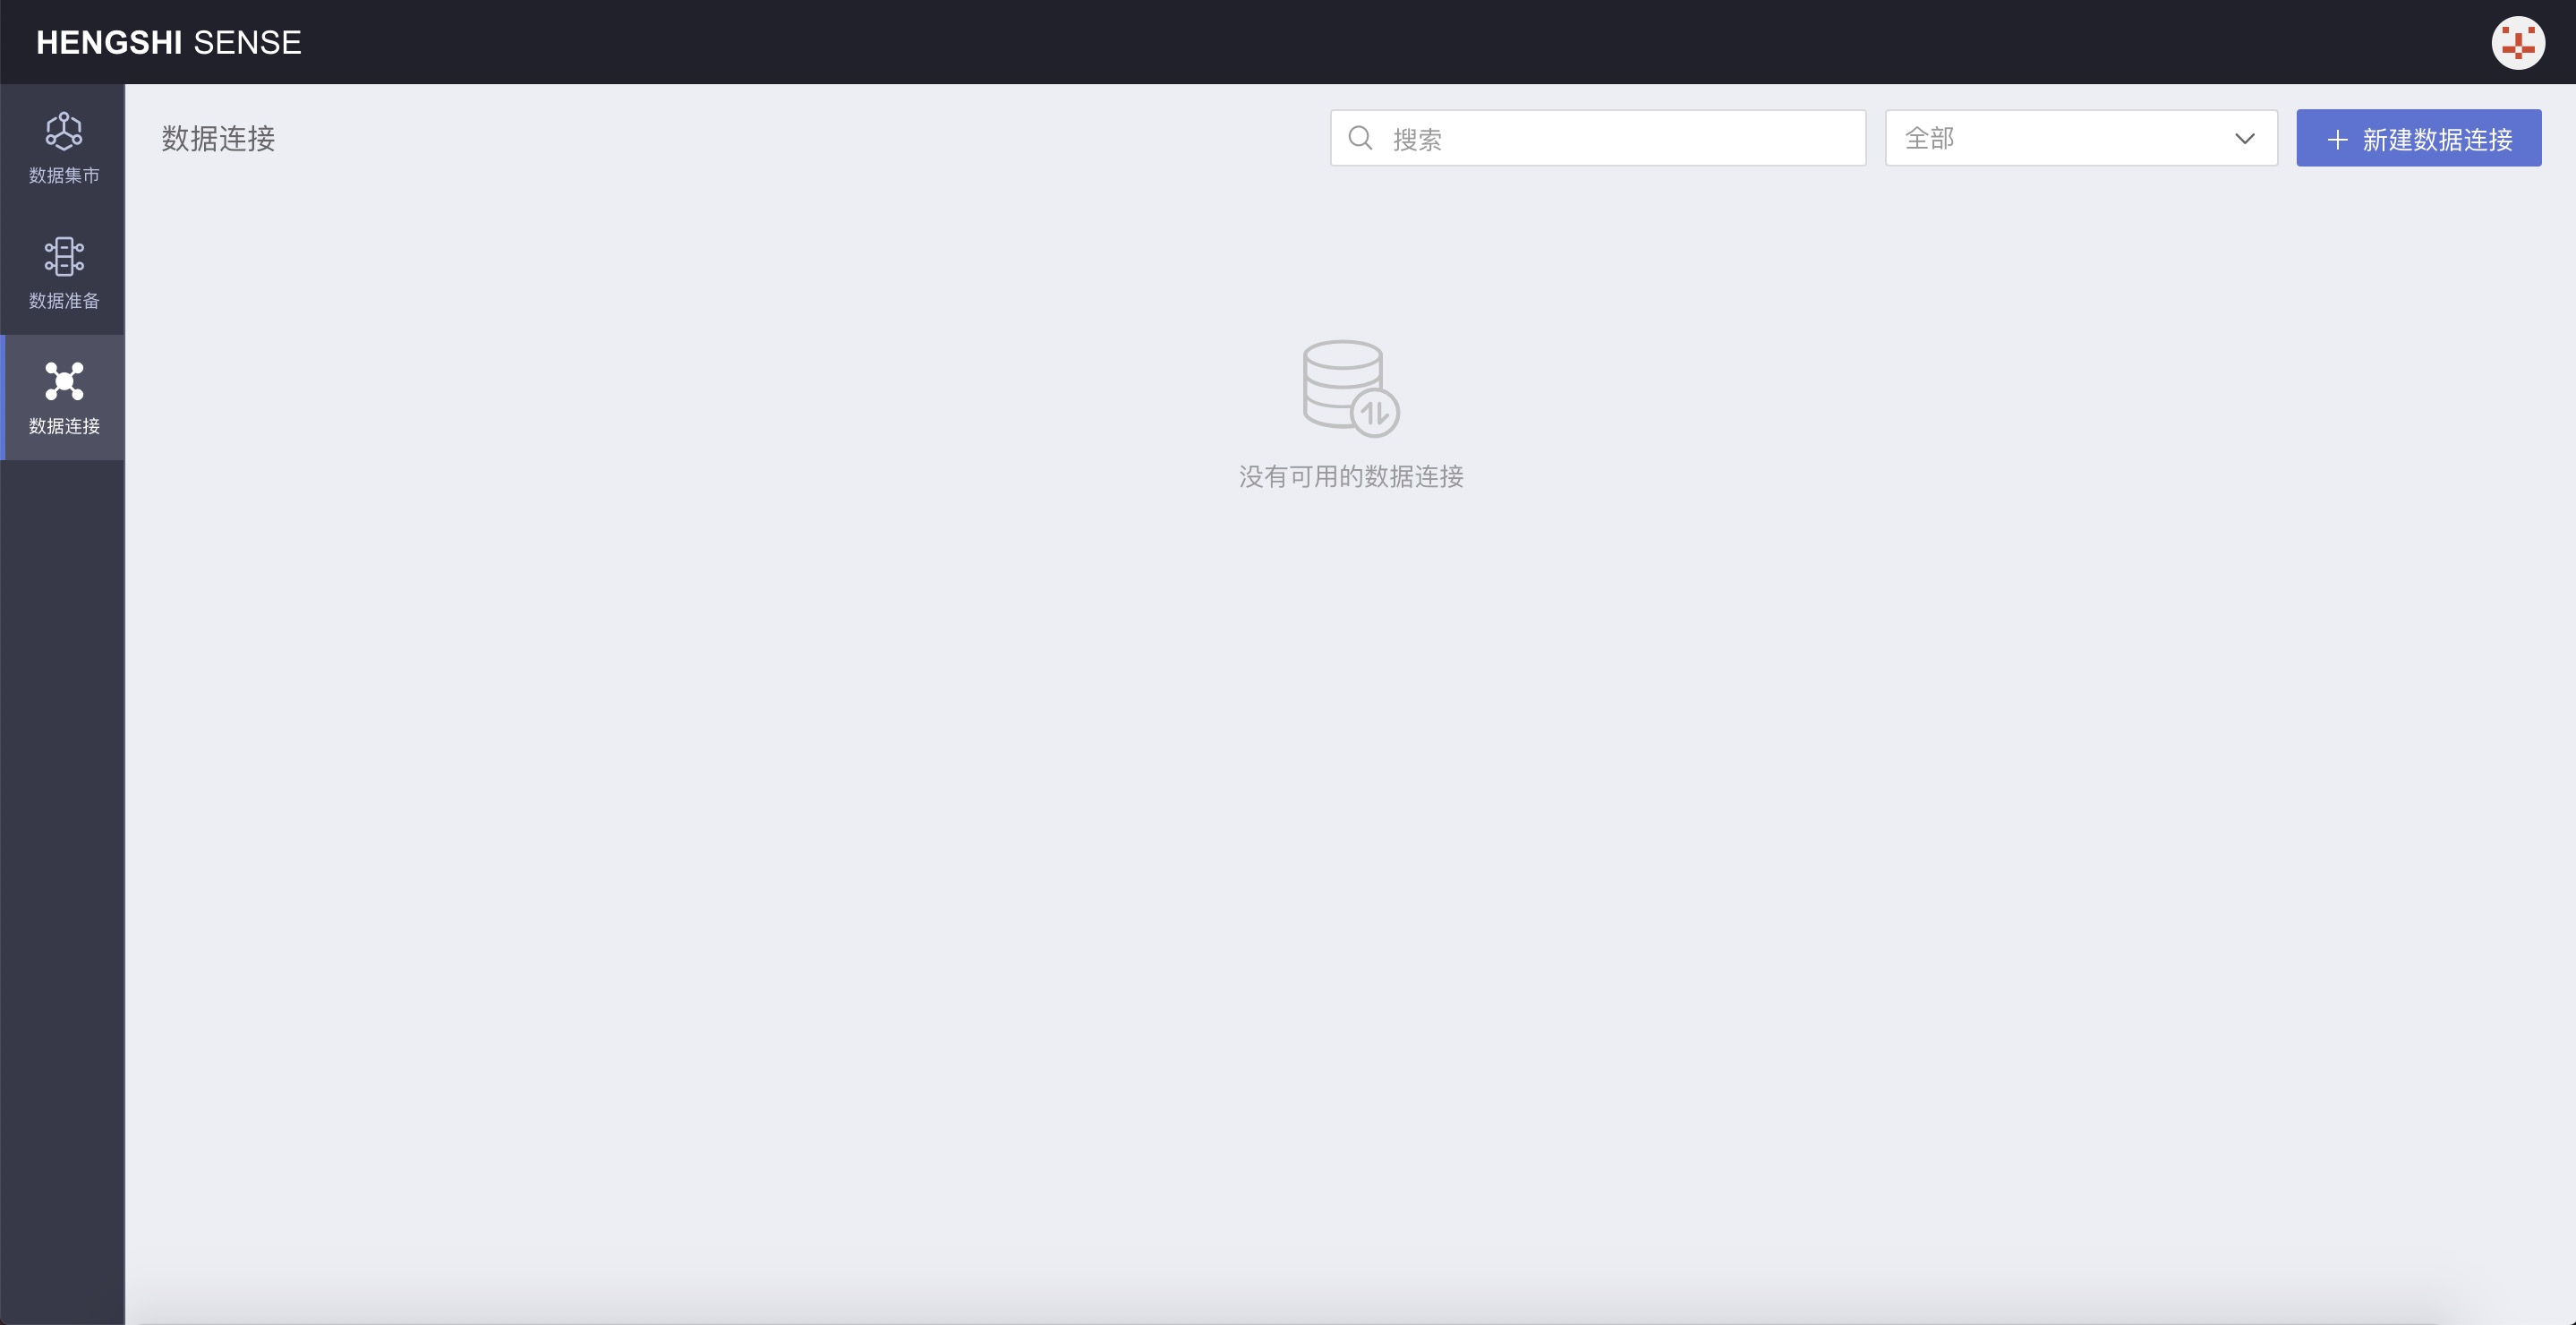
You can create a new data connection on this page. There is a button in the top right corner of the page for New Data Connection:
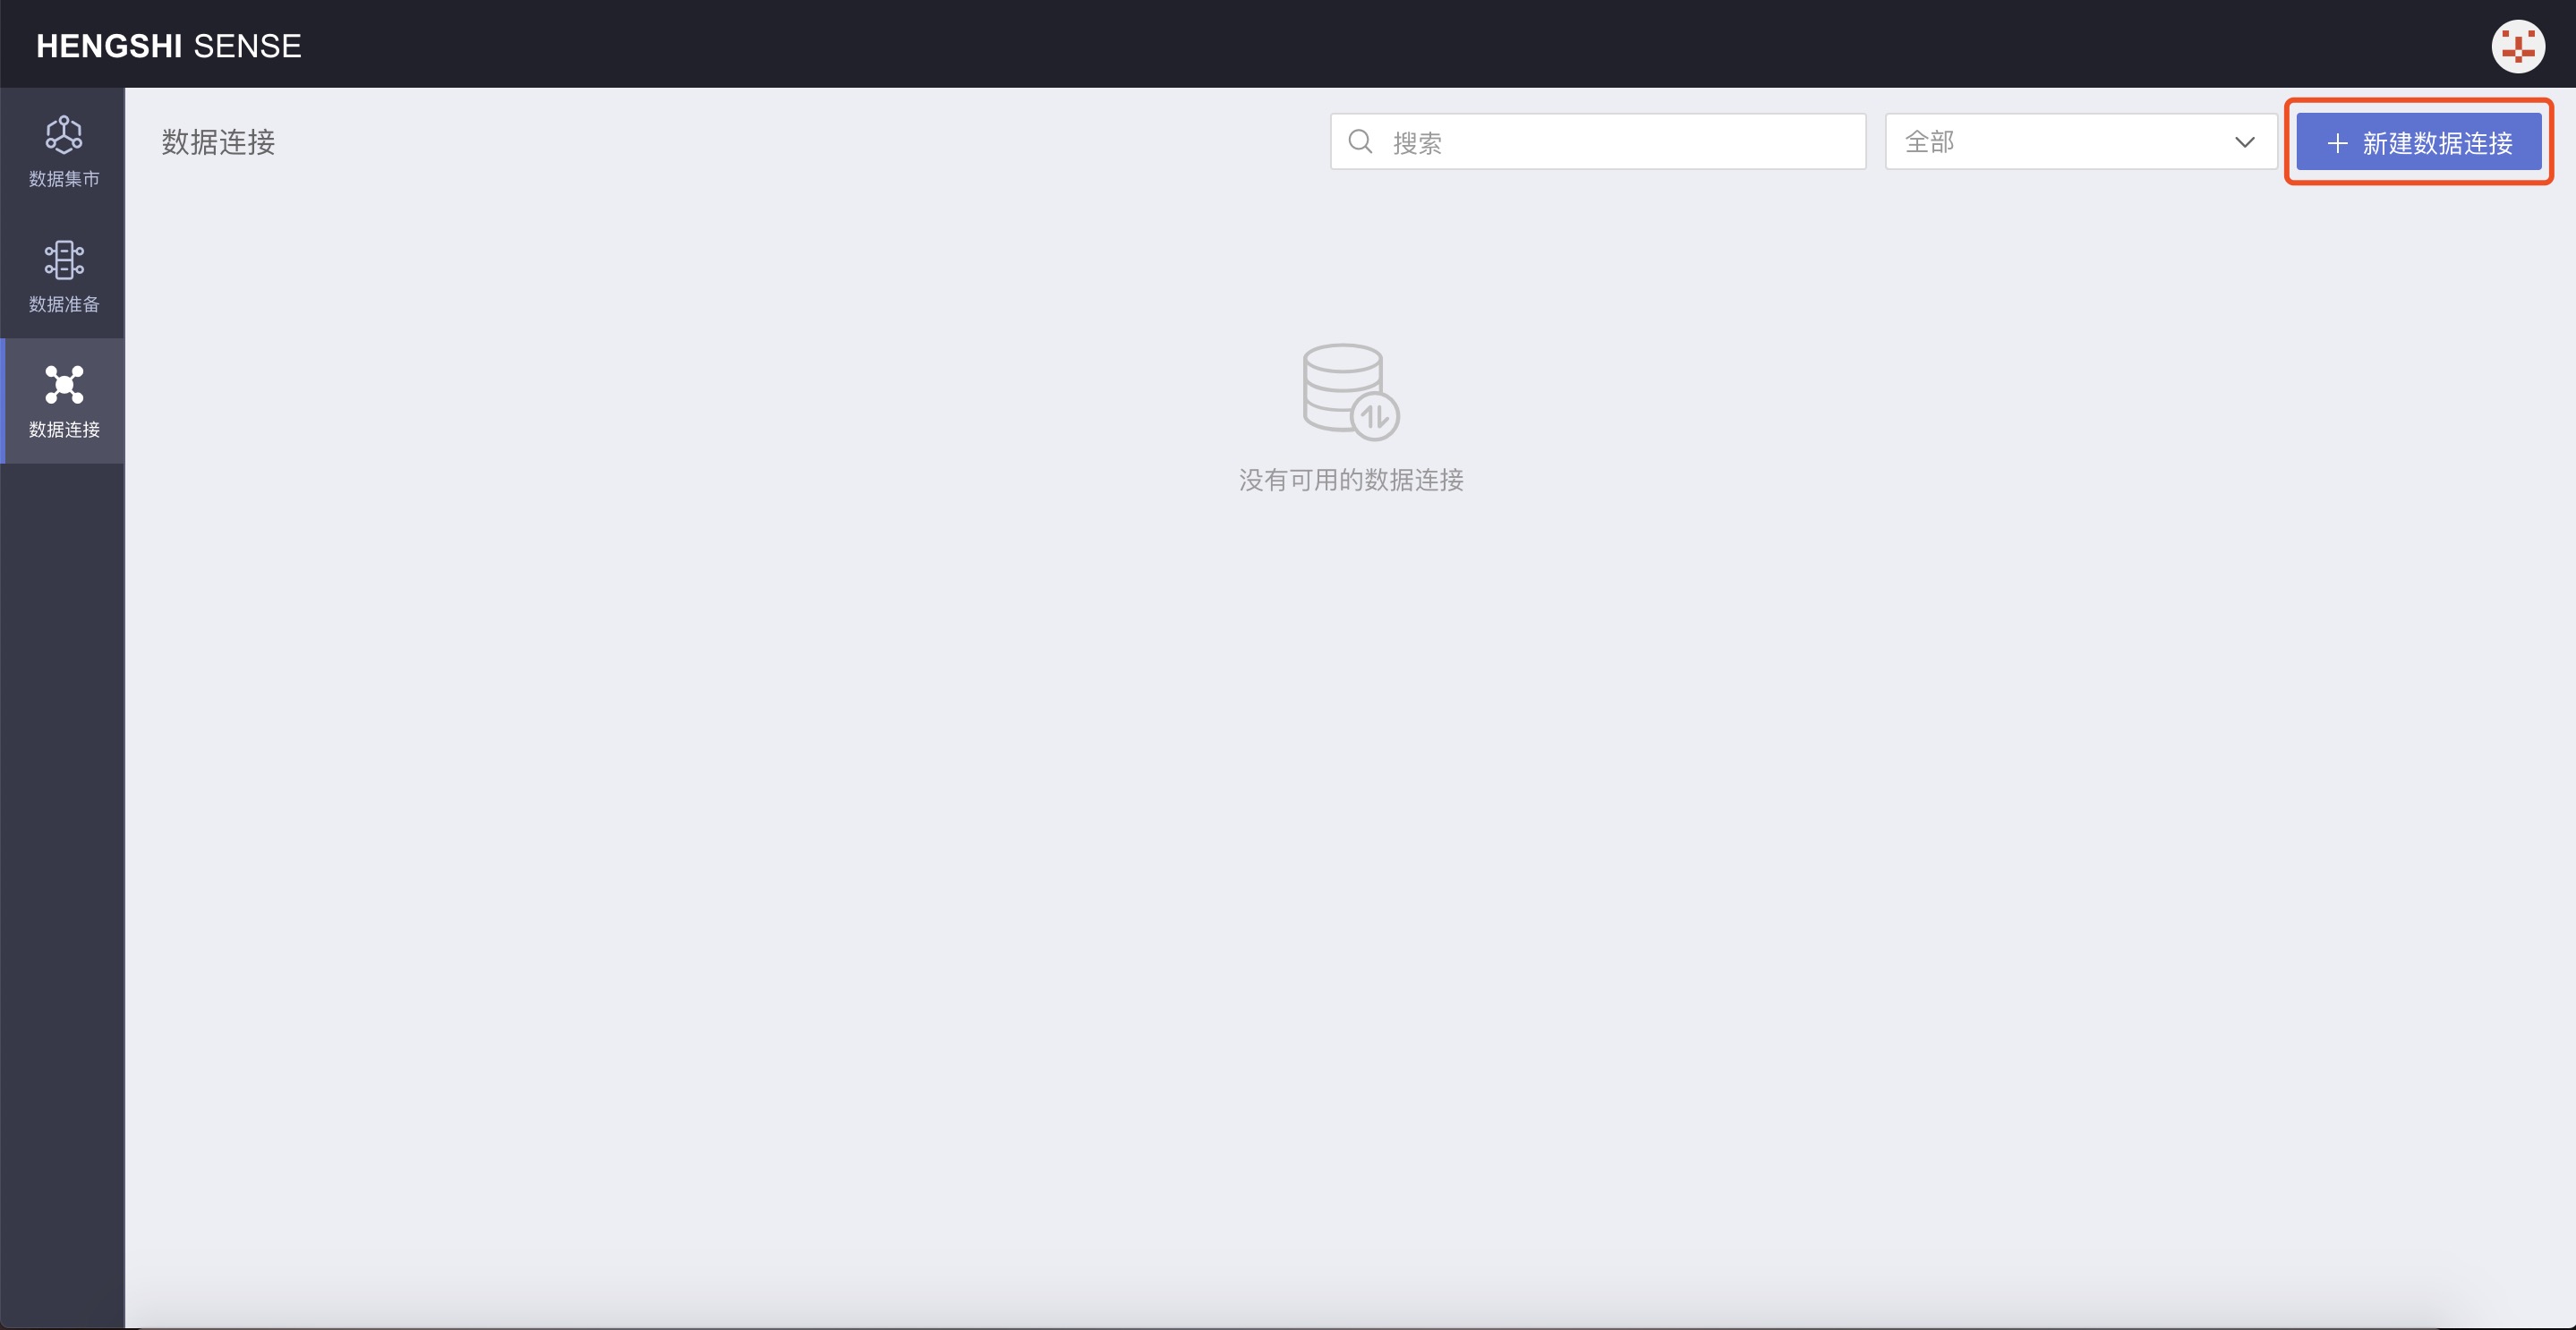
Click New Data Connection to open the connection type selection page:
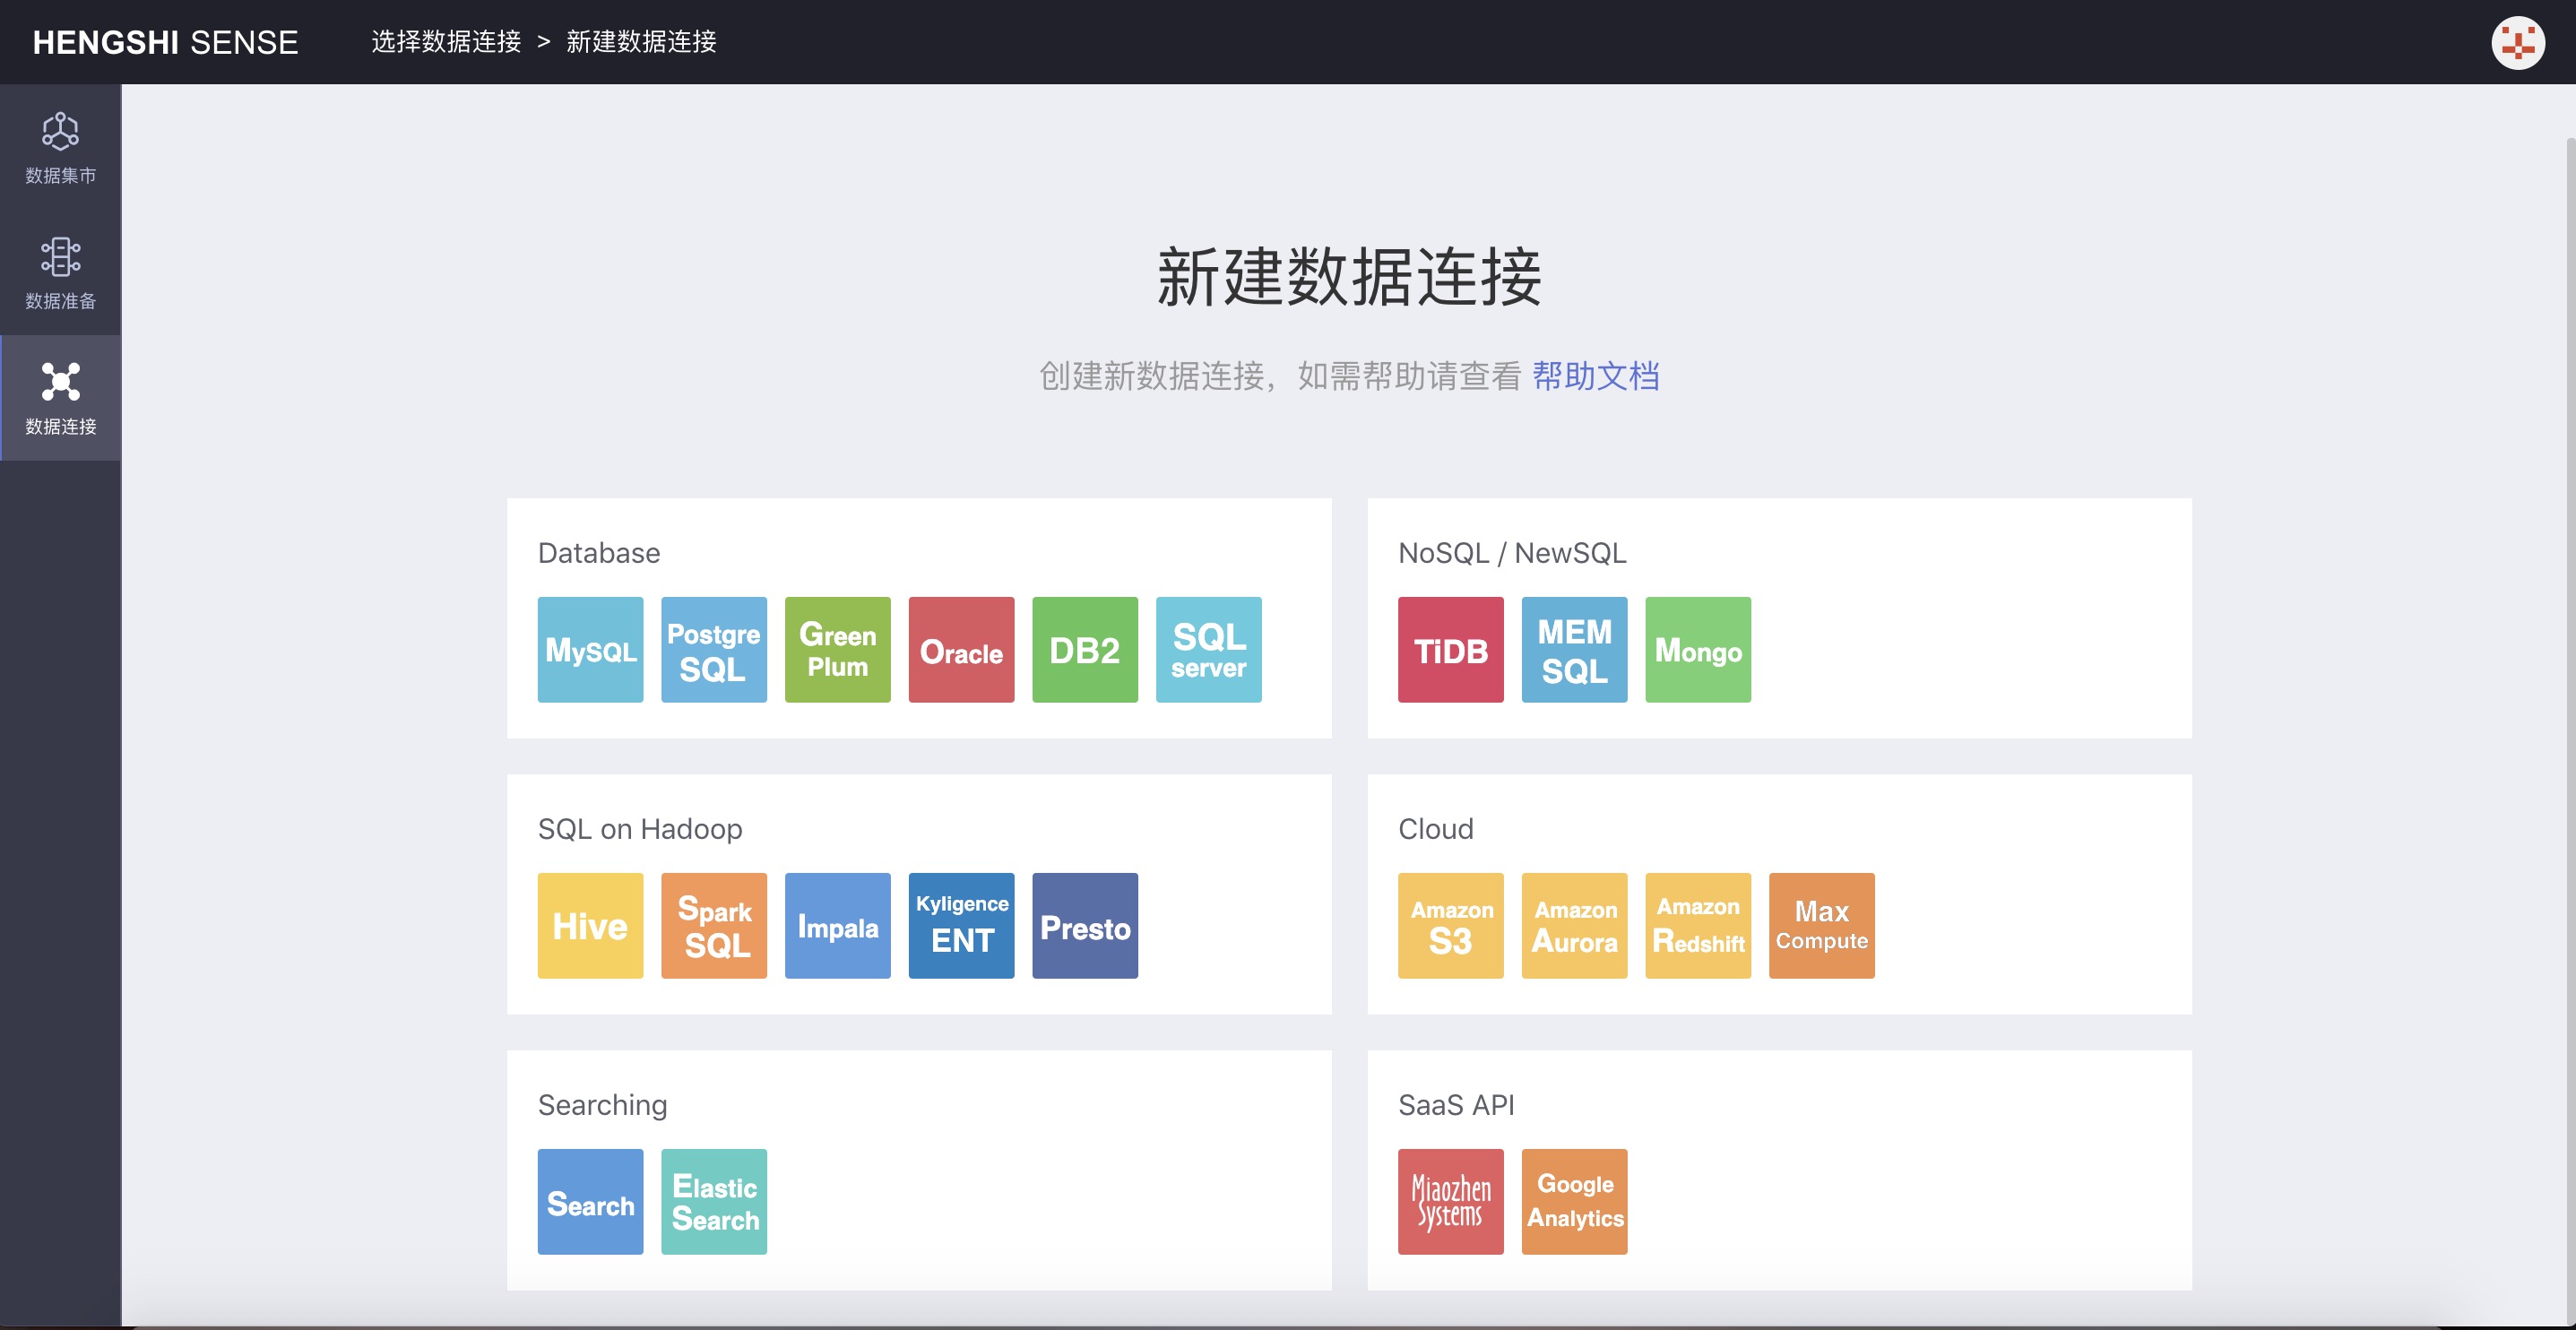
Choose a data connection based on your company's database. Below, we use the example of creating a new Green Plum data connection:
In the Database, you can select a Green Plum connection:

Click to select the connection, which opens the configuration page for the connection:
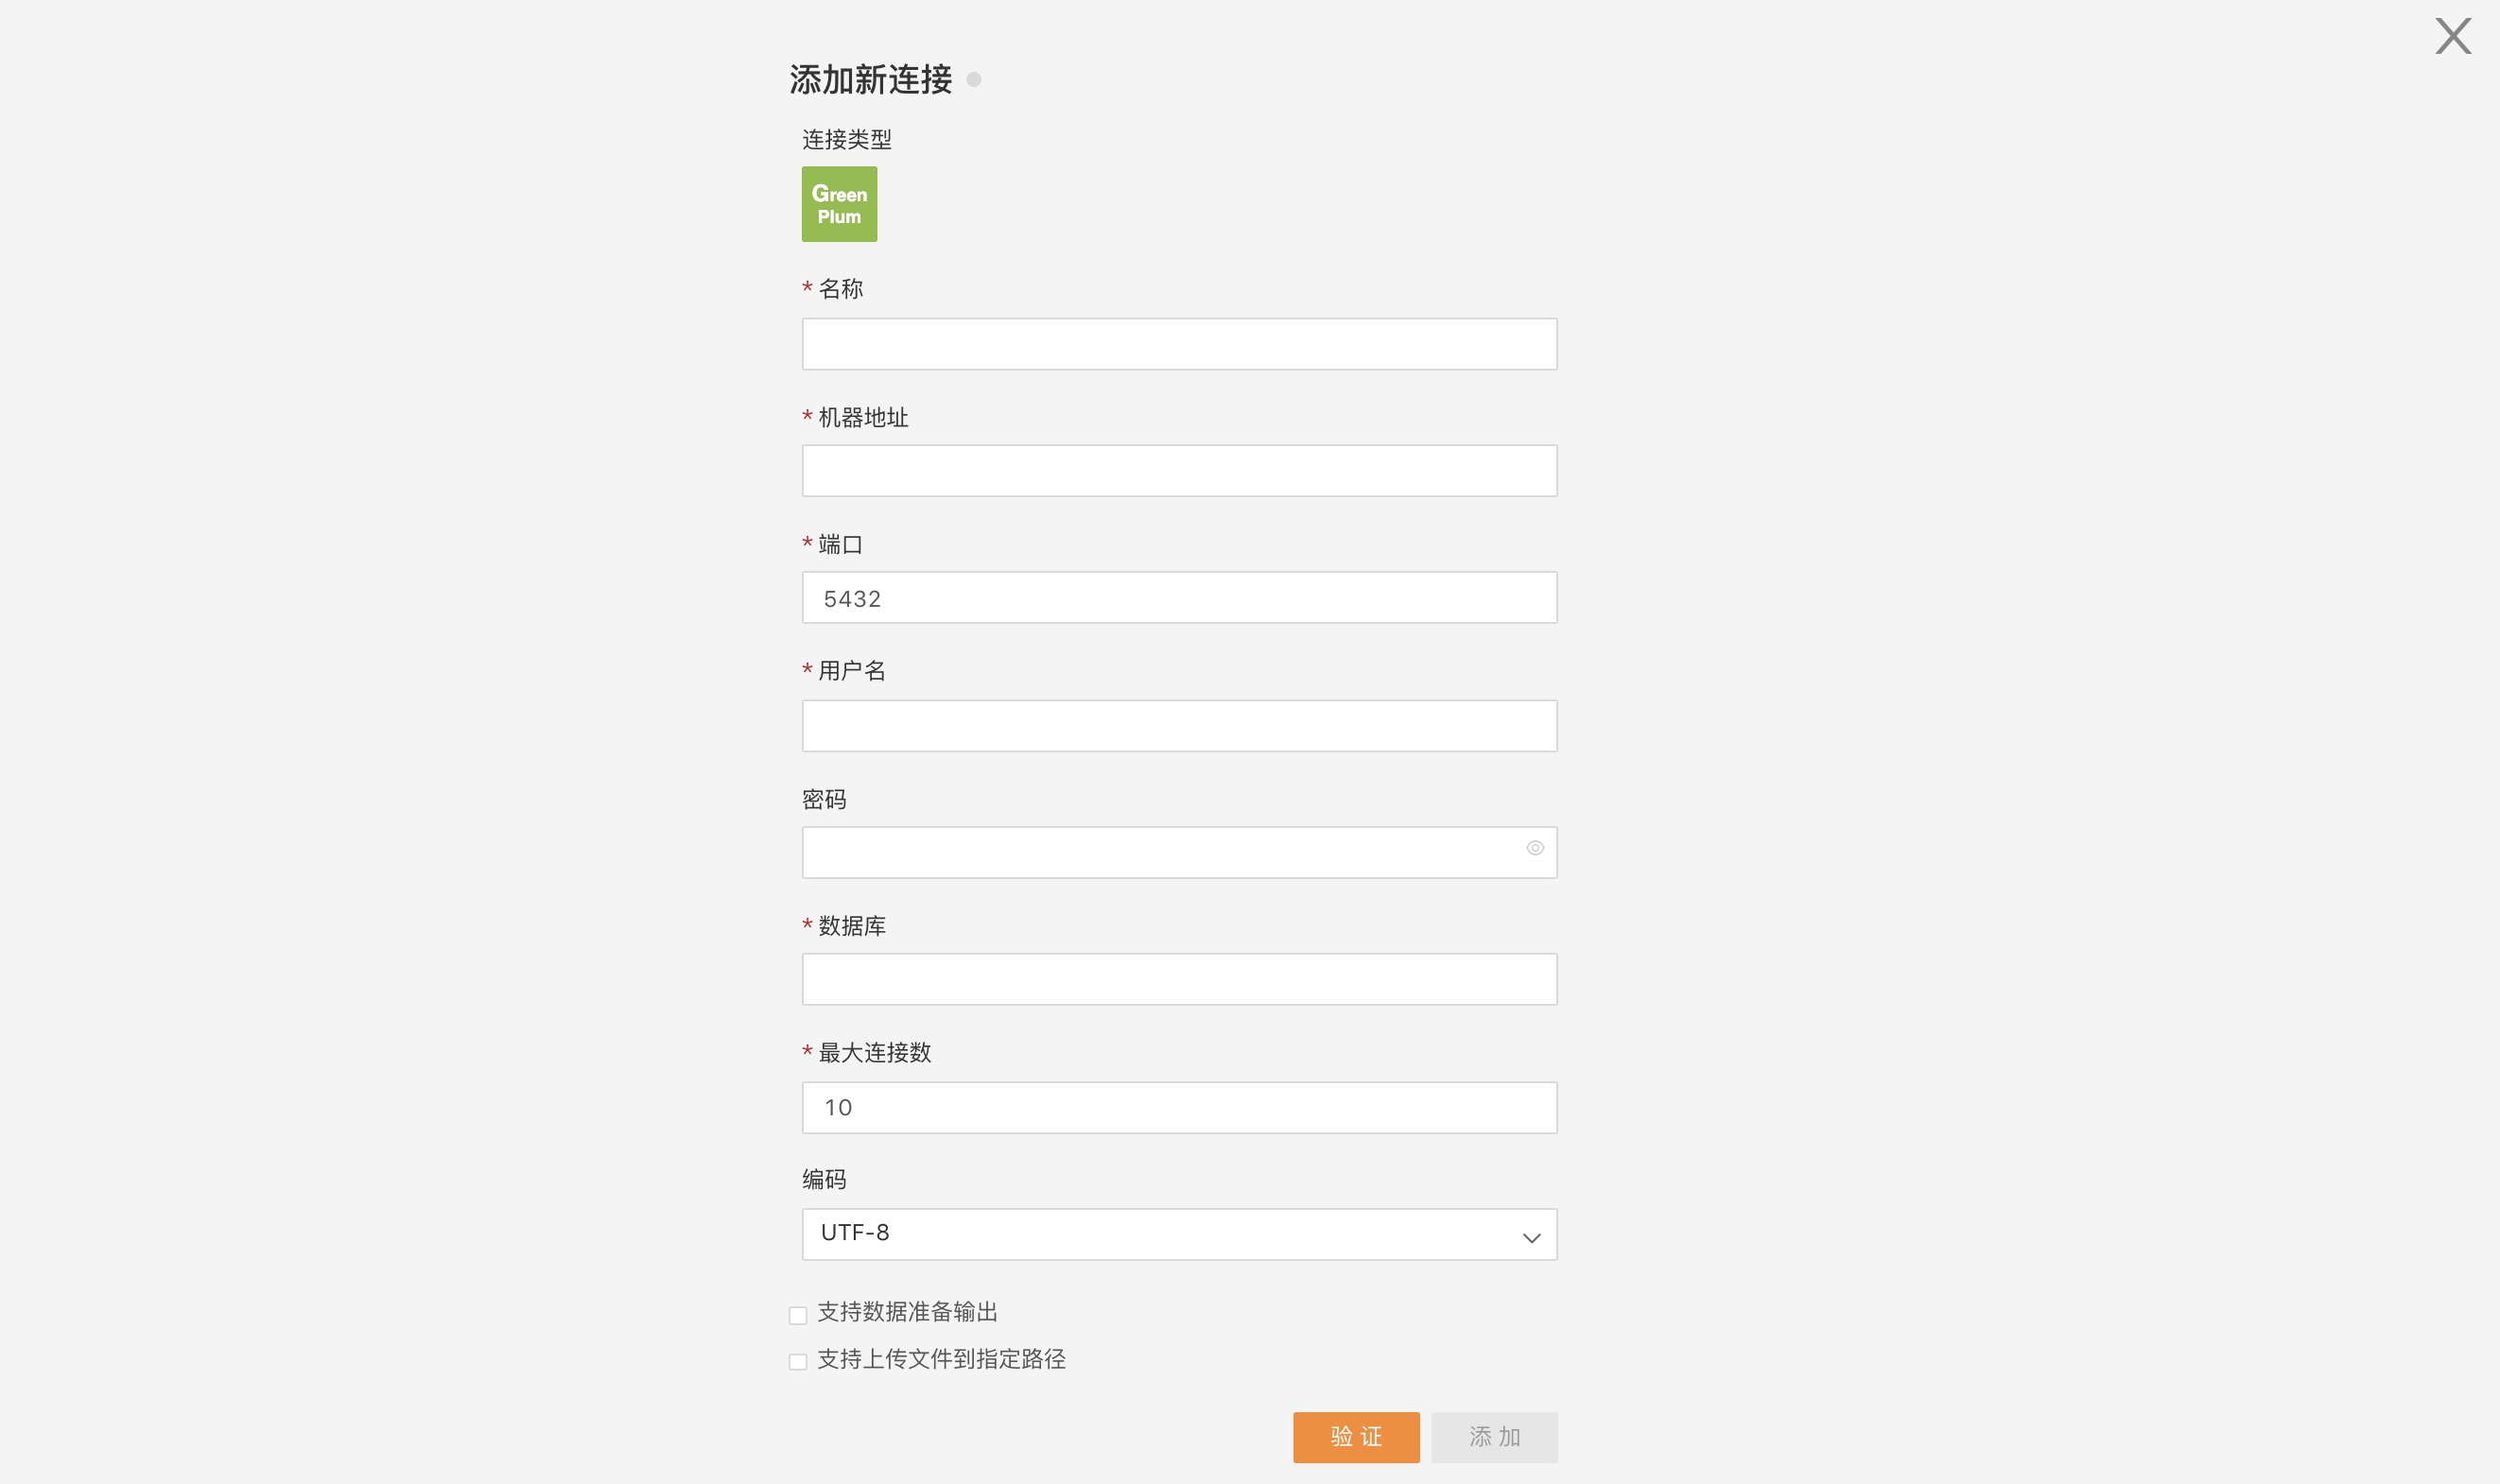
On this page, enter the required connection information according to the specifications, click verify, and if verification passes, the Add button turns green and becomes clickable:

Click Add to successfully create the data connection:
Set connection permissions. For specific operations, see Connection Permissions.

Third: Data Preparation
Version Information: The content of this section has been enhanced in version 3.0 by adding the datasets from the Data Mart as input nodes. Other configurations have not been changed.
Data preparation provides ETL (Extract-Transform-Load) functionality, which extracts data from different sources, filters it, transforms the format, adds calculated columns, performs joins, merges, aggregates, etc., and outputs to a data source specified by the user for subsequent exploration and analysis. Version 3.0 introduces the ability to output the data modeling results from the application into different databases through data preparation, establishing a complete data processing link. The sources for data preparation support incremental updates, improving the timeliness from data updates to data analysis.
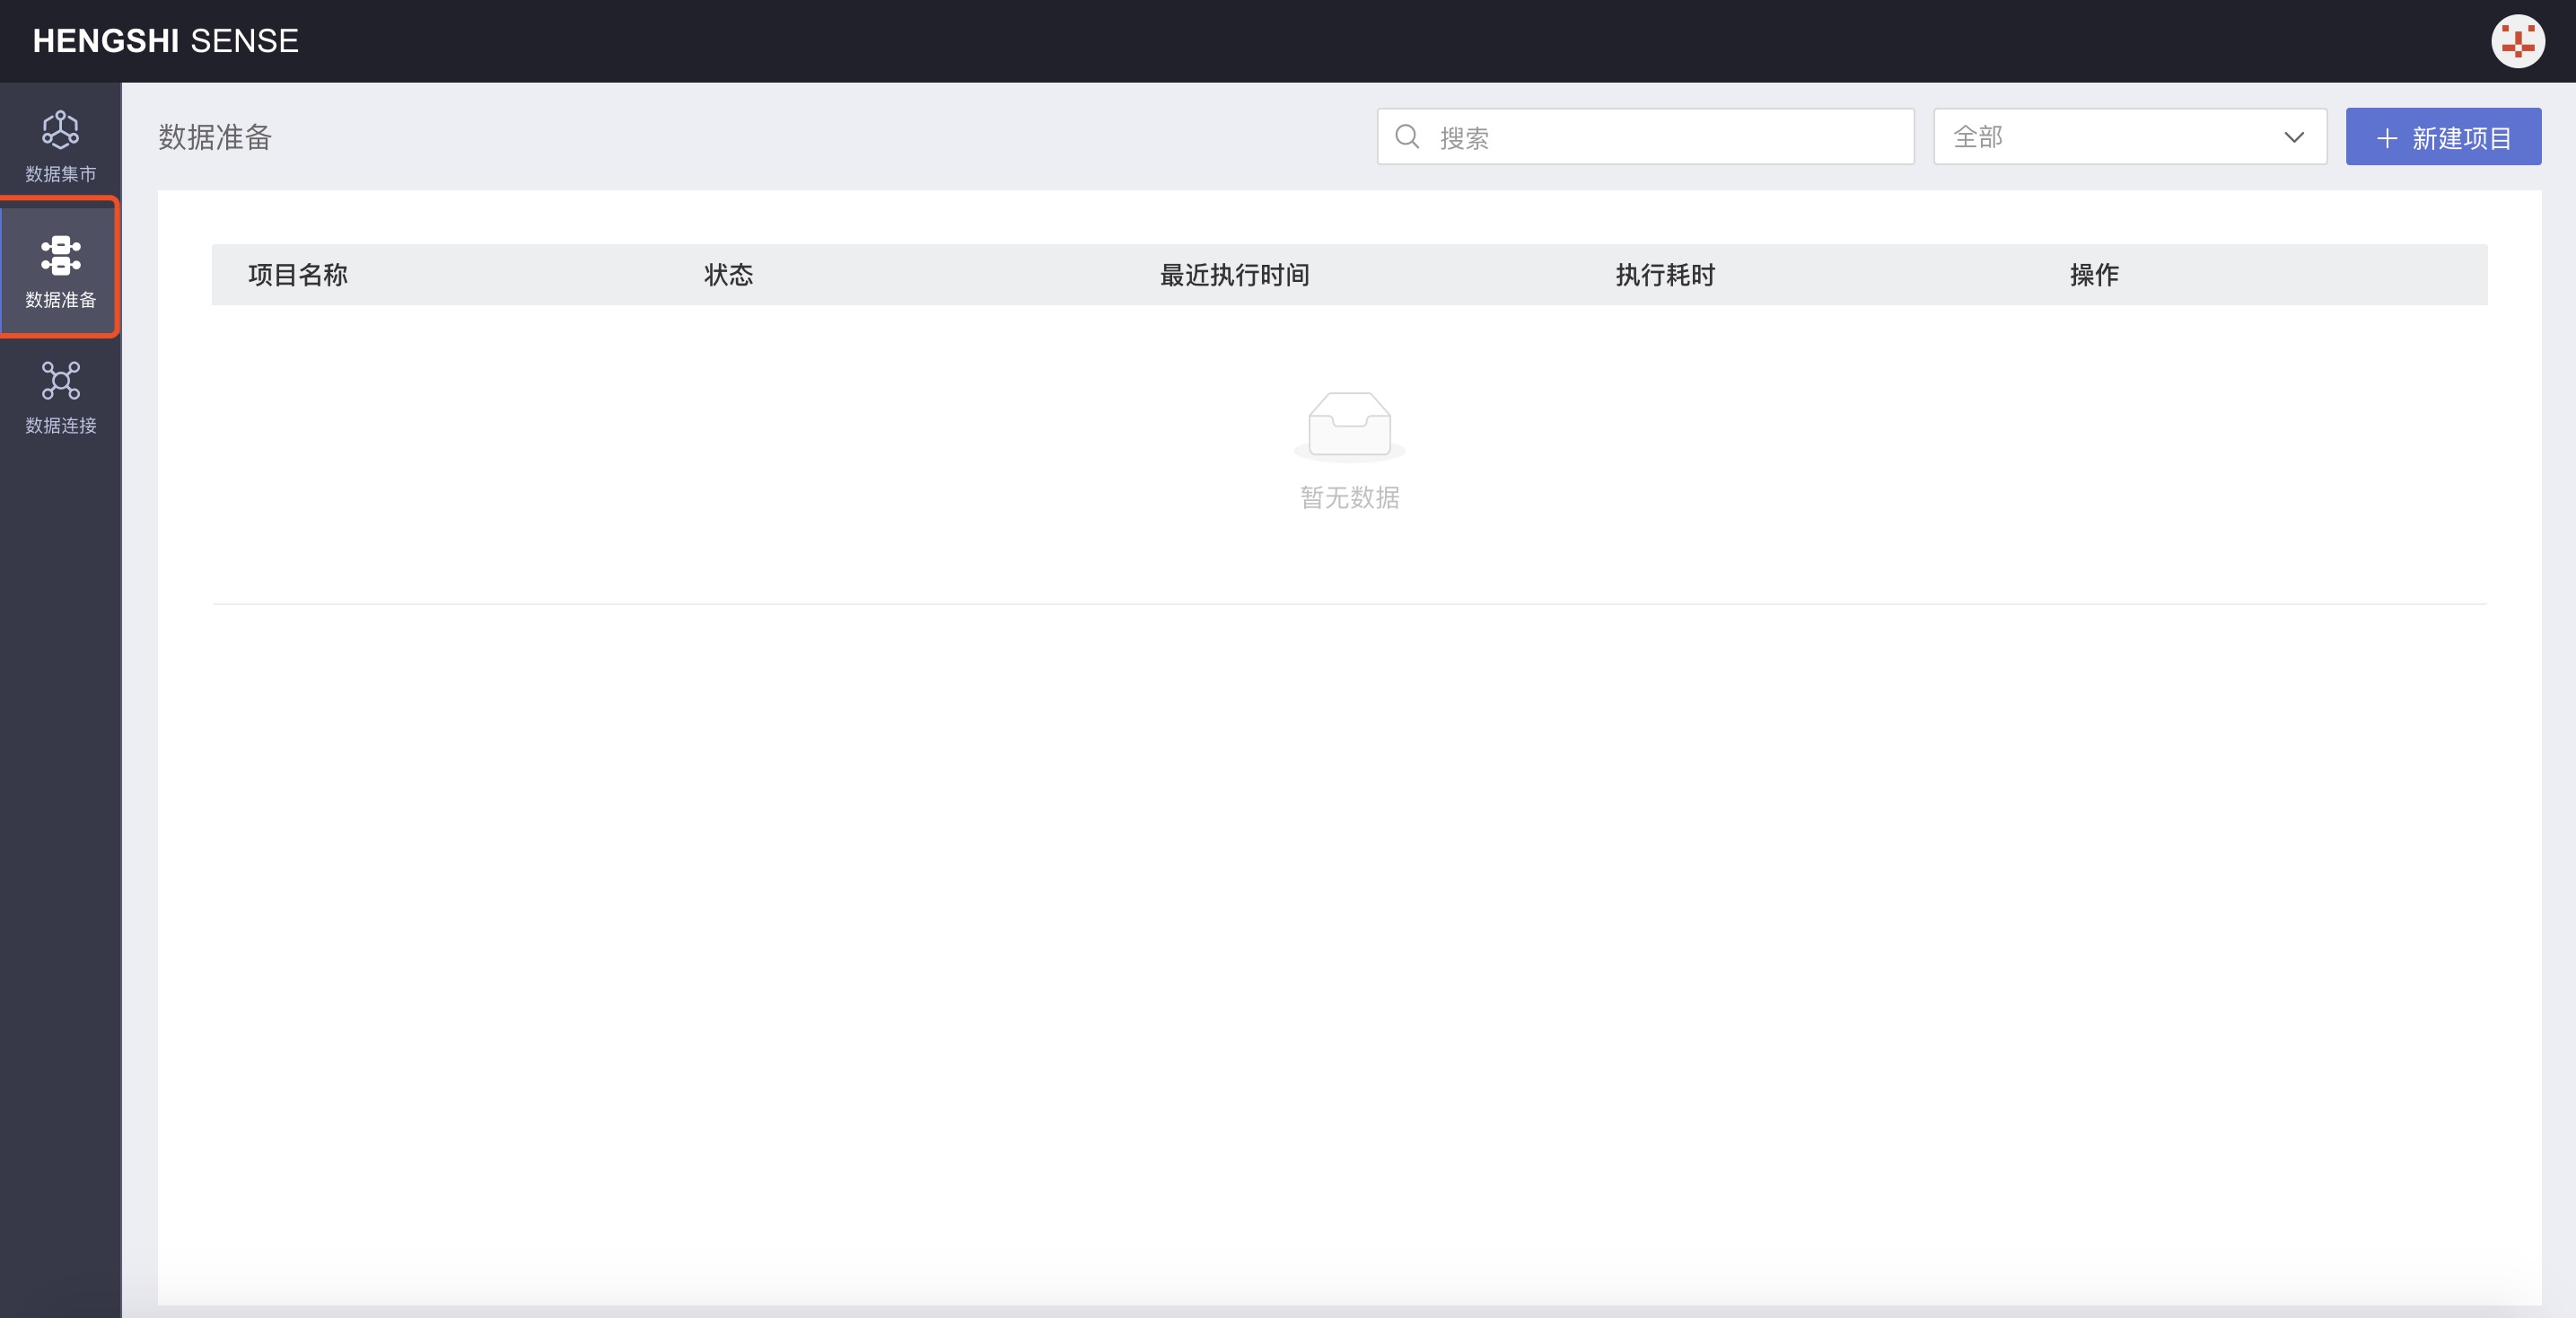
Accounts with the Data Management role can view and build the data preparation module. Below is an example of the user: Data Administrator (data_admin) logging in;
Click Data Preparation from the navigation bar on the left to open the data preparation display page:
Creating New Projects
Create a new data preparation project from New Project in the top right corner, as shown below:
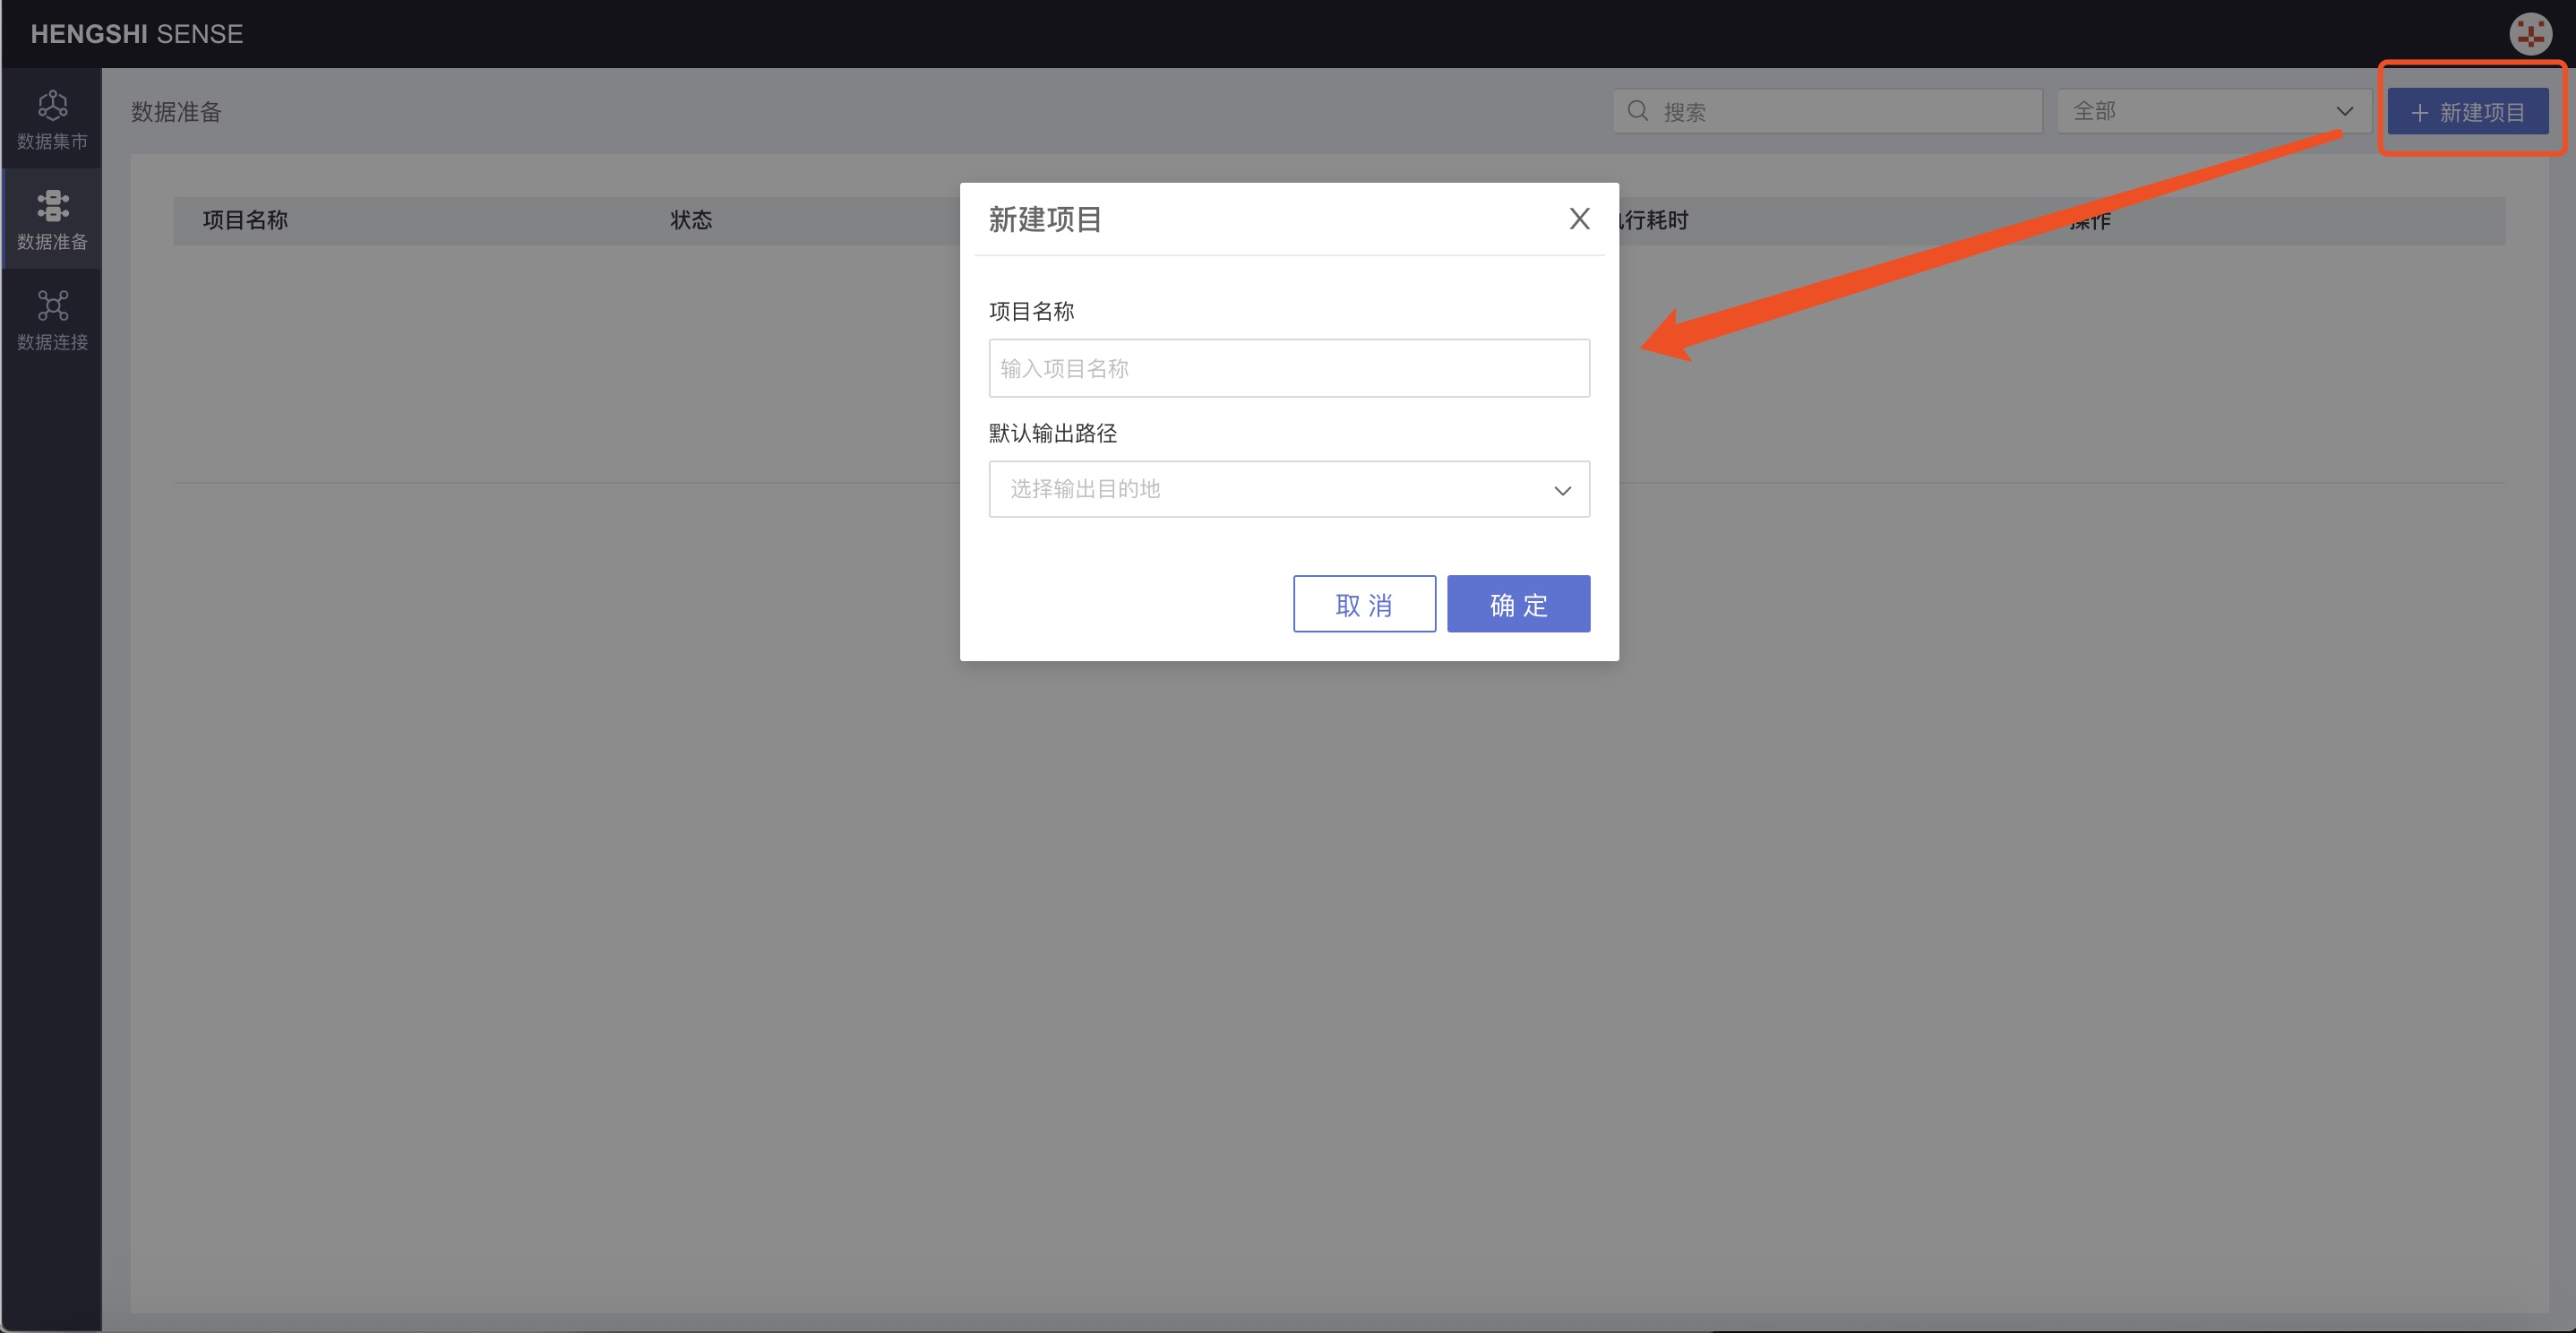
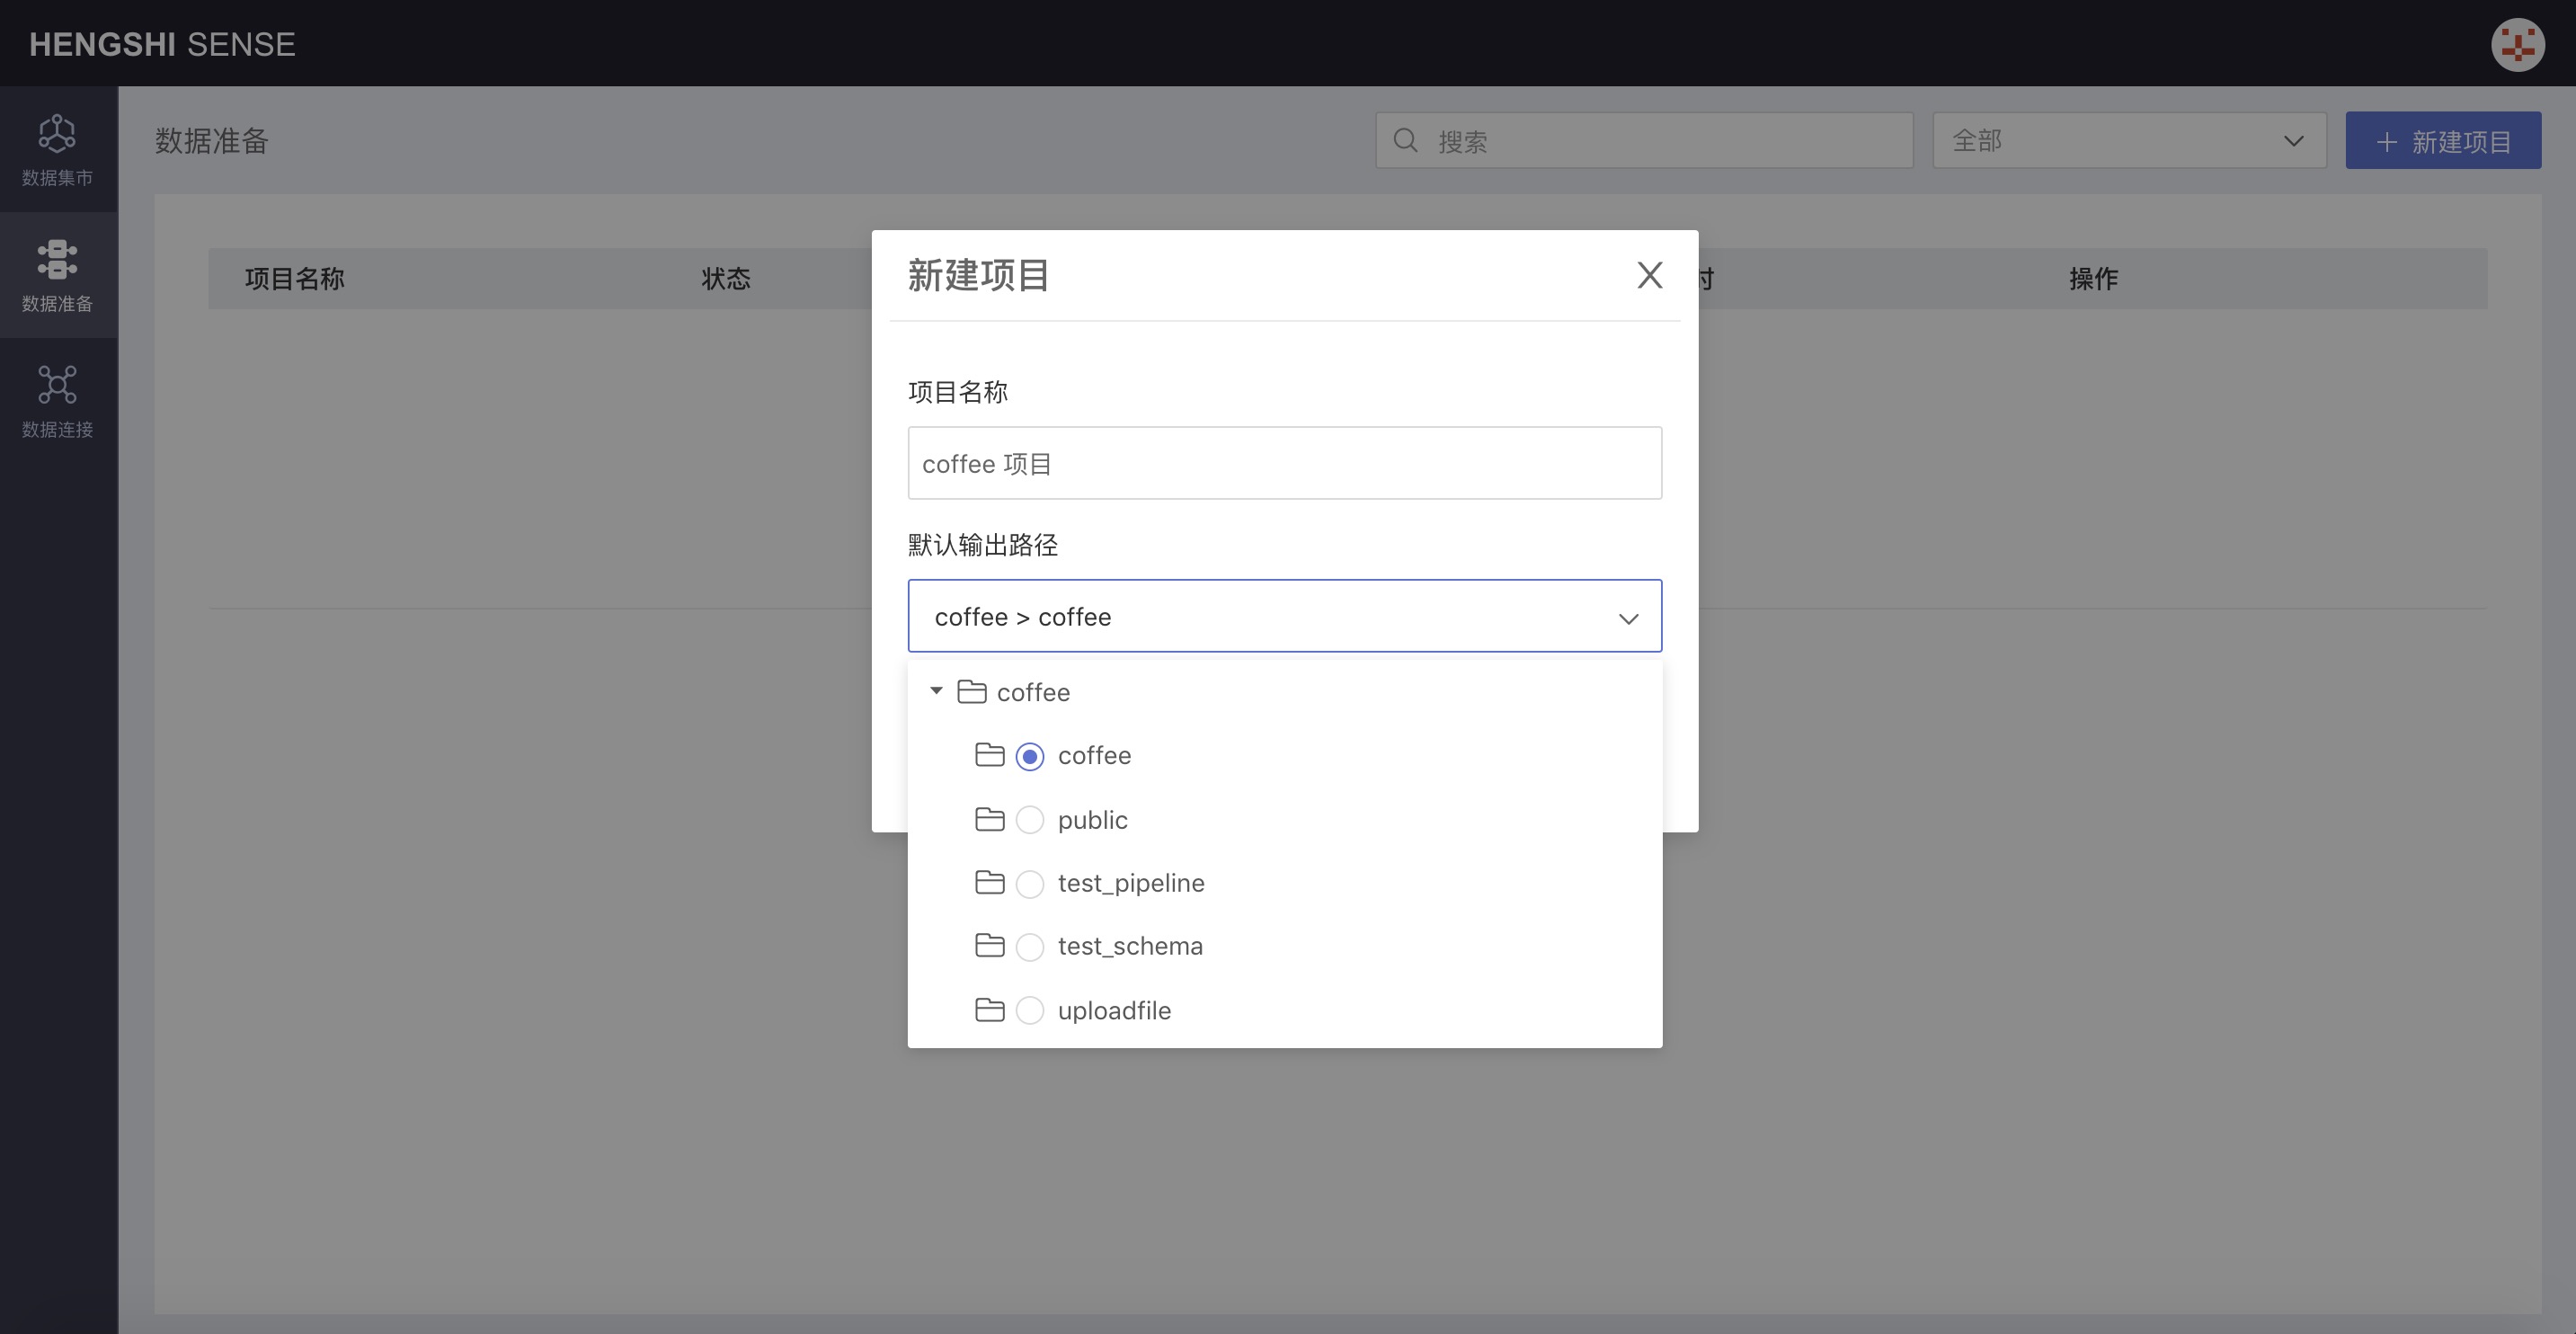
In the pop-up window, enter the project name and specify a database from the selectable data connections as the default output path from the drop-down menu.
To note:
- Currently, only Greenplum, PostgreSQL, and Amazon Redshift data sources are supported as output paths;
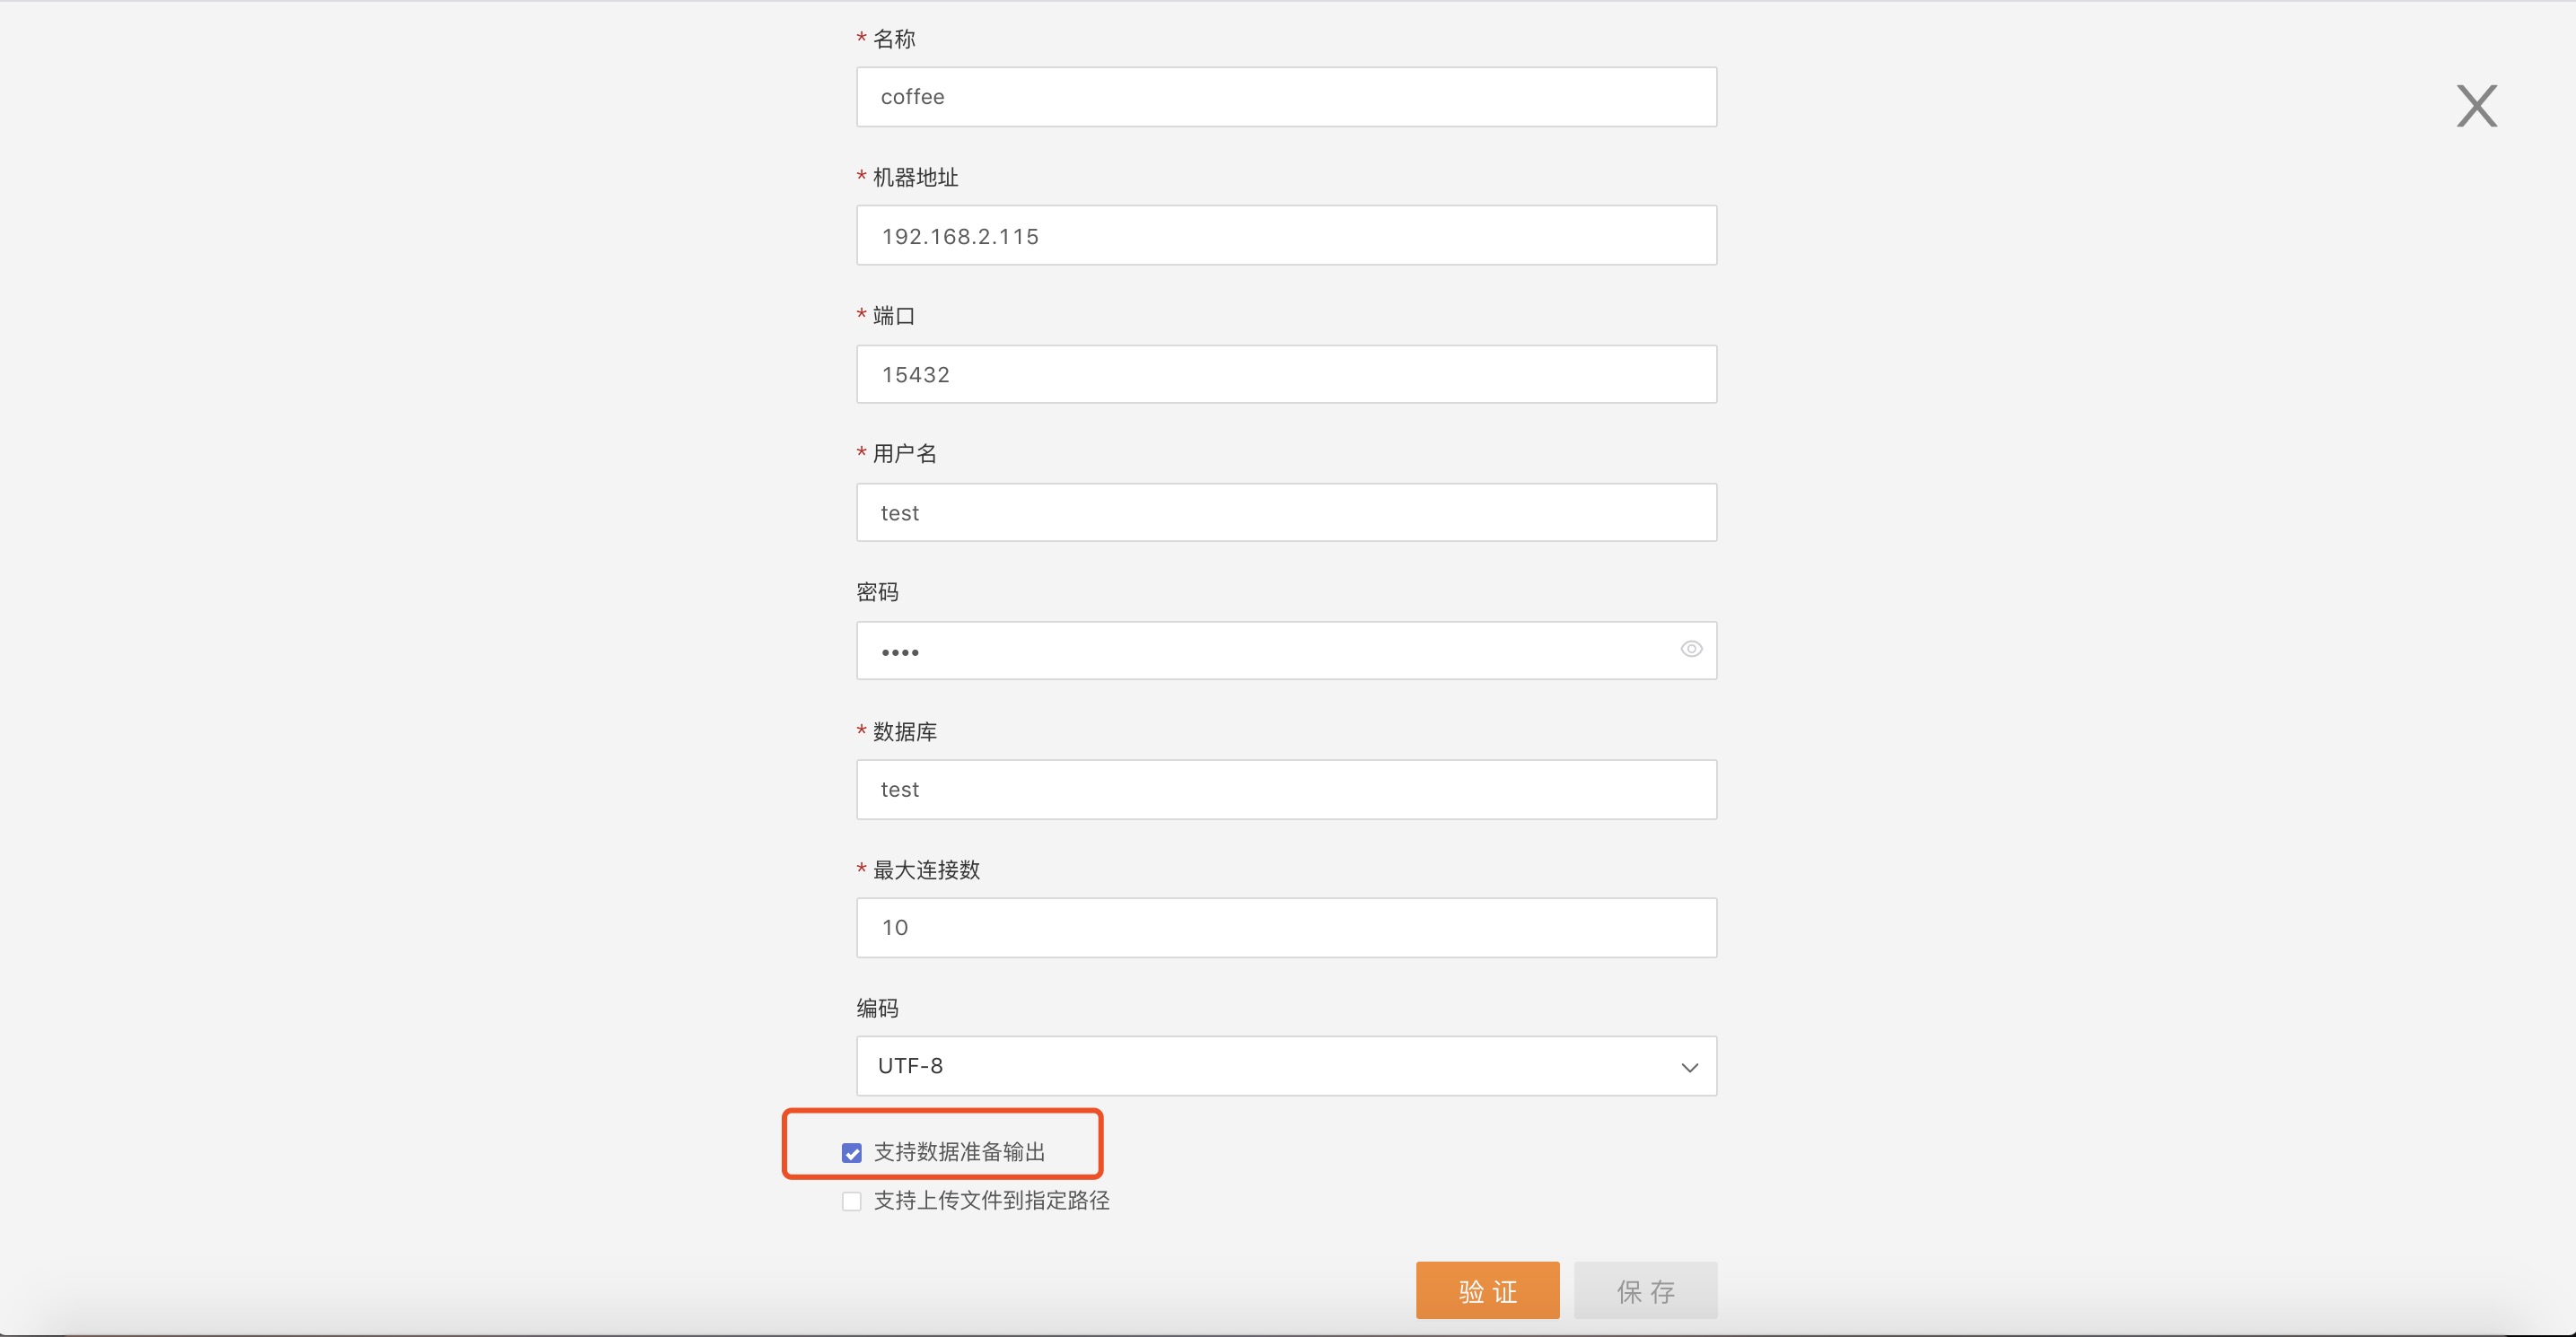
- Connections available as output paths for data preparation must have the Support Data Preparation Output option checked by the owner when creating the connection: Greenplum, PostgreSQL, Amazon Redshift.
For example, edit the connection coffee to check Support Data Preparation Output, verify and save:
Project Operations
First Step: Add Input Node
New projects open by default, and there is a drop-down box for Add Input Node in the upper-right corner of the interface. From the drop-down box, choose the type of input node you want to add, including local files, Data Mart, and data connections:
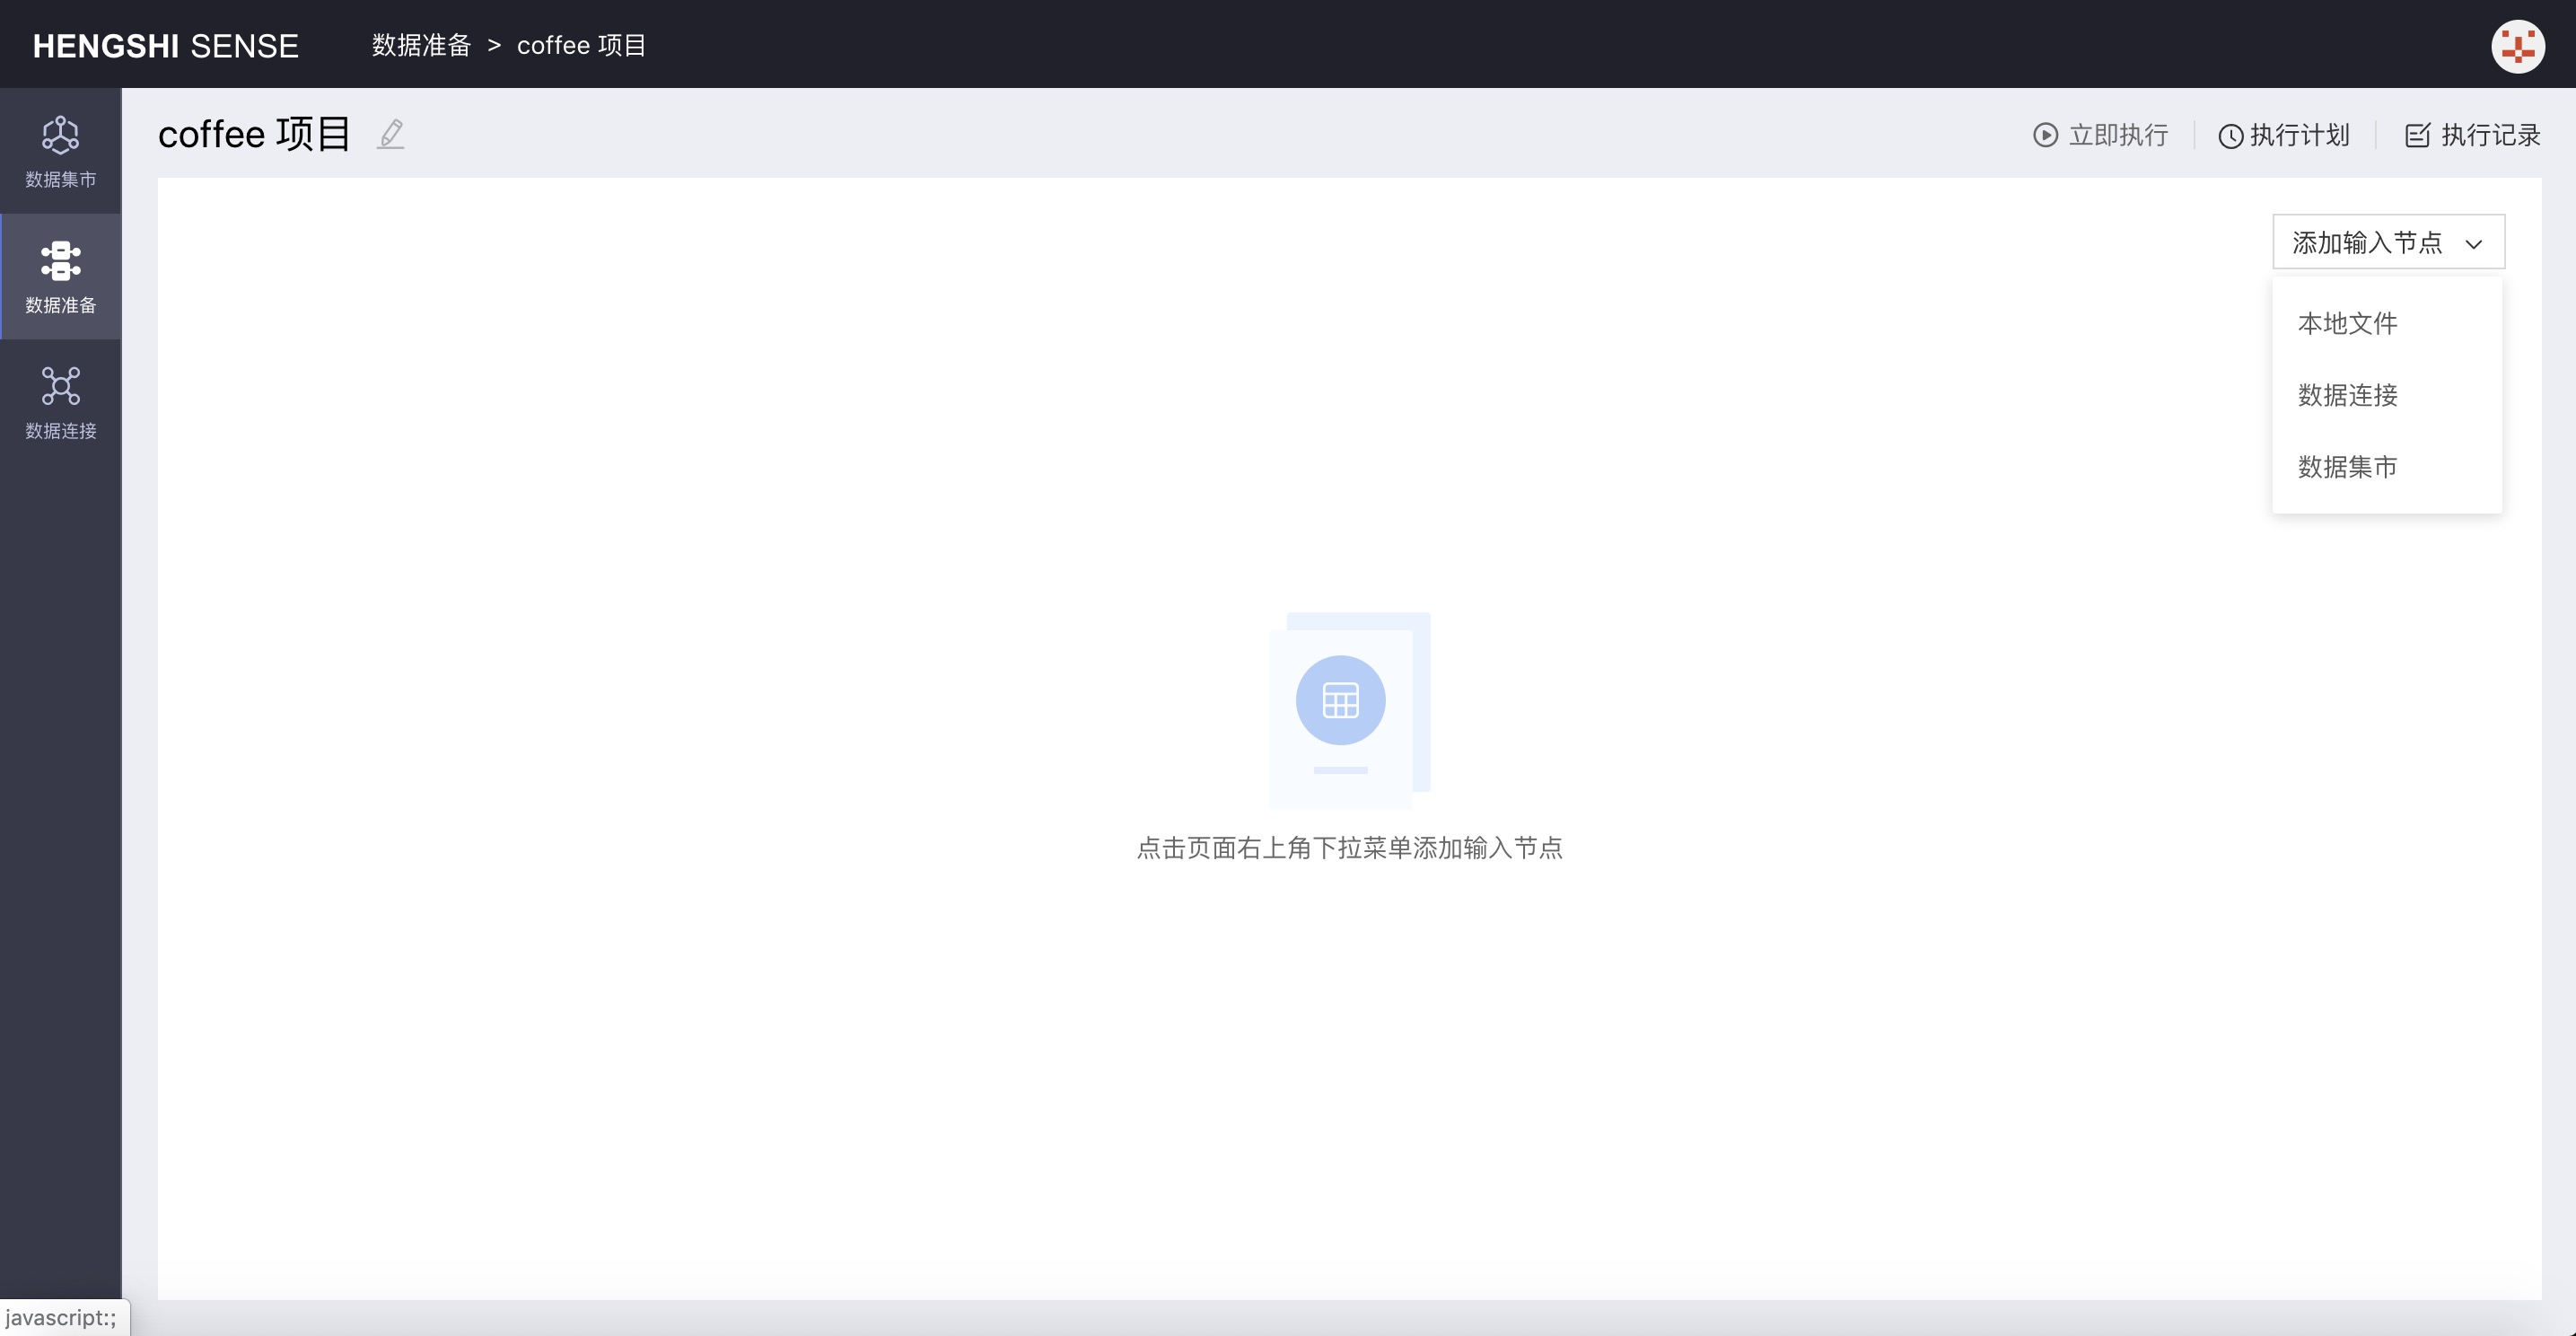
- Local File
When adding a local file input node, Excel and CSV files are supported. - Data Mart
When adding a Data Mart input node, you can choose any dataset from the Data Mart's dataset bundle. - Data Connection
When adding a table from a data connection as an input node, there are built-in data connections and user data connections.
Restrictions when using user data connections to add input nodes:
- When the current account's permission for a certain database in the selected data connection is View Name, none of the tables in that database can be added as input nodes to the data preparation project;
- When the current account's permission for a certain table in the selected data connection is View Name, that table cannot be added as an input node;
Below, let's take adding a Data Mart input node as an example:
Click Data Mart from Add Input Node, which pops up the project list from the Data Mart:
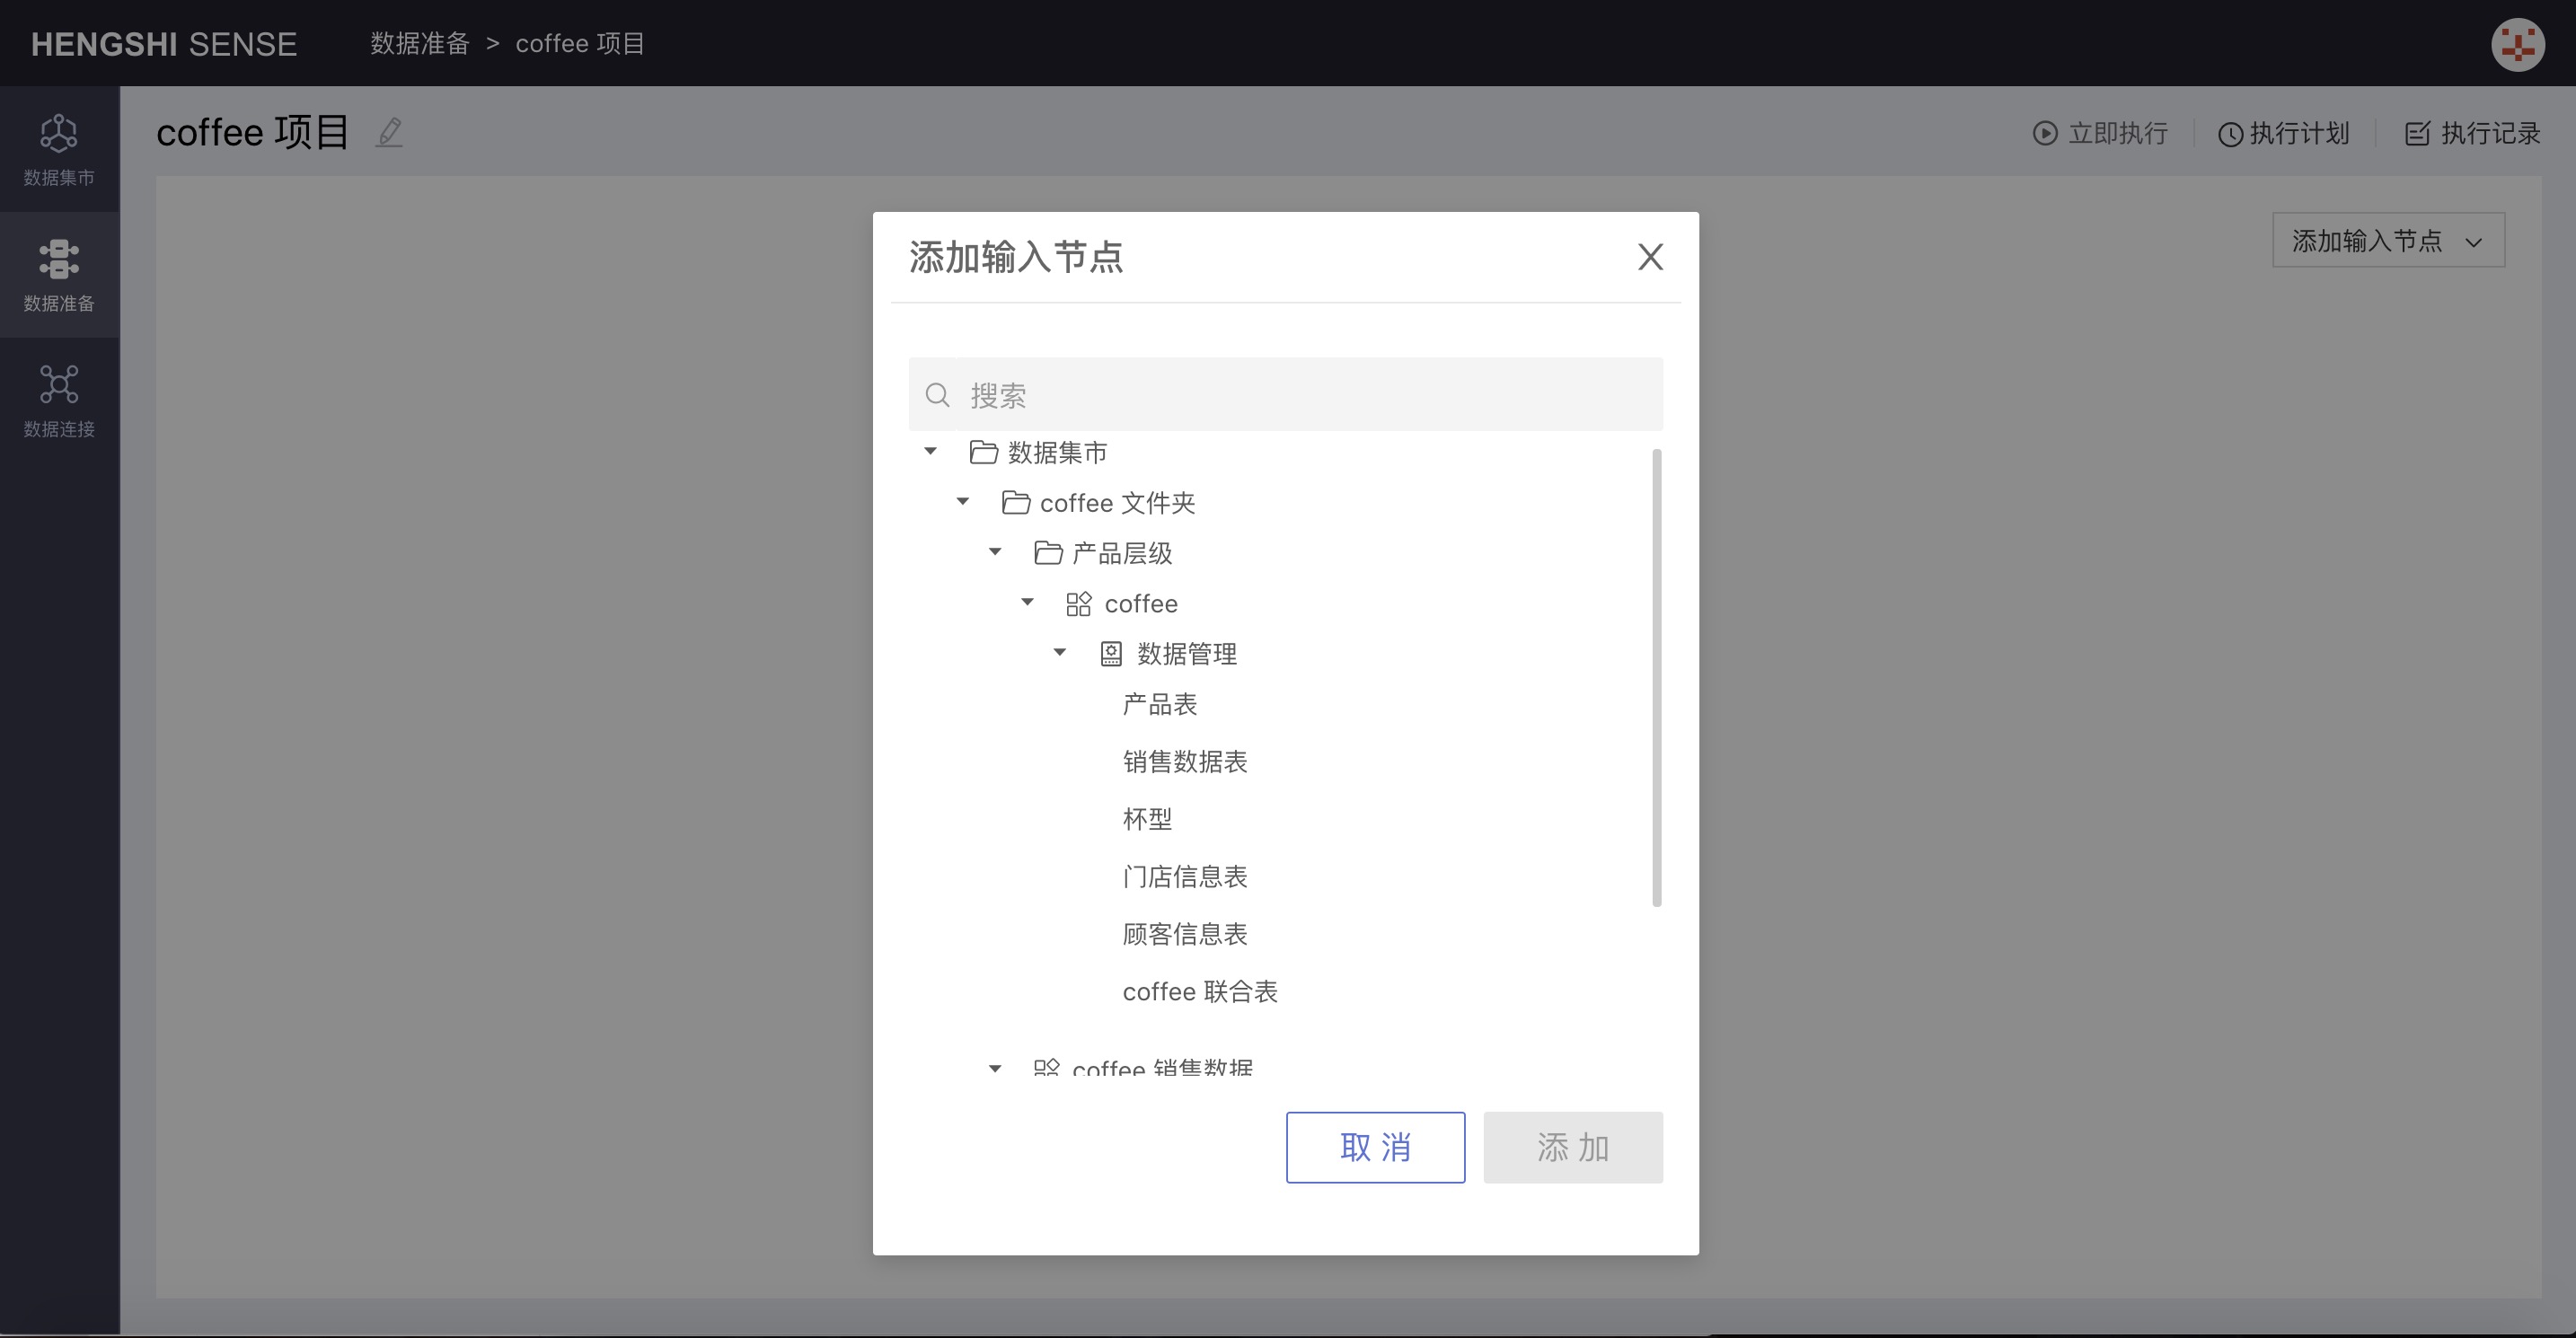
Choose Sales Data Table:
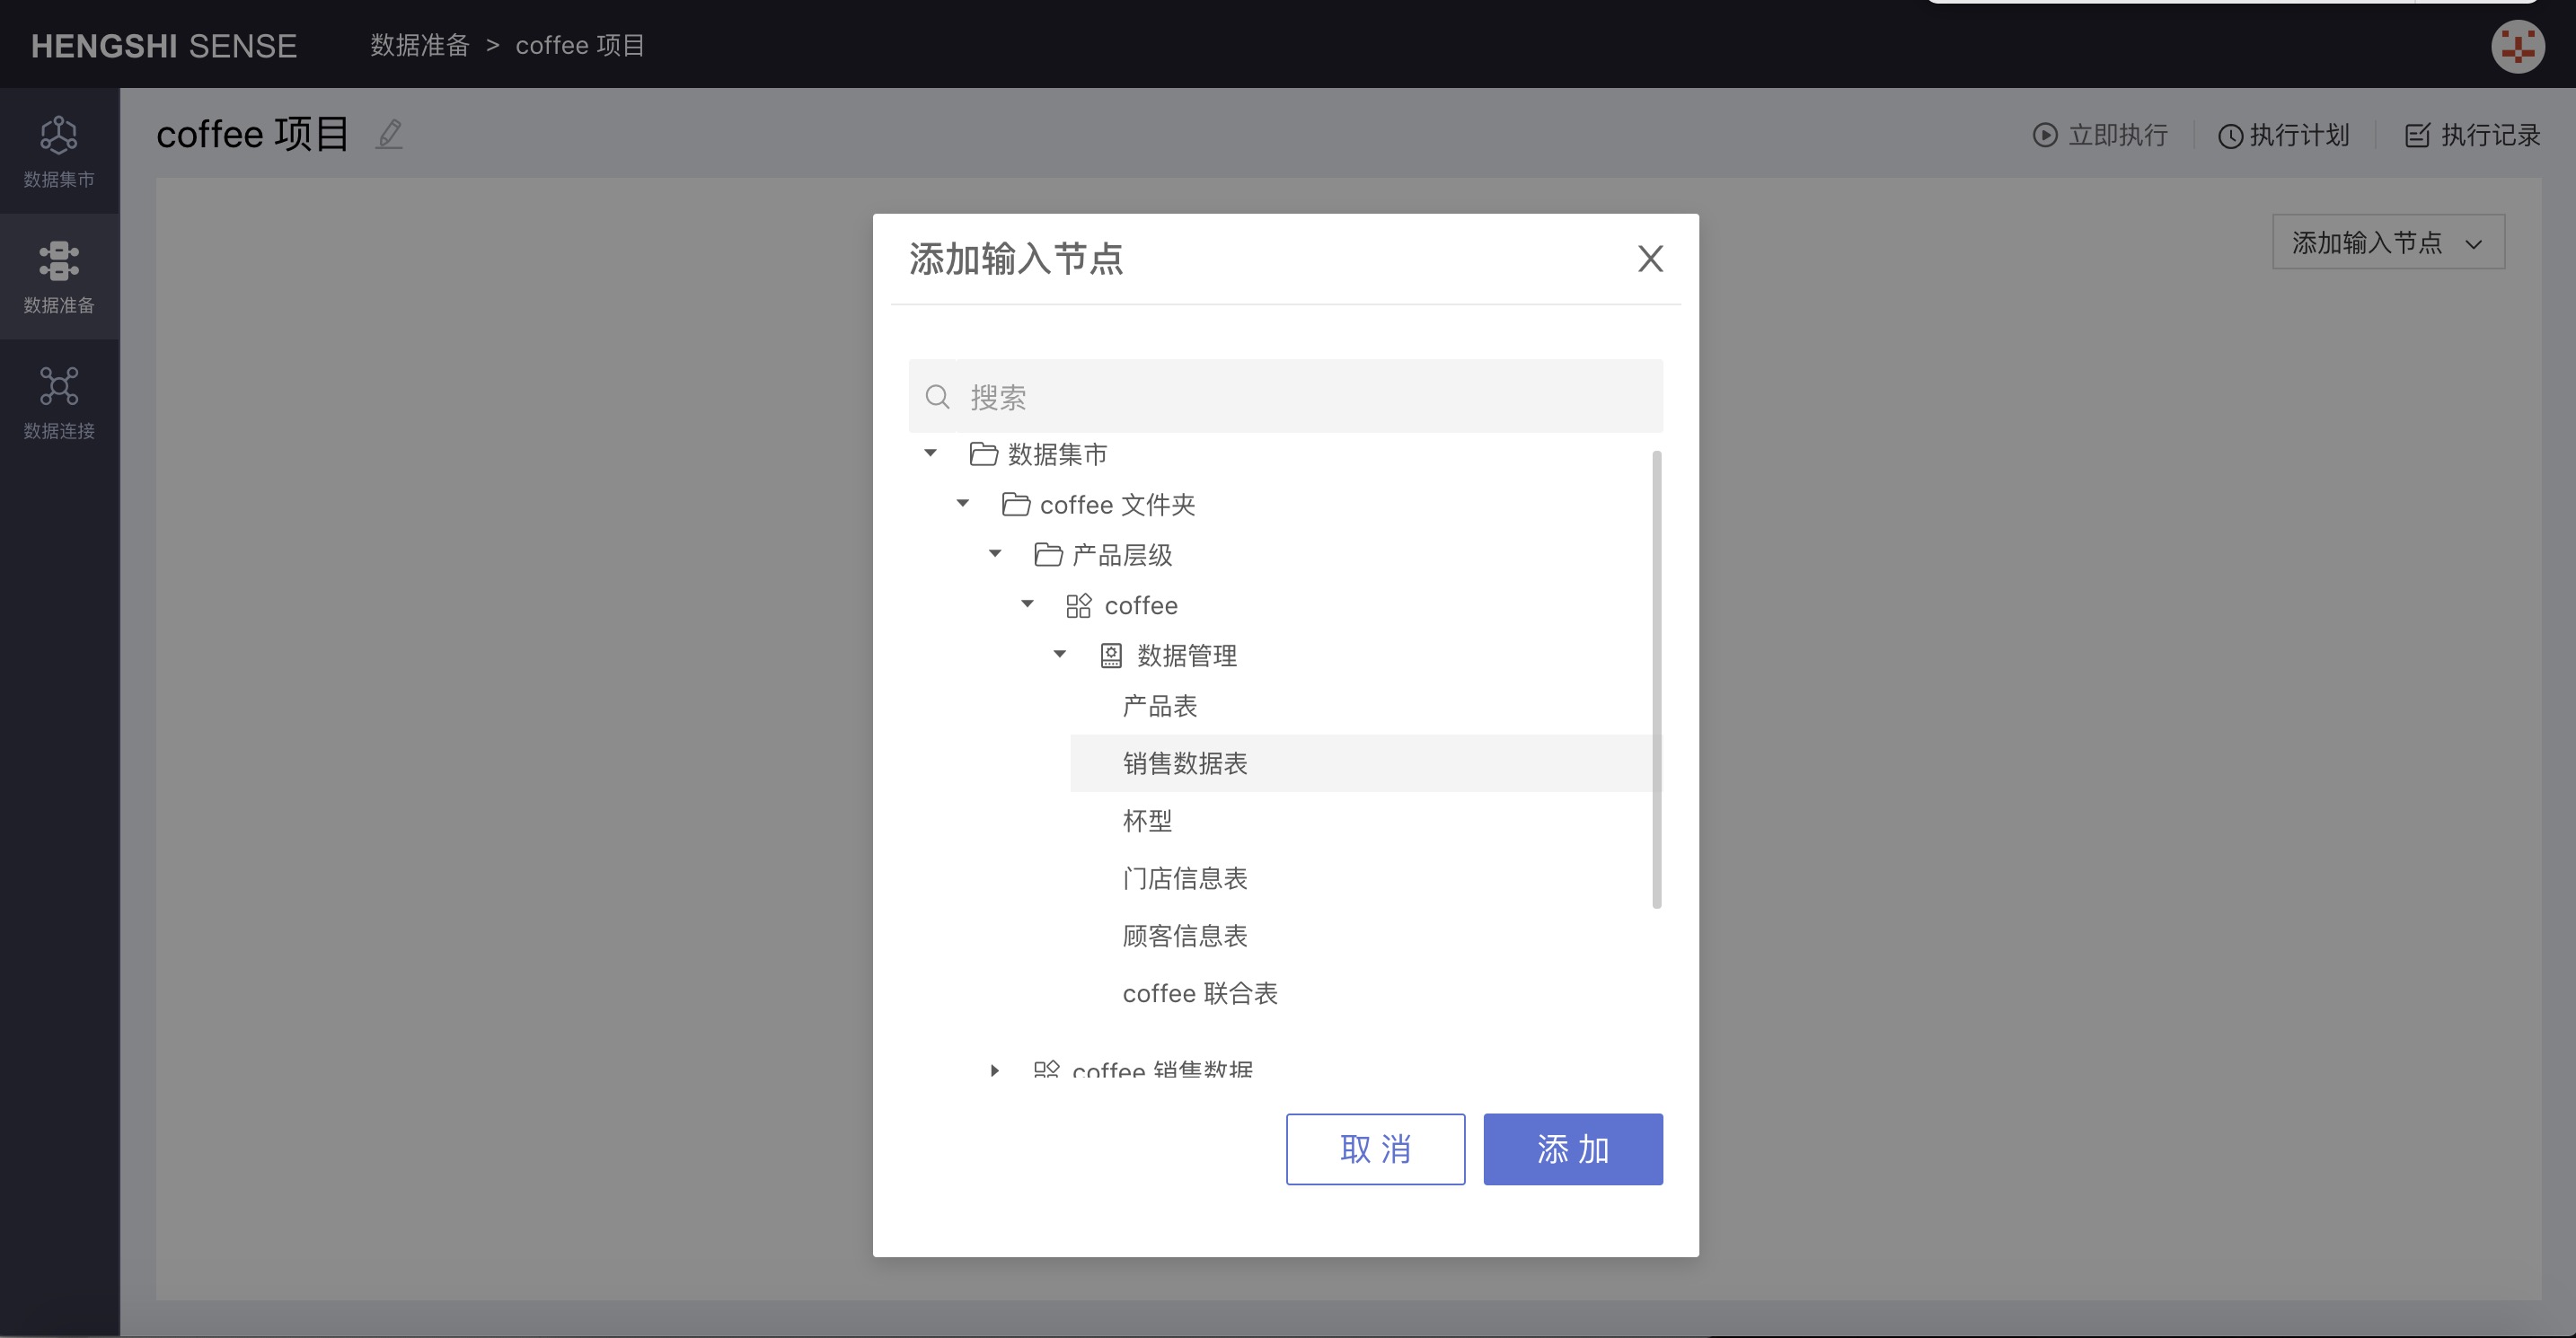
Click confirm, and the input node is successfully added.
Second Step: Set Up Input Node Information
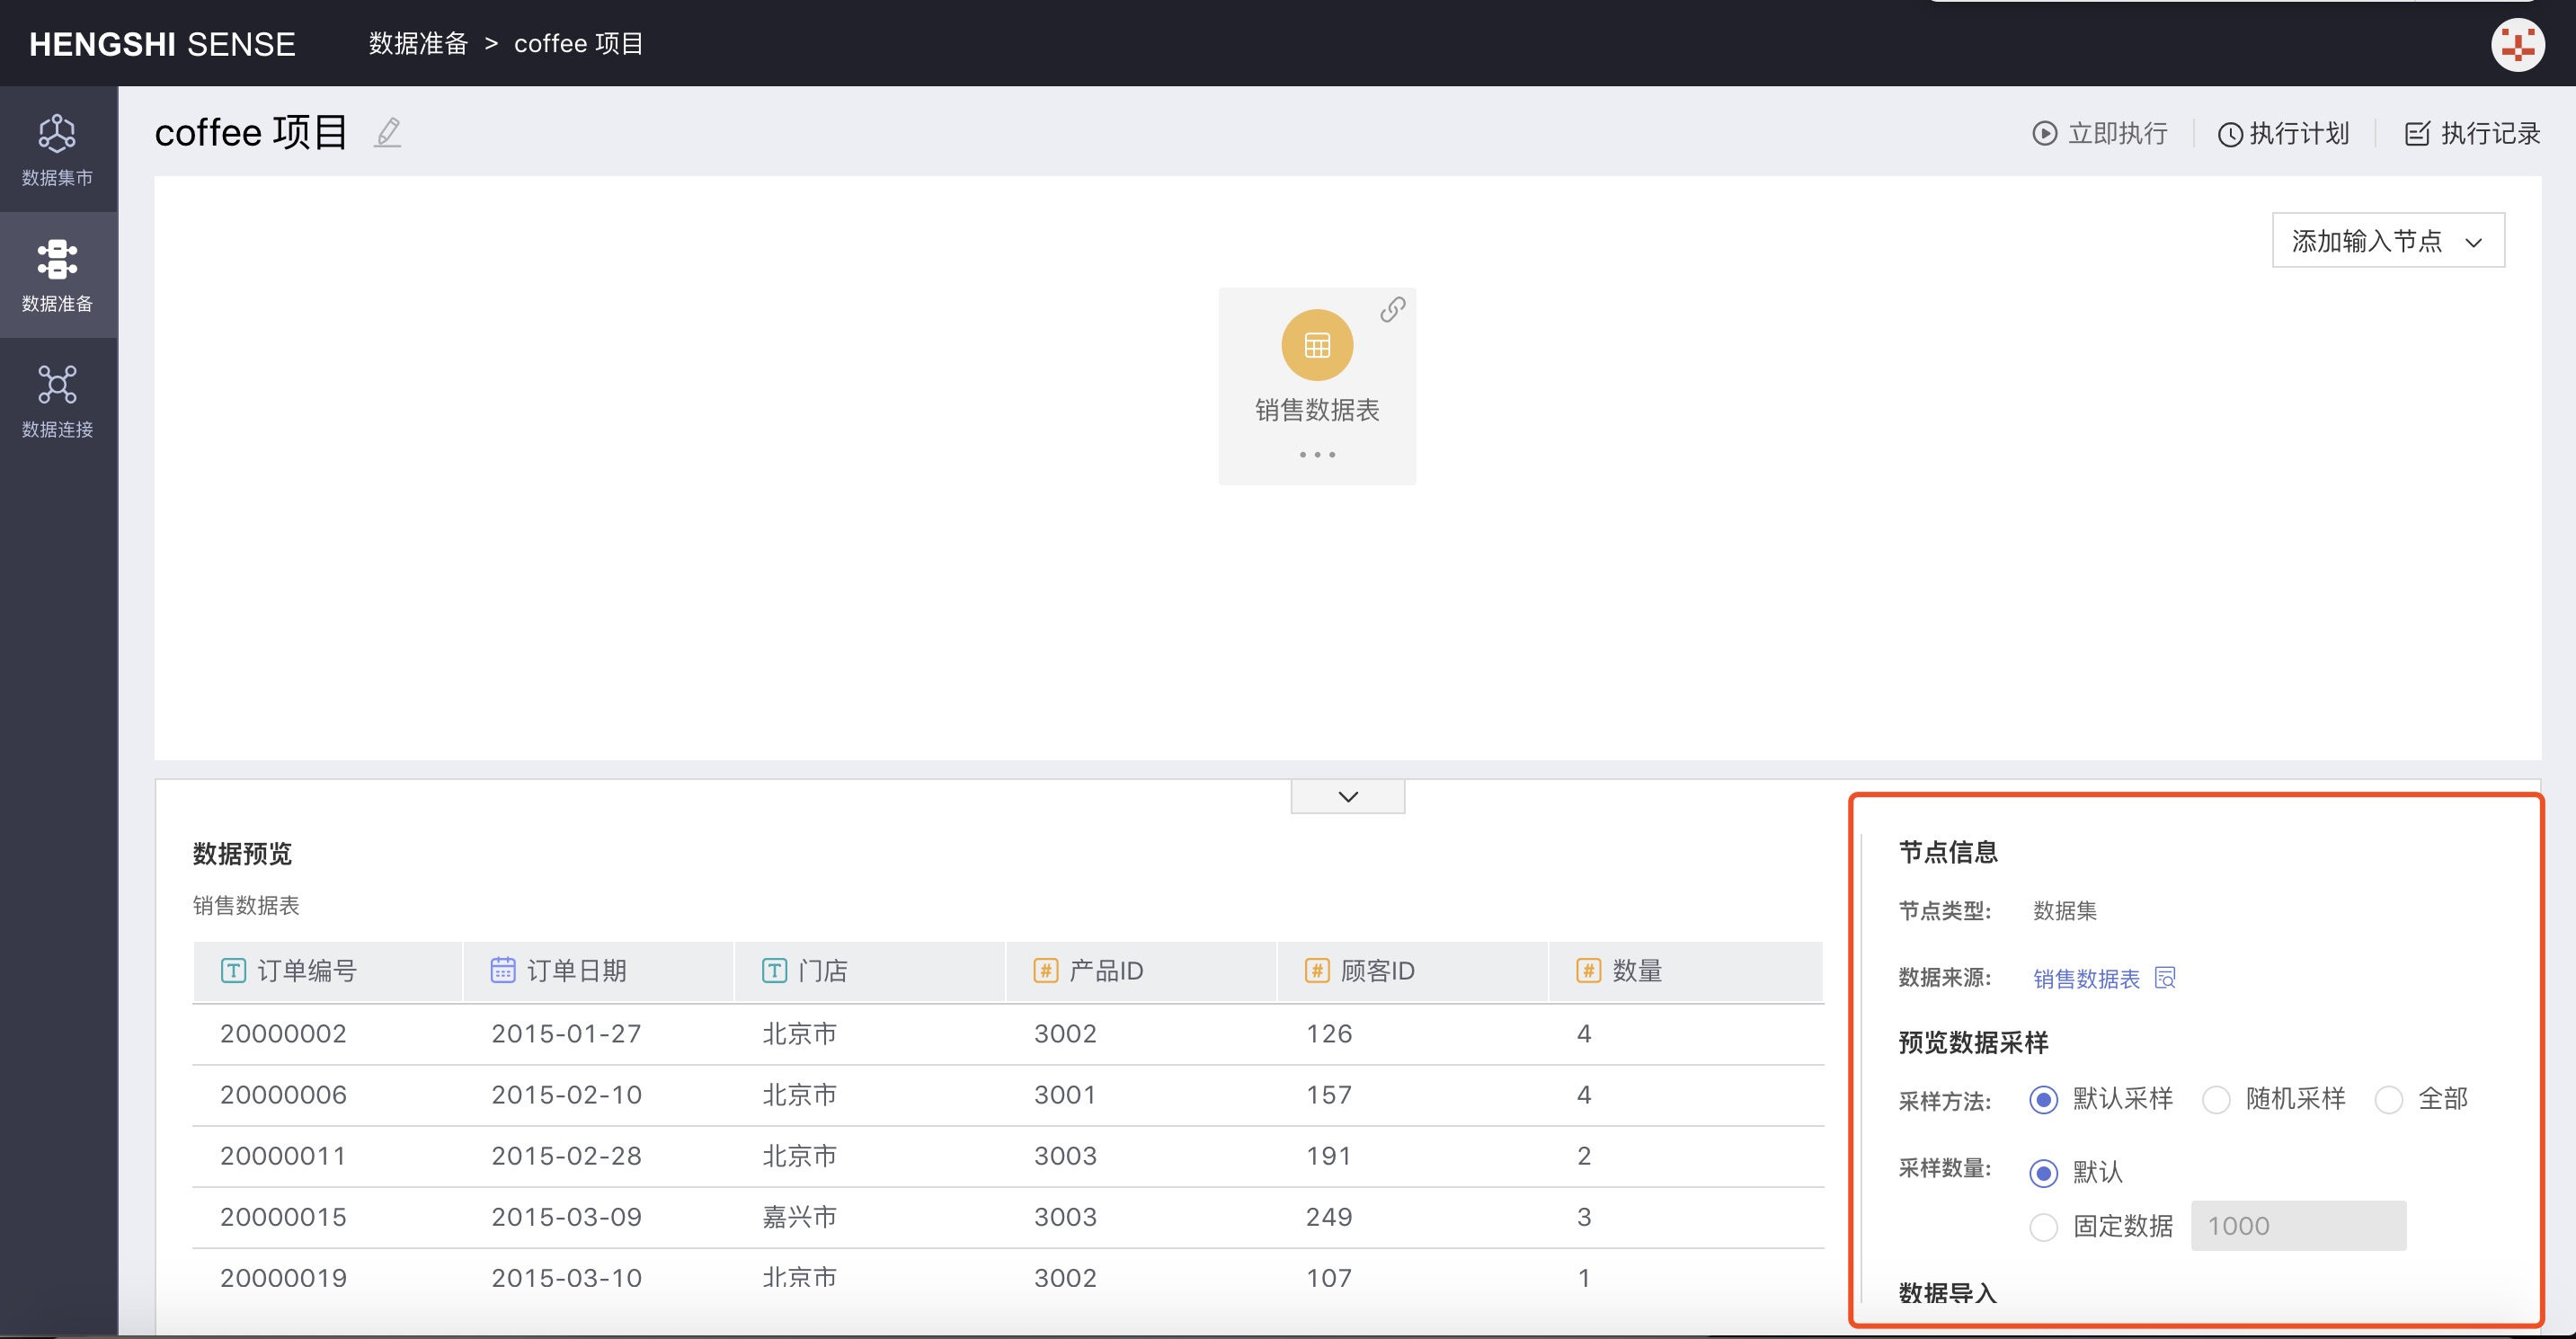
- Node Information
- Node Type: Marks the type of input for the node, corresponding to the three ways to add an input node.
- Data Source: Click the search button after the data source to open that dataset directly in the Data Mart.
- Data Preview Sampling
- Default Sampling
Takes data from the database storage location in order and extracts the specified amount;
Default: When "default" is selected, the system extracts the first 1000 rows as stored in the database; - Random Sampling
Does not concern itself with the storage location in the database and randomly extracts the specified quantity; there are two kinds of sampling amounts: default and fixed data: - Default: When "default" is selected, 1000 rows of data are randomly extracted;
- Fixed Data: When "fixed data" is selected, follow the number X entered into the input box to randomly extract X rows from the database;
- All
When "All" is selected as the sampling method, it extracts all the data from the database, and you can't manually set the number of samples;
- Default Sampling
- Data Import
- Full Import
- Incremental Import
The number of samples is just for convenience in viewing the data of the input nodes in data preparation; the number of samples does not affect the data in the table generated in the output node after the project is executed. The data in the table at the output node are the full amount.
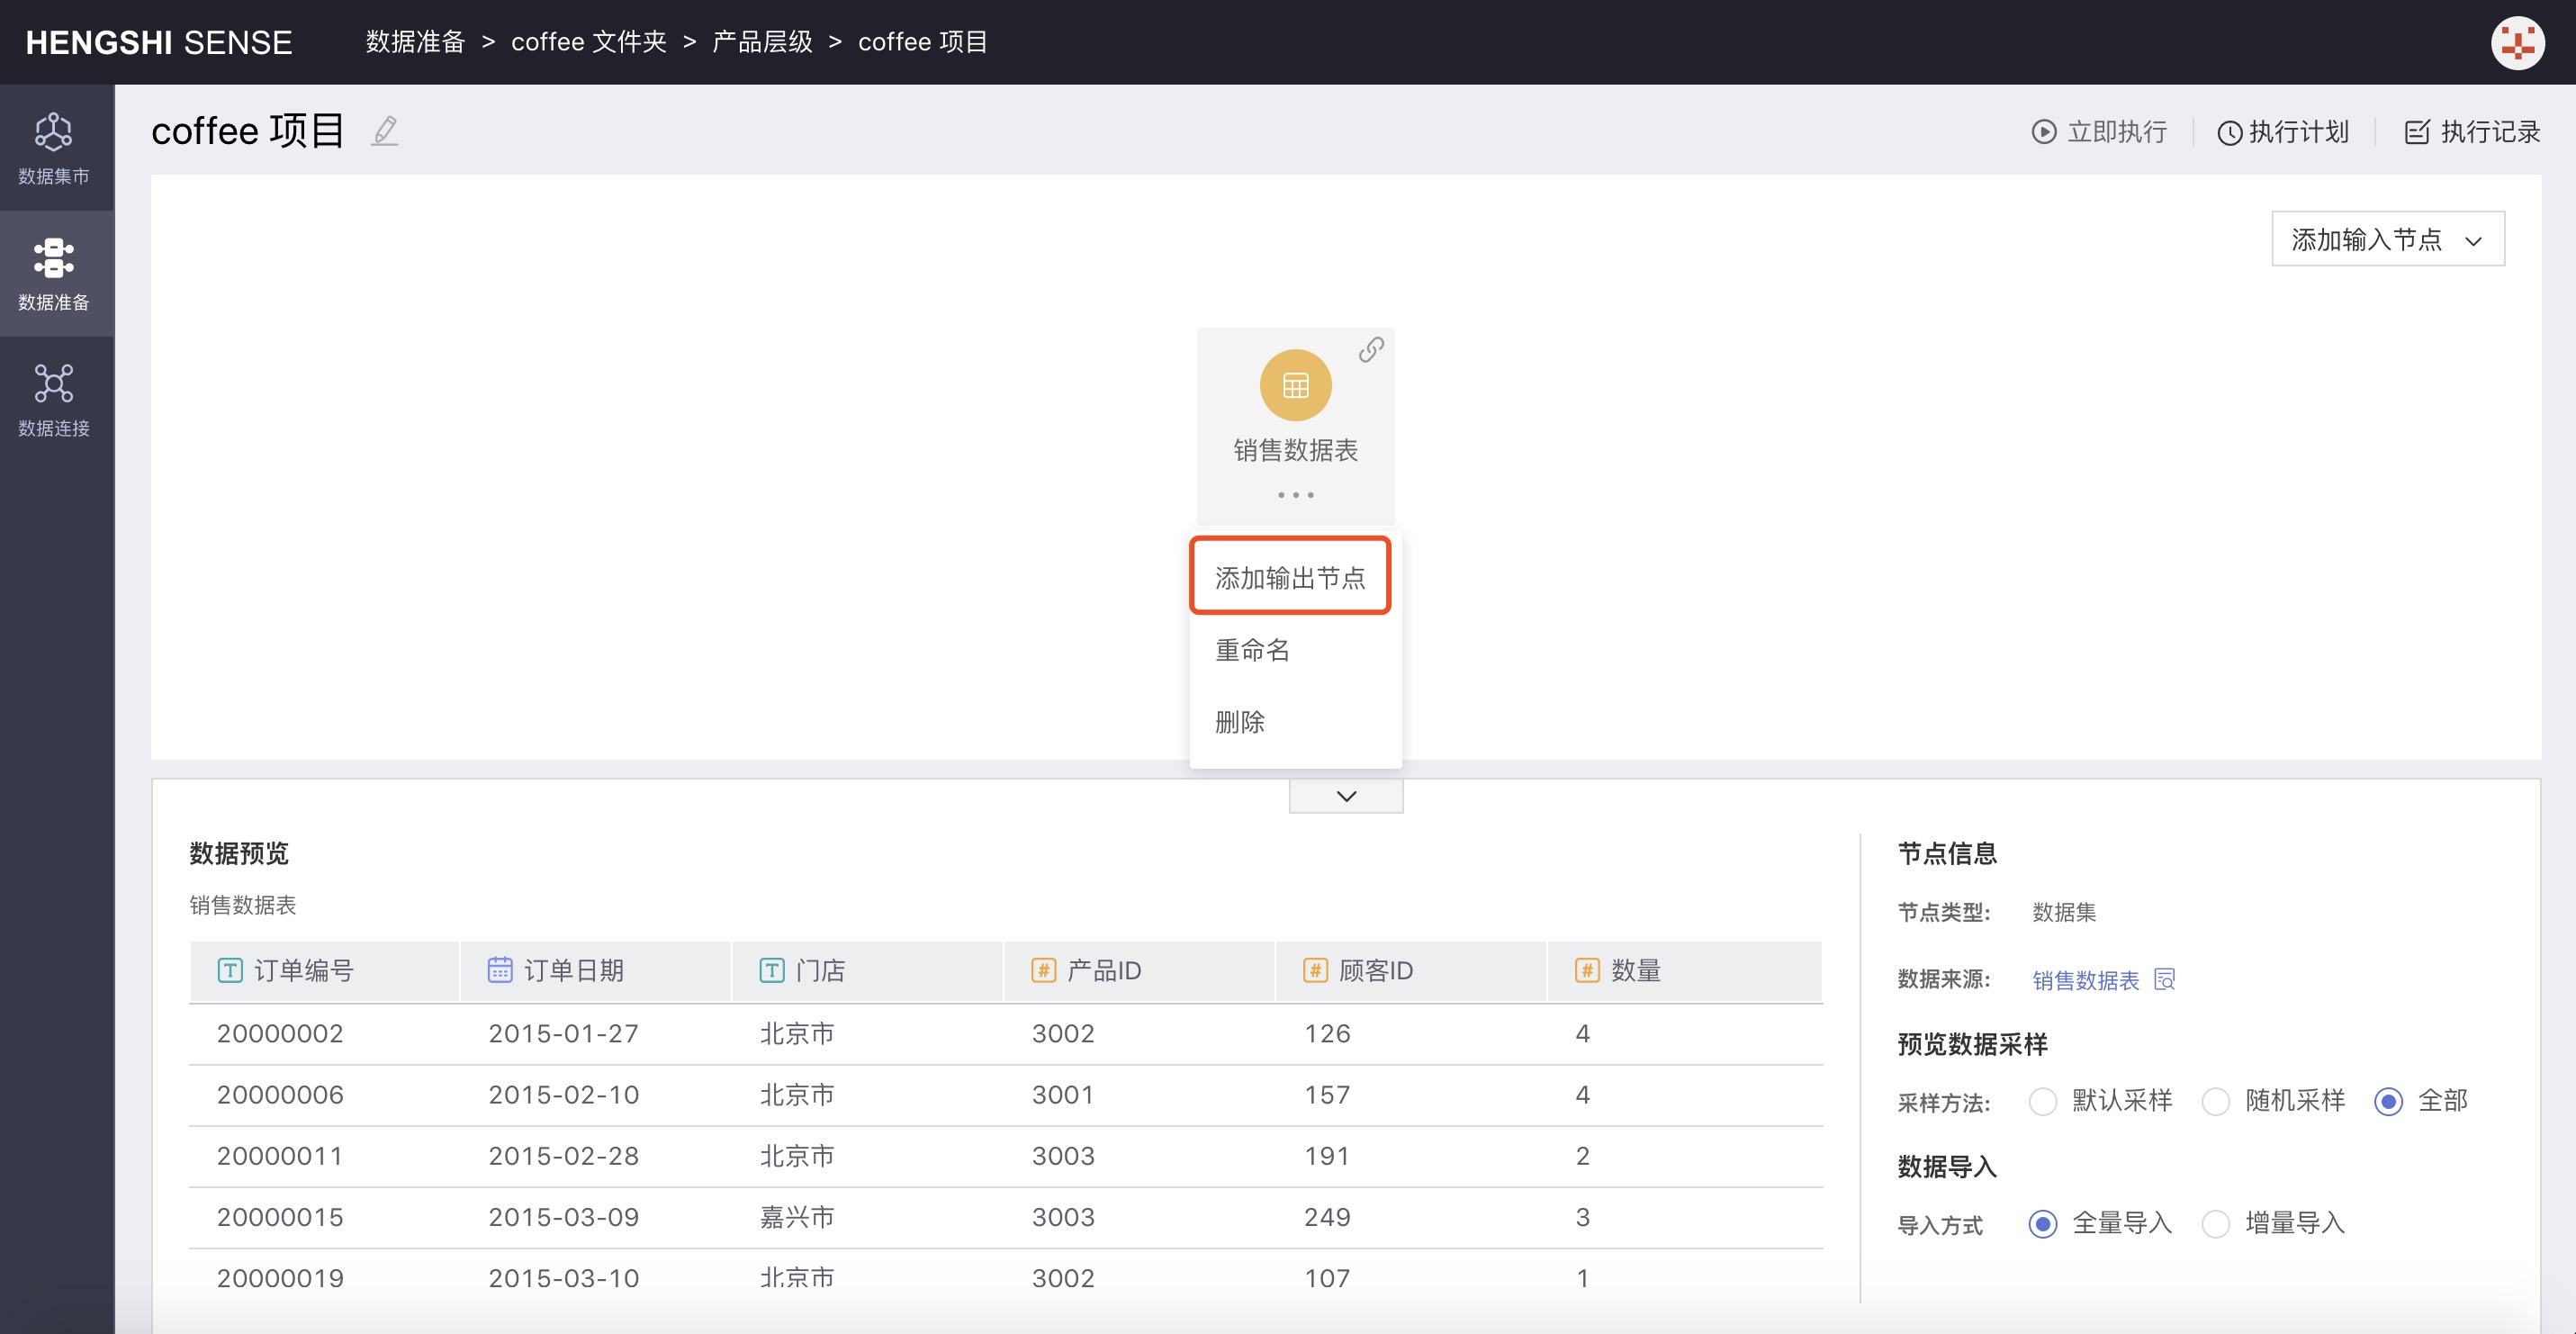
Third Step: Add Output Node
Select the input node to add an output node to and click the three-dot menu of the node to choose Add Output Node. The new output node is successfully added;
Fourth Step: Set Up Output Node Information
Output Destination
Can be modified, defaults to the destination selected when creating the project. It can be expanded from the drop-down menu to modify other paths;Table Name Setting
Can be modified, to be the table name in the database generated by the input node after the project is executed. It is displayed by default as Output Node;Duplicate Name Strategy
The table name setting for the output node can result in two scenarios:The output node's chosen database contains a table with the same name as the specified output table (modifying an existing table in the database when executing the project);
The output node's chosen database does not contain a table with the same name as the specified output table (creating a new table in the database when executing the project);
For the above first scenario, when the output node's table name matches an existing identical name table in the selected output path, modifying the existing table in the database requires the user to choose a duplicate resolution strategy. There are currently four strategies available for resolving duplicates in the system:
Match and Overwrite
This is the default option. Only when the input node's table structure (field names and field types) are completely identical to the existing duplicate table, will choosing this option allow the existing duplicate table to be overwritten. Otherwise, the project will fail.Match and Append
Only when the input node's table structure is completely identical to the existing duplicate table, will choosing this option allow adding to the existing duplicate table. Otherwise, the project will fail.Force Overwrite
Forces overwriting the existing duplicate table without checking; choosing this option will be successful after executing the project.Force Append
Force appending to an existing duplicate table. When table structures are different, the data appends out of place, and any gaps are filled with null values. The project will be successful.
Fifth Step: Project Execution
You can execute the current project from the top right corner, set the project execution plan, and view the execution records.
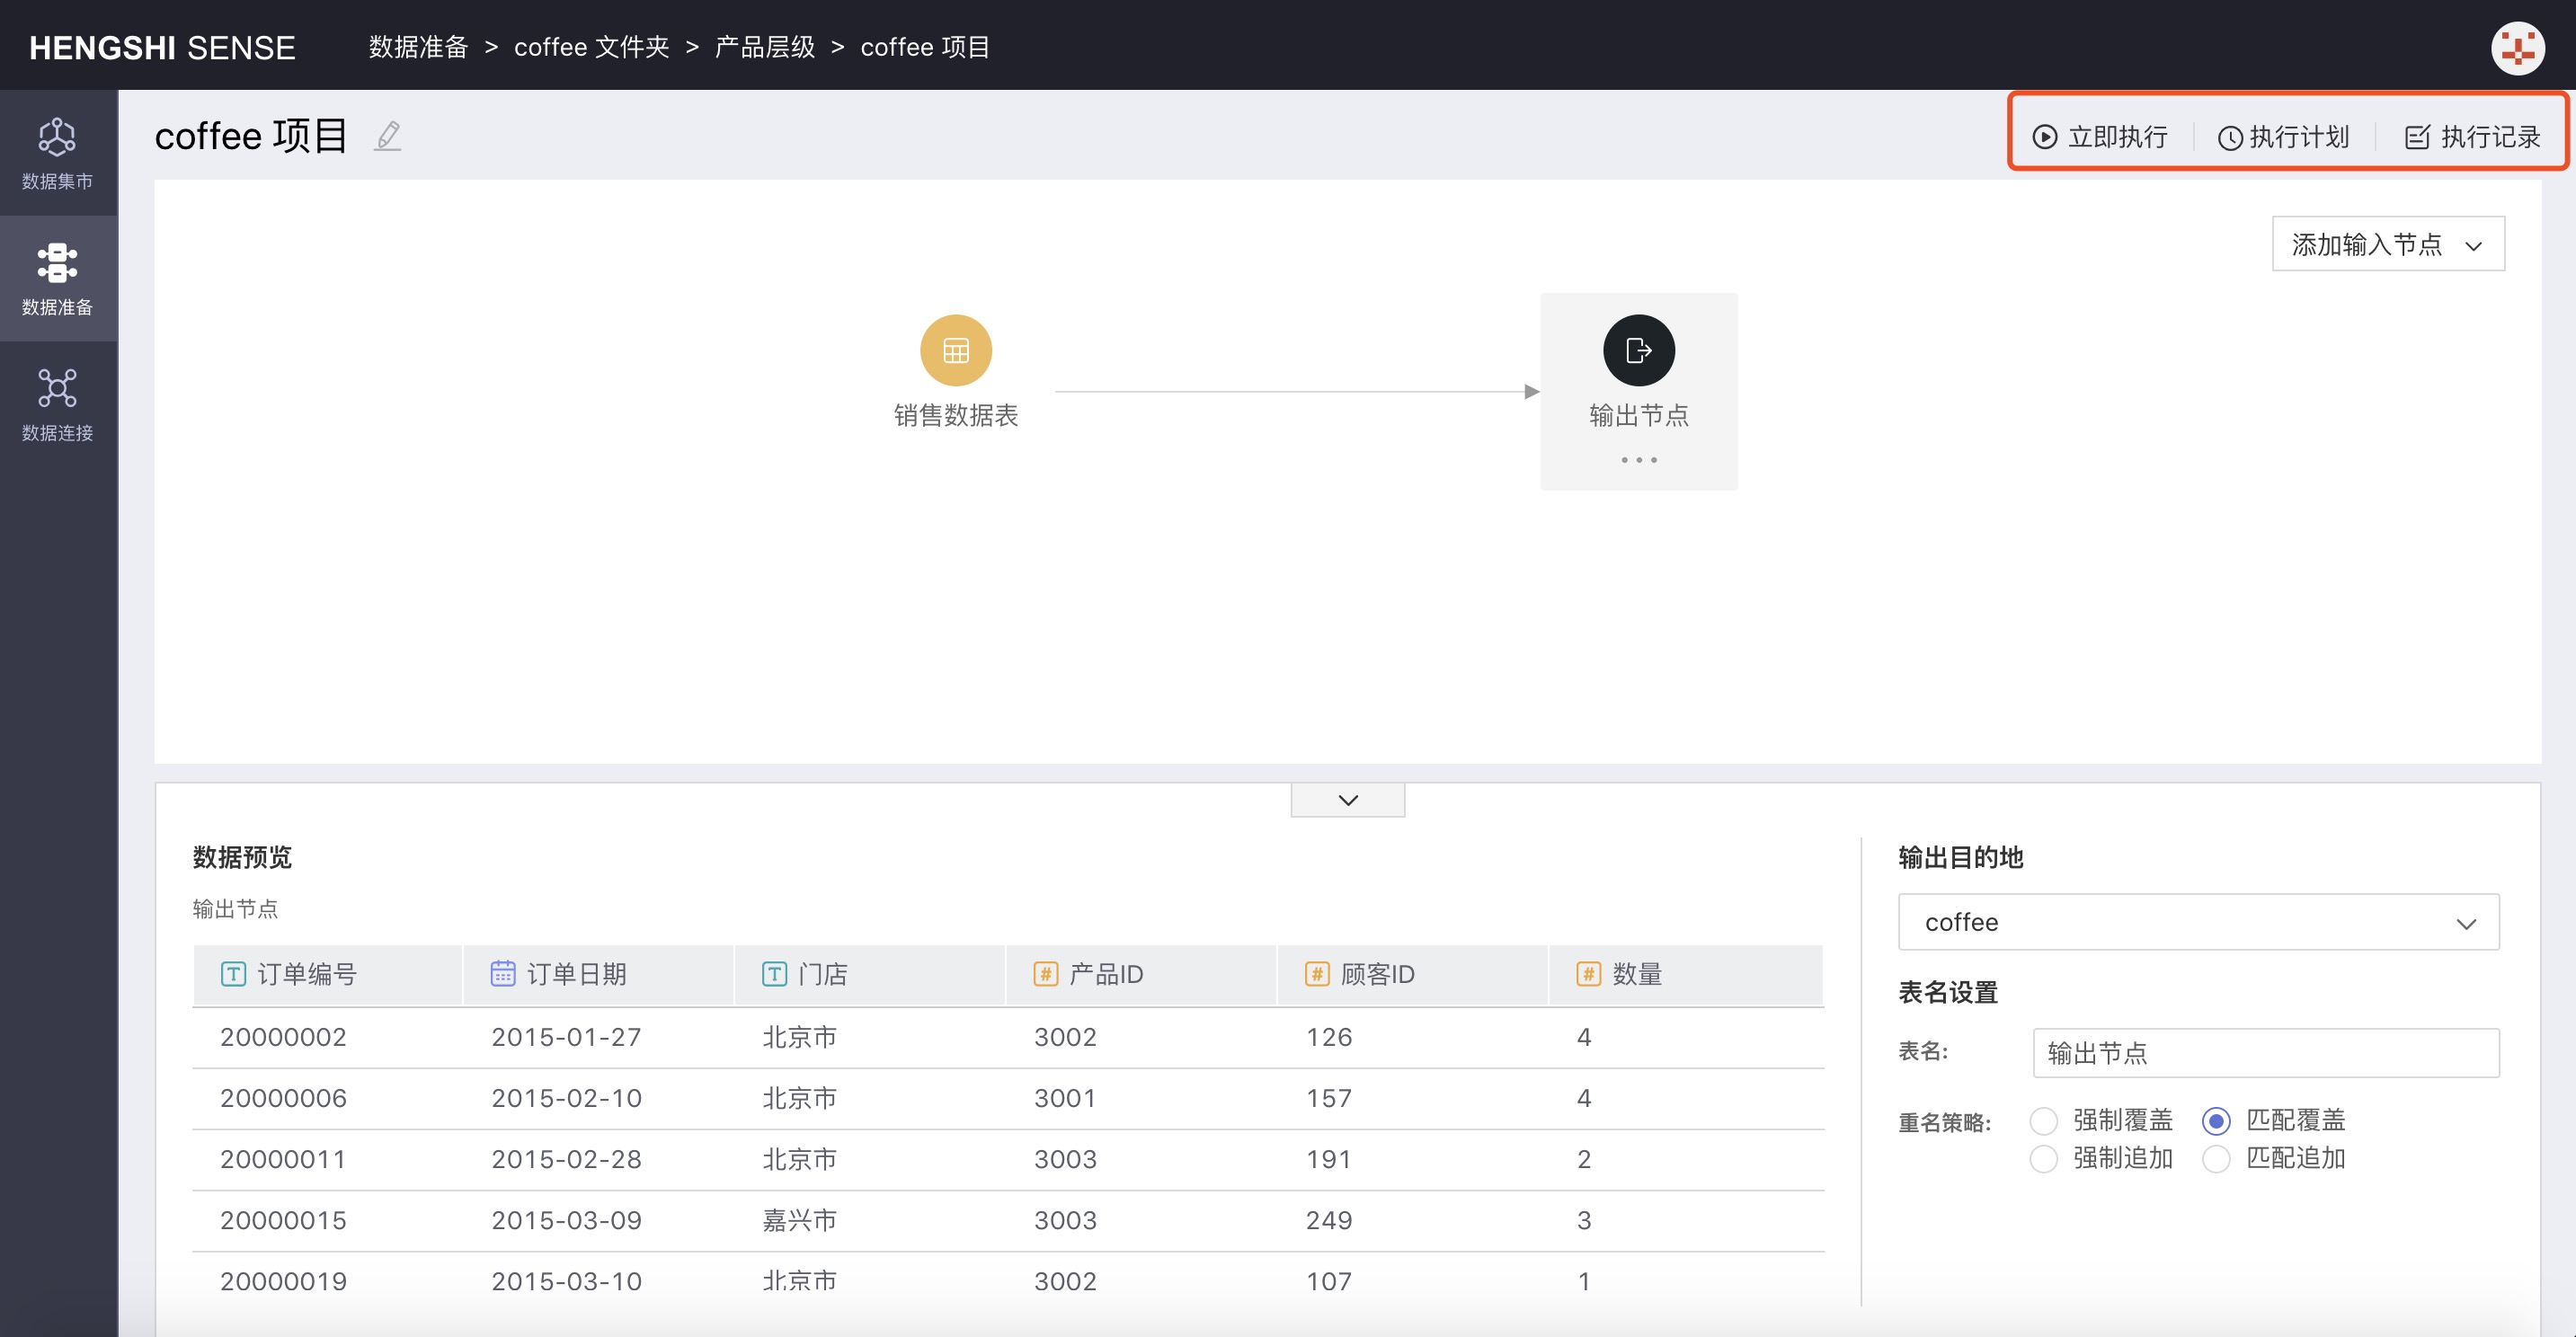
- Execute
ClickExecuteto immediately execute the project. - Execution Plan
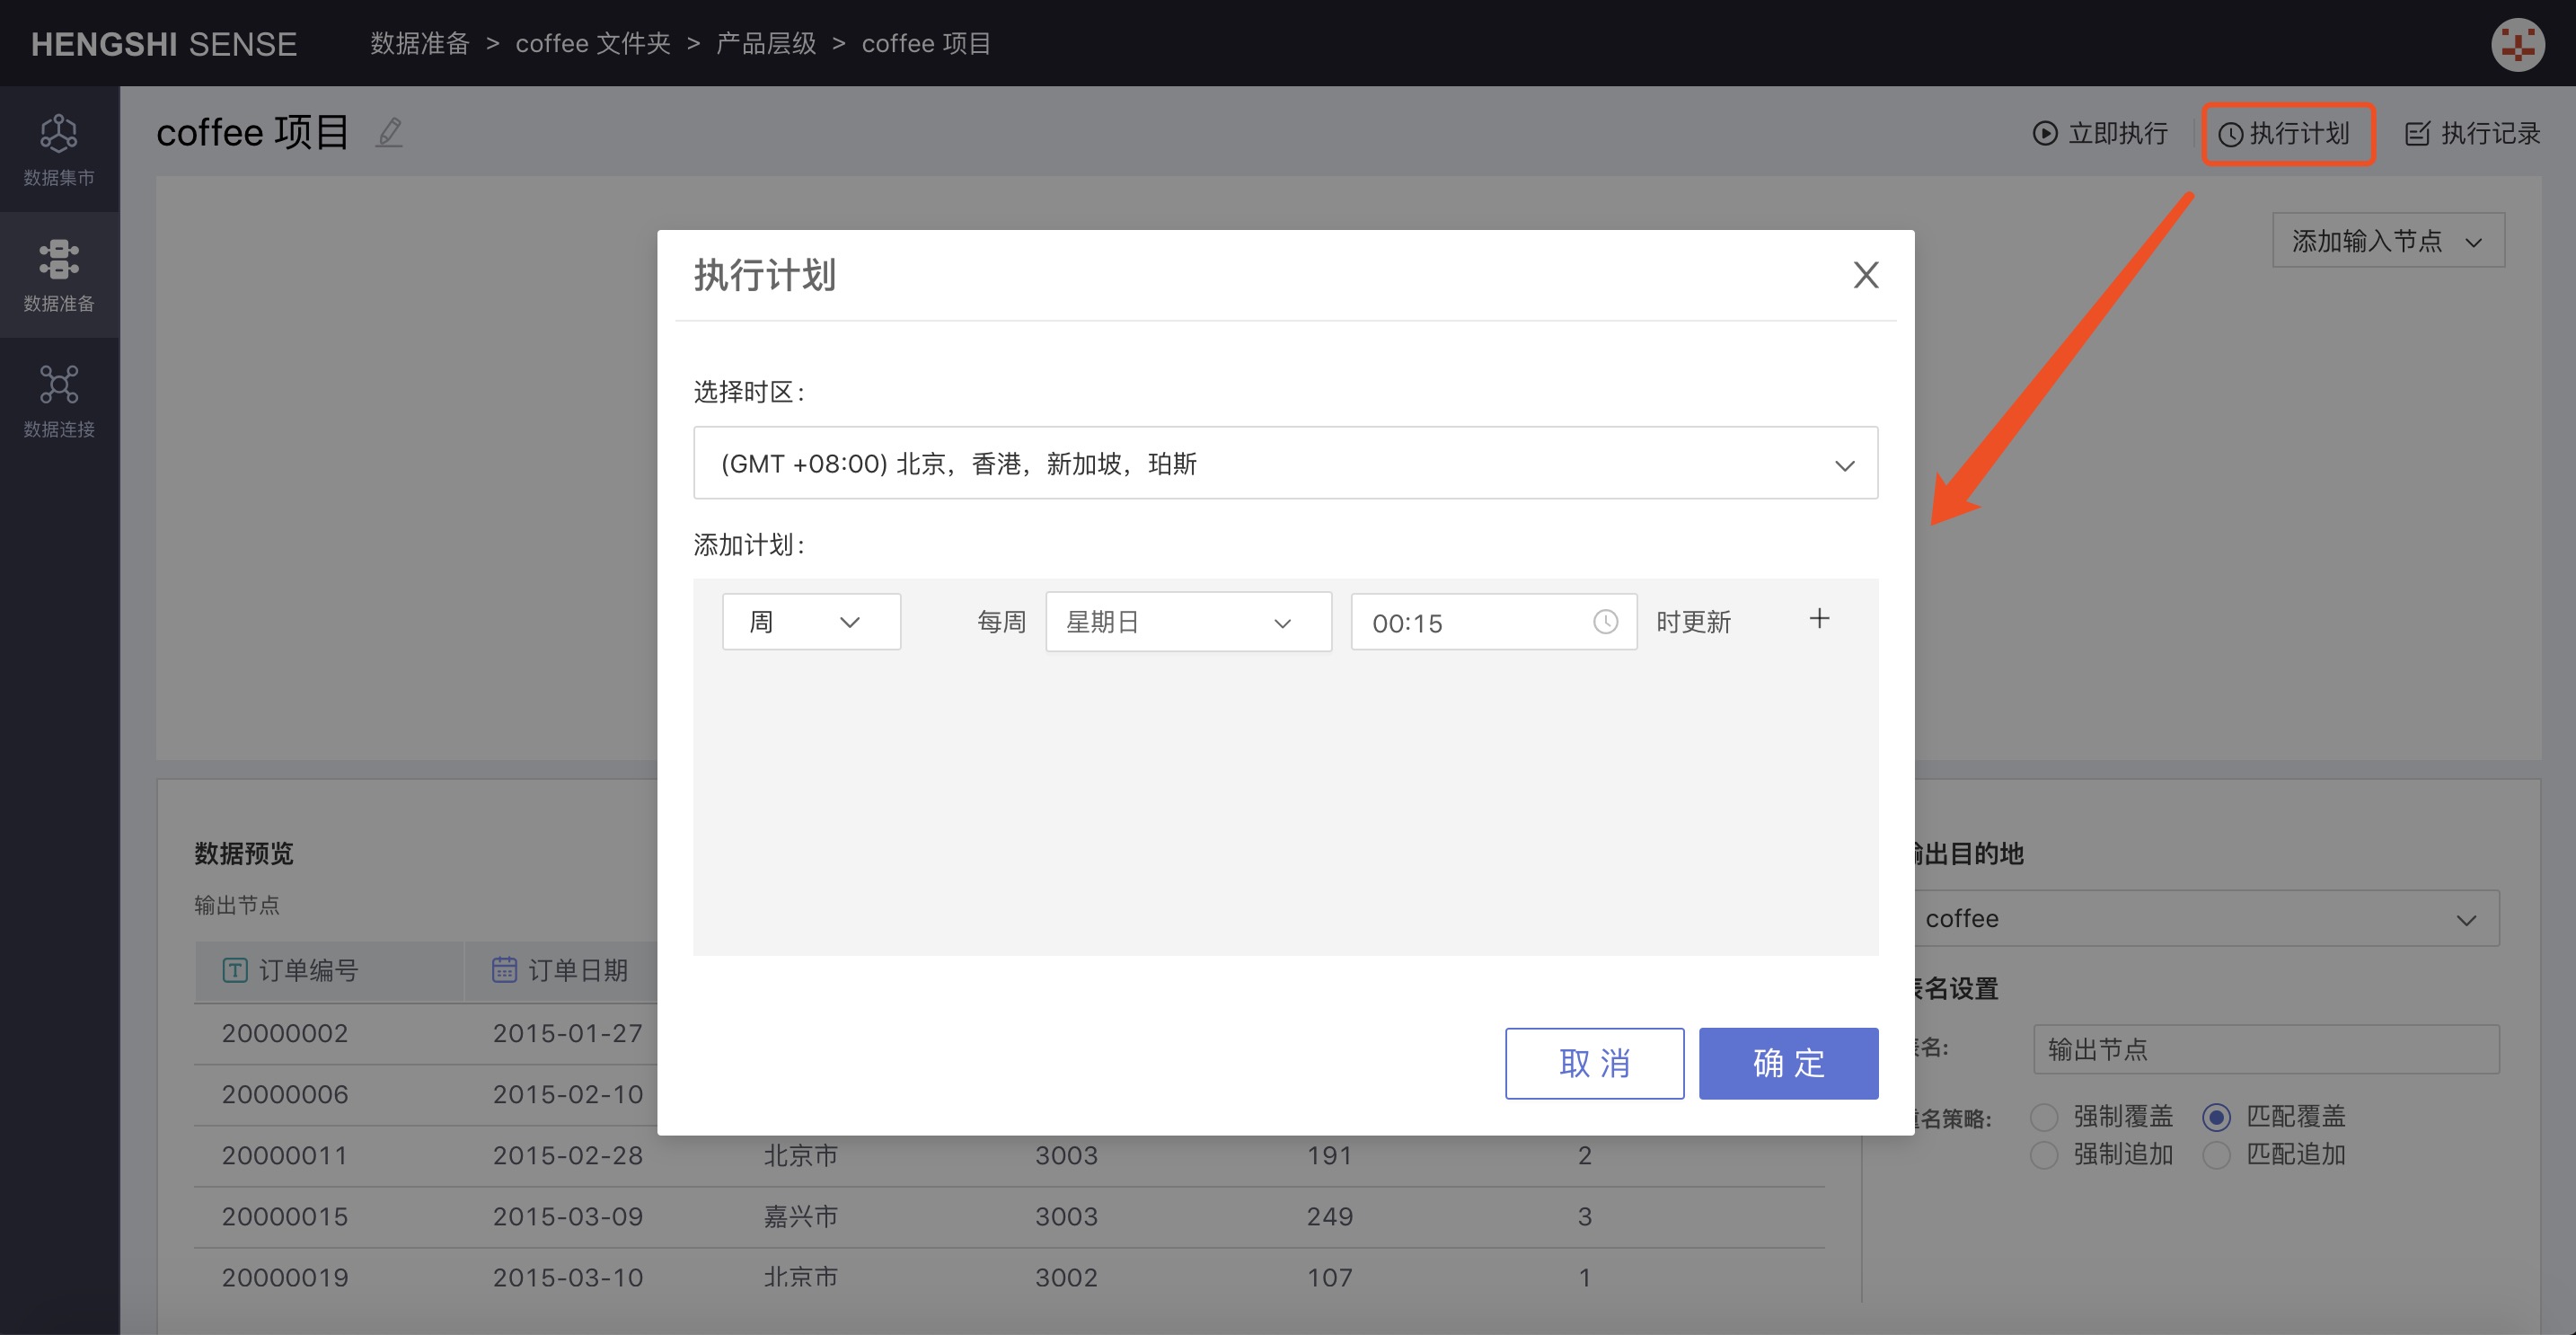
- Choose Timezone
- Add Plan
- Hourly: You can set which minute of every hour to update
- Daily: You can set a specific time point for daily updates
- Weekly: You can set a specific time point for updates on specific days of the week; you can select multiple days
- Monthly: You can set a specific time point for updates on specific days of the month; you can select multiple days
- Custom: You can set your own time points for updates
- Execution Record
Click on the execution record to jump to the execution record list page for the project:
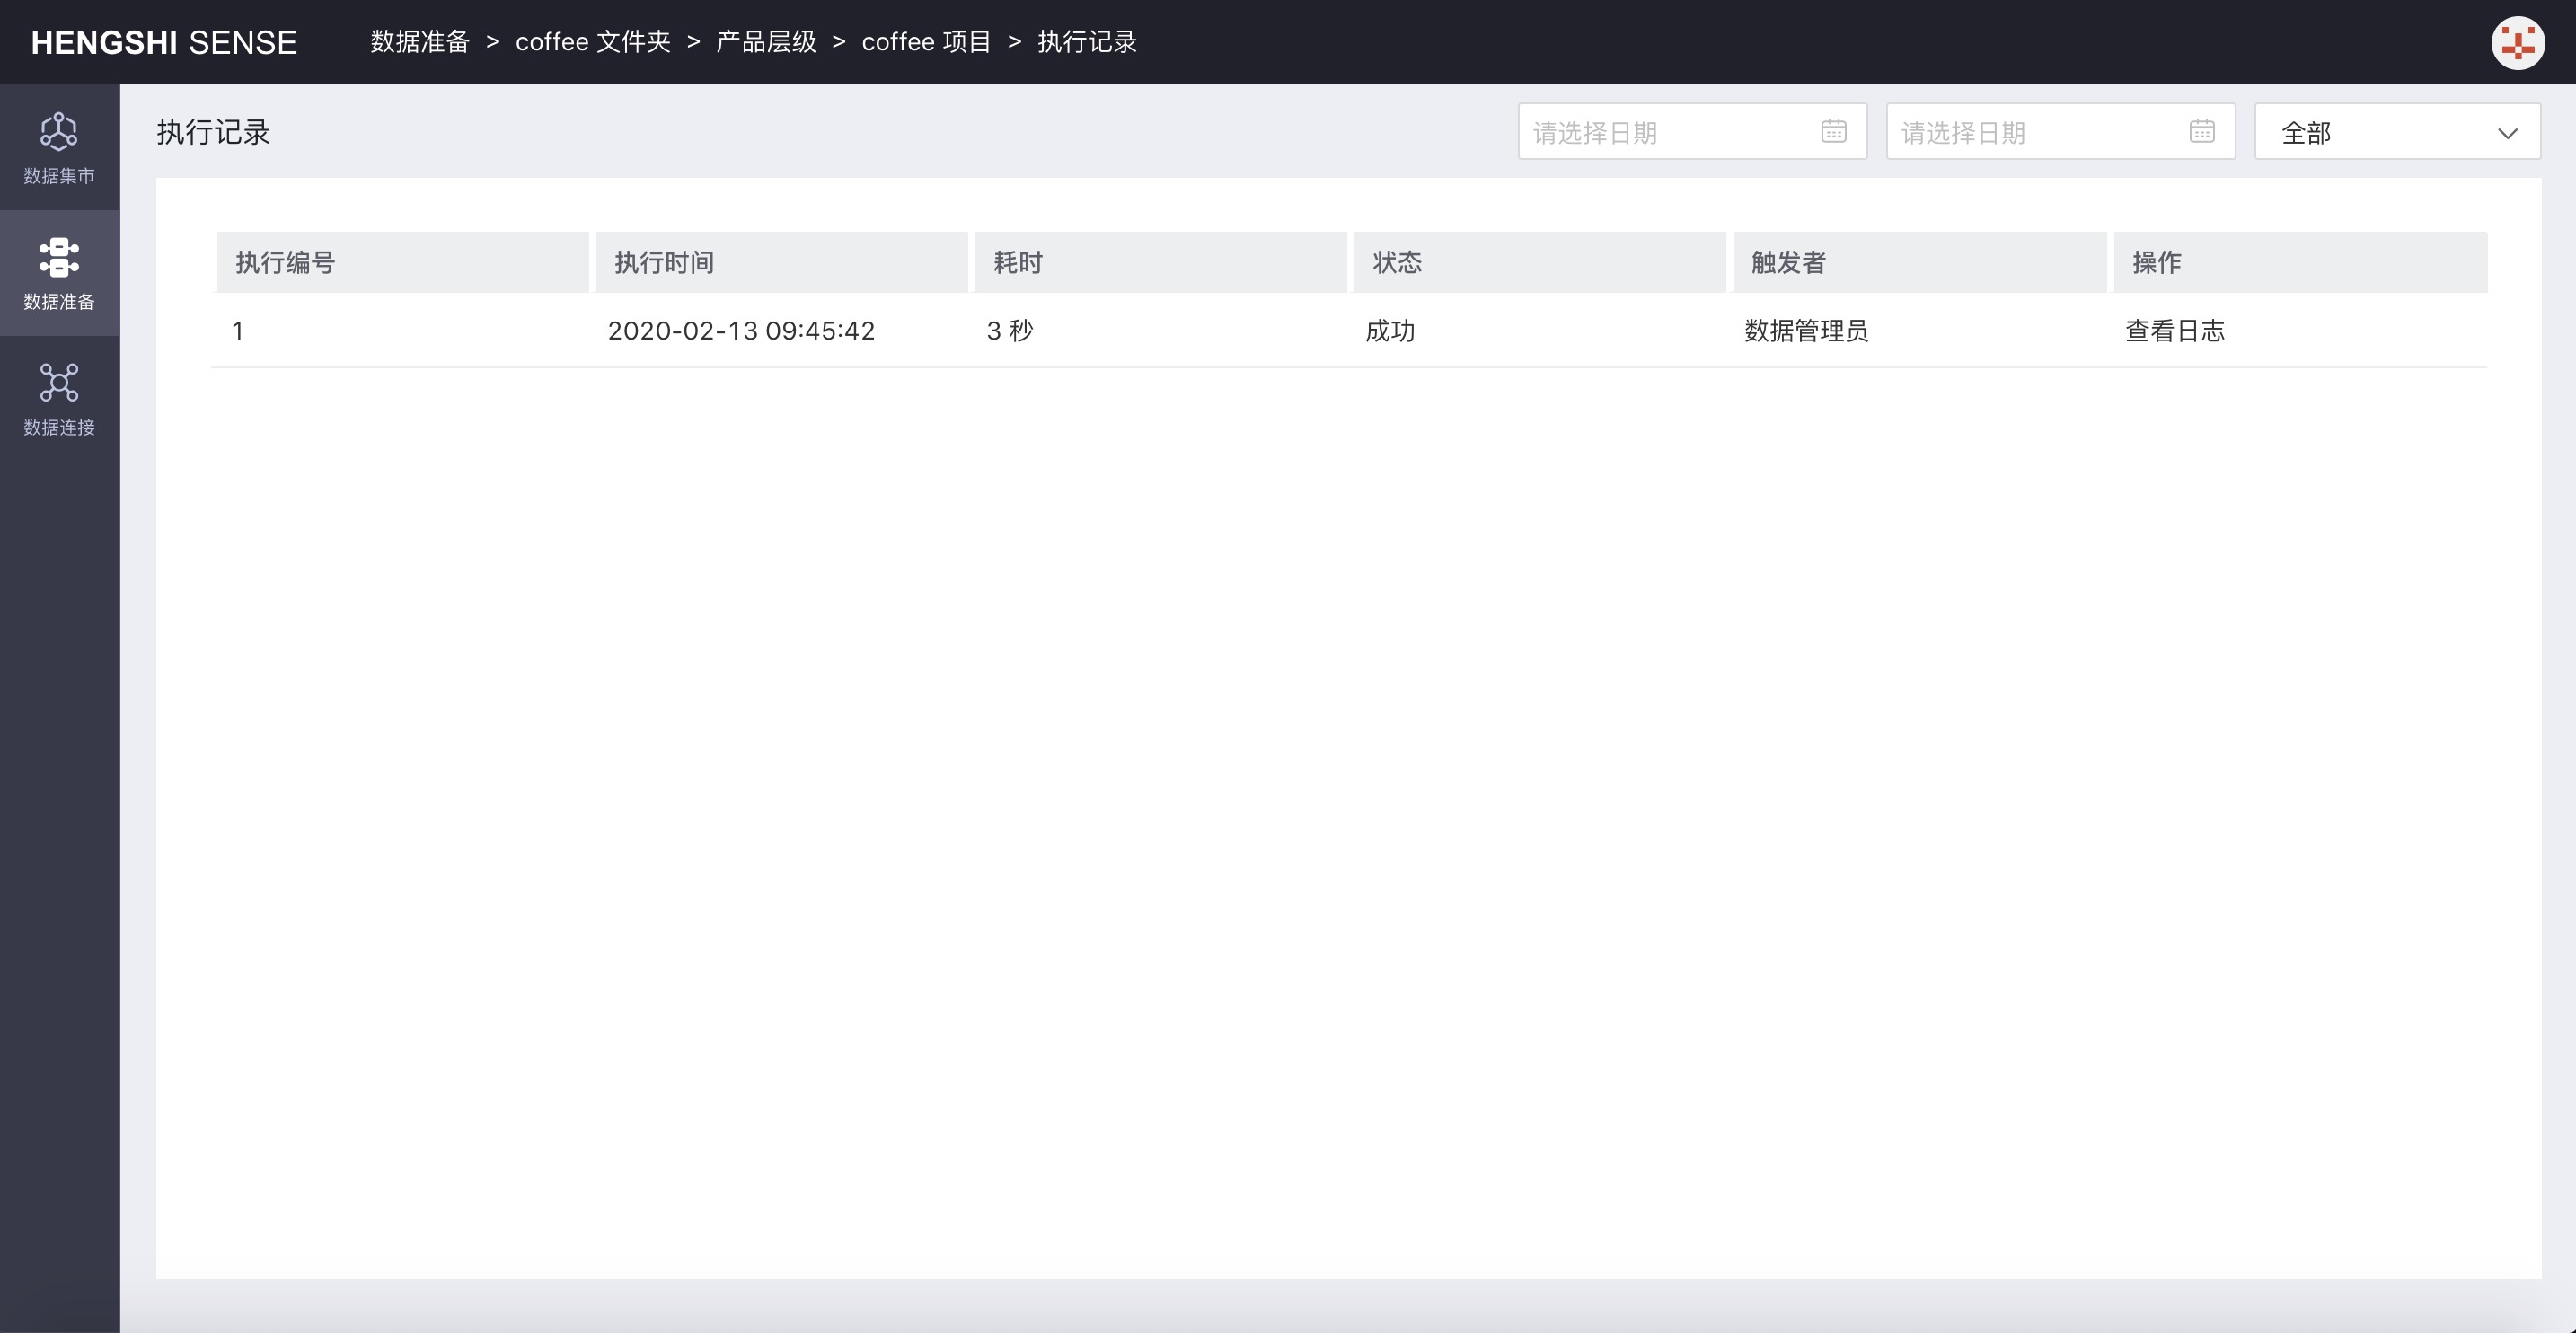
So far, the setup for a data preparation project is complete.
Fourth: Construction of the Data Mart
Version Information: New content in version 3.0.
Version 3.0 introduces the Data Mart feature, providing centralized data mart management. The Data Mart supports the establishment of hierarchical data marts, authorization by user, user groups, organizational structure, and distribution of data to the right people. It supports unified management of calculated fields and calculated indicators, realizing key KPIs' statistical logic consistency and statistical algorithms within the enterprise to eliminate data inconsistency. Complete data permission settings support multiple permission models such as data connection permissions and row permissions to meet different permission management scenarios.

For data security reasons: operations in the data mart are limited based on user roles, as shown in the table below
| User Role | Data Mart Visibility | Create Folders in Data Mart | Create Datasets in Data Mart Folders |
|---|---|---|---|
| System Management | Not visible | –––––– | –––––– |
| Data Management | Visible | Cannot create | –––––– |
| Data Analysis | Not visible | –––––– | –––––– |
| Data Viewer | Not visible | –––––– | –––––– |
| System Management + Data Management | Visible | Can create | Can create any dataset |
| System Management + Data Analysis | Not visible | –––––– | –––––– |
| System Management + Data Viewer | Not visible | –––––– | –––––– |
| Data Management + Data Analysis | Visible | Cannot create | –––––– |
| Data Management + Data Viewer | Visible | Cannot create | –––––– |
| Data Analysis + Data Viewer | Not visible | –––––– | –––––– |
| System Management + Data Management + Data Analysis | Visible | Can create | Can create any dataset |
| System Management + Data Management + Data Viewer | Visible | Can create | Can create any dataset |
| System Management + Data Analysis + Data Viewer | Not visible | –––––– | –––––– |
| Data Management + Data Analysis + Data Viewer | Visible | Cannot create | –––––– |
| System Management + Data Management + Data Analysis + Data Viewer | Visible | Can create | Can create any dataset |
From the table above, we can conclude:
- When users have both Data Management + System Management roles, they can log into the system and build the directory structure of the data mart.
- Users with the Data Management role can view folders that have already been created in the data mart and can create the directory structure of these folders and process data after logging into the system.
Logging in as a User with Data Management + System Management Roles
Creating New Folders and Data Bundles
![ ](images